

Compress Video for the Web with Media Encoder
What do you do if a video is done and you need to deliver it, but the file is way too big? Let’s use Adobe Media Encoder to compress the video by making an H264 that will maintain quality but severely cut down your file size!
Import Your Video File
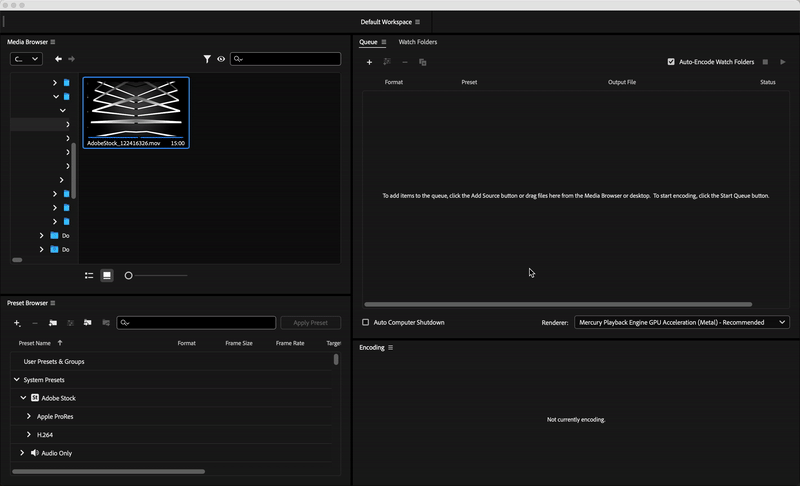
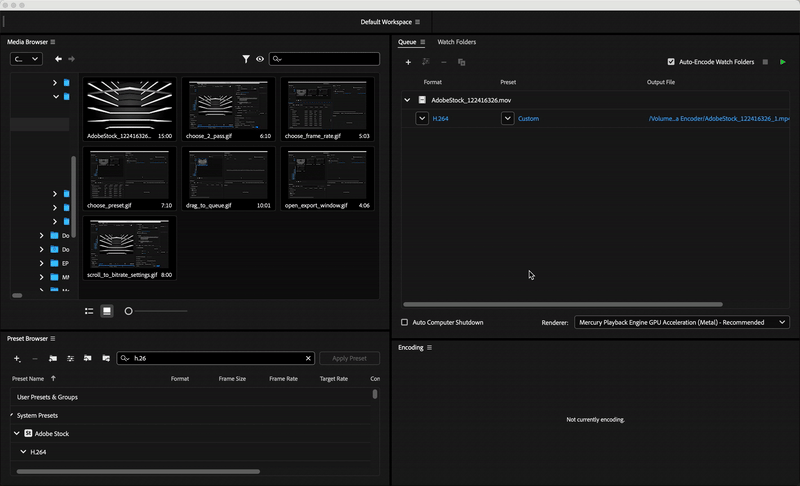
The default window in Media Encoder will give you four windows:
- Media Browser (top left) – Find your file here if you’re not into dragging it in
- Queue (top right) – Here’s where you’ll put your files and apply presets to them
- Preset Browser (bottom left) – Here’s where to find all kinds of presets to suit your needs
- Encoding (bottom right) – Watch the magic happen here when you’re done
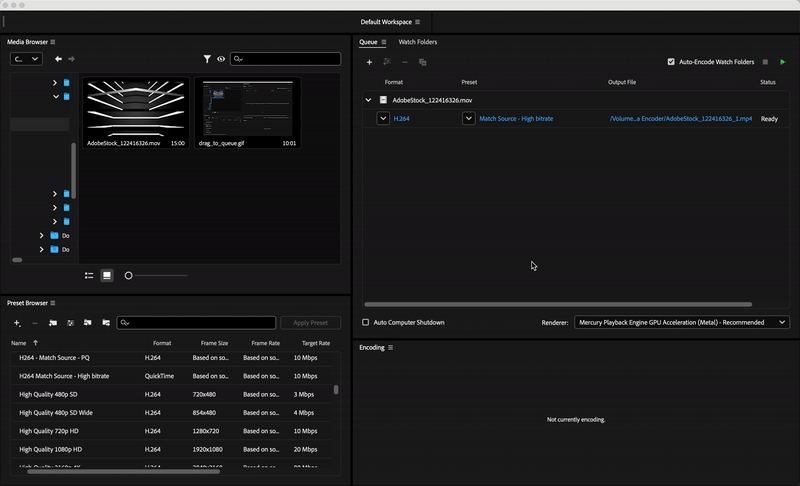
To start, drag your file into the Queue window. Media Encoder will now add a default setting that probably won’t work well for the web. Replace the format with an H.264 setting from the format drop-down menu.
Now, it is time to choose the preset you want to use.
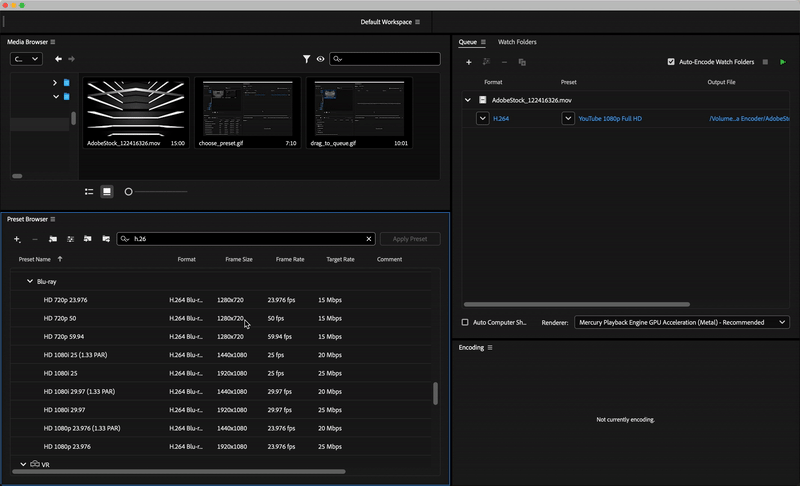
To begin with, you could try a YouTube preset. Click the drop-down menu under preset to find it. A good option here is the 1080p HD.
For the web, aim to use the HD 1080 presets, but you’ll need to make sure you select the right FRAME RATE option. This will be based on your video file. What frame rate was it shot and edited?
YouTube and most H.264 presets will automatically choose the same frame rate as your file, so if you used either of these presets you don’t need to worry about this.
News interviews and B-roll footage tend to be shot at 60 or 30 FPS (frames per second), so you’ll want to use the 29.97 preset to keep it consistent. Films are generally shot at 24 FPS, so you’d want to use the 23.976 setting.
To find the frame rate of each preset, you can look at the preset browser at the bottom left of the screen, and drag whichever fits your footage to the file.
Next, drag the setting onto your file. Make sure to over-write the preset that was there before.
Change Your Export Settings
With your preset applied, let’s take a look at the settings to make an adjustment or two.
In the Queue window, click on the blue words of the format (H.264) or preset (depending on which you dragged here). This will open the EXPORT SETTINGS window.
A lot is going on here, but let’s just focus on the VIDEO tab in the middle of the right column.
Use the scroll to the right to move this window down to the BIT RATE SETTINGS.
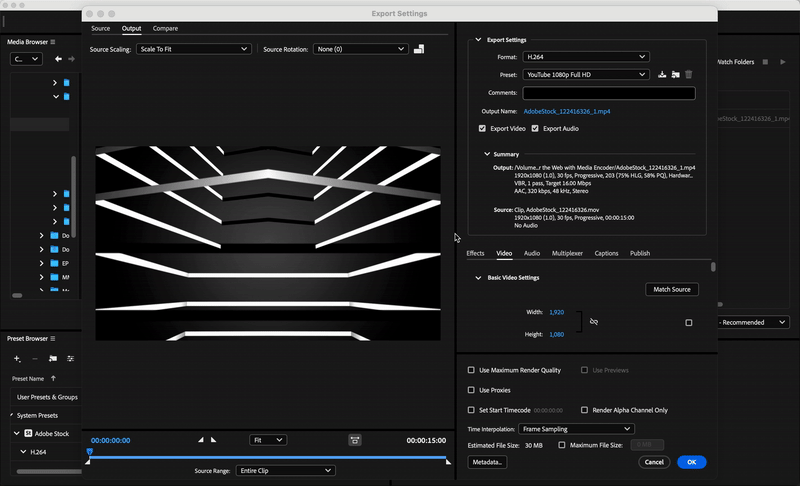
Once there, change the VBR from 1-pass to 2-pass. This will NOT change your file size and will make Media Encoder scrub over your footage twice to make sure it’s doing the best compression possible. It might take a few more minutes, but it’s worth it.

Next, let’s stay here and look at the TARGET BITRATE and MAXIMUM BITRATE. If you use the YouTubeHD preset, they will both be set to 16. The H.264 1080p preset will have 32 and 40.
These sliders WILL affect your file size. If you are looking for a high-quality master file that will be played from your computer, keep it around 32 (Target) & 40 (Max) for “Blu-Ray” quality. If you know you will be sending this file straight to YouTube or Vimeo for streaming on the web, take these down to 16.
Oftentimes, I will make one of each – one that will stream on the web (16Mbps), and one master (32Mbps) that will stay on a hard drive as a high-quality archive. It depends on your purposes.
Hit OK when you’re ready.
Set the File Location & Start the Encode
With these two minor tweaks to the presets (VBR and Bitrate settings), you are ready to go!
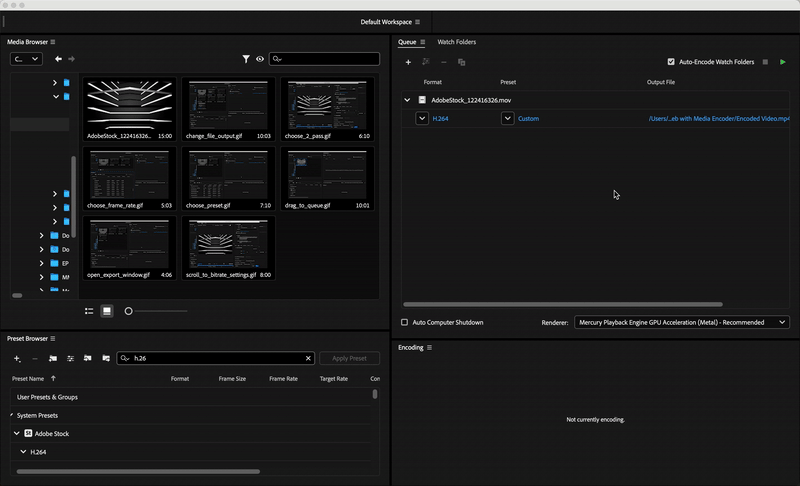
Let’s go back to the Queue window and set our output file to go to the Desktop. Click in the blue file path to change this:
After that, hit the green arrow to begin encoding. The ENCODING window will chart your progress.
Now you know how to compress your file and make the file size smaller!
To learn more about video editing, take a look at our Premiere tutorials!