


Topics
- Step1: Create a composition
- Step2: Add Video
- Step3: Add a solid layer
- Step4: Draw the rectangle
- Step5: Adding Gradient
- Step6: Adding Text
- Step7: Adding Breaking News
- Step8: Setup for Animation
- Step9: Creating an Alpha Matte
- Step10: Animating
- Step11: Adding Ease
- Step12: Create News Ticker
- Step13: Animate the News Ticker Text
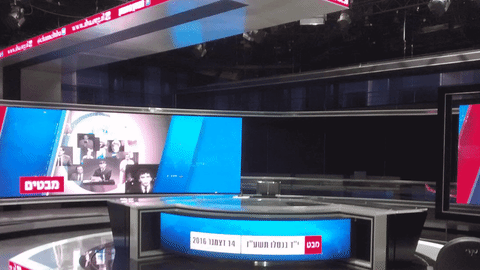
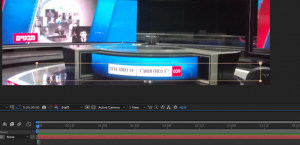
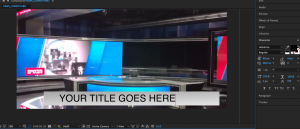
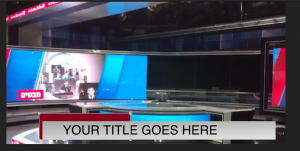
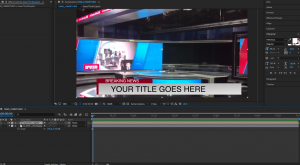
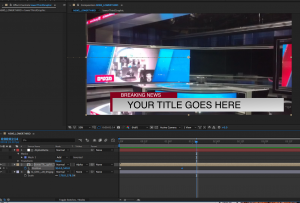
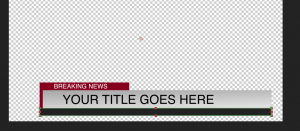
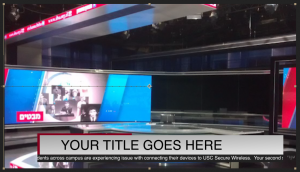
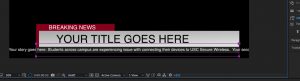
This tutorial will show you how to create a CNN-style lower third like this:
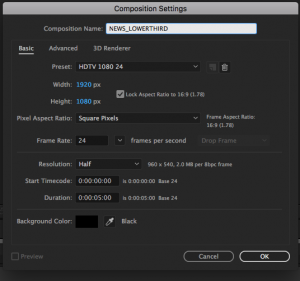
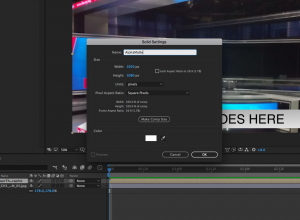
Step1: Create a composition
Create a composition [shortcut: CMD N] and set it to your desired video output resolution. I used the preset 1920 x 1080 HDTV.
Step2: Add Video
(OPTIONAL) Import your edited cut or B-roll that you want to add the lower third onto.
[Shortcut: CMD I or double click the Project Window]
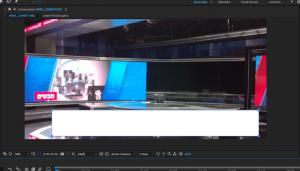
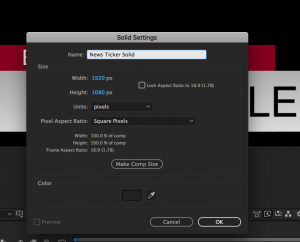
Step3: Add a solid layer
Create a new solid layer [Shortcut: CMD Y] and set the color to grey. It will fill your entire composition by default.
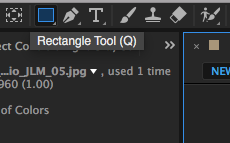
Step4: Draw the rectangle
Turn off the visibility on your grey solid so you can see your background footage.

Then use the rectangle tool in the top tool bar to draw a rectangle for the base shape of your lower third.
Then, you turn the layer visibility back on, after which you would see a grey bar in front of your video.
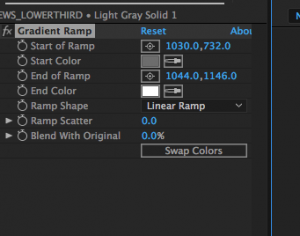
Step5: Adding Gradient
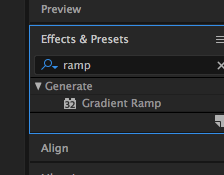
We are going to add a gradient to the rectangle shape to make it look more like the CNN lower third. Search ramp in the effects and presets window, and apply that effect to your grey bar layer by dragging and dropping. Change the colors of the gradient ramp to white and grey, and then click on the pivot button on the right of the [Start of Ramp], [End of Ramp] attributes to position the positions of the ramps.
Step6: Adding Text
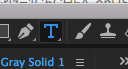
Select the text tool up at the toolbar, and then click on the left side of the grey rectangle to place the text. You can type in the title of your story here.
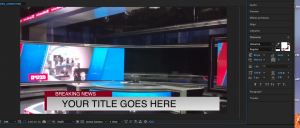
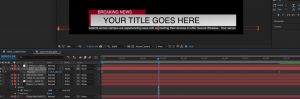
Step7: Adding Breaking News
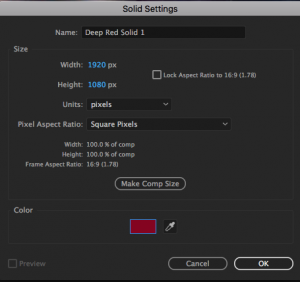
Similar to how we created the grey rectangle, create a new solid with a dark red fill color and mask it with a rectangle tool. Place the layer underneath the grey rectangle. Then use the text tool to add “Breaking News” and adjust the font accordingly.
Step8: Setup for Animation
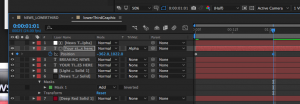
We are going to pre-comp the graphic assets so that they are in a group we can animate.
Select all the text and solid layers and then go to layer – precompose [Shortcut: CMD SHIFT C]
All the layers should now be grouped inside a single layer.
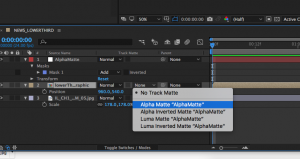
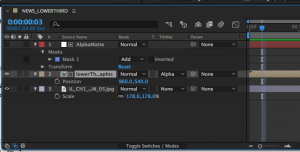
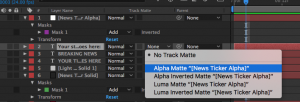
Step9: Creating an Alpha Matte
We are going to create an alpha matte which allows the lower third graphic to slide into the frame from an empty space. First create a solid and use a rectangle mask to draw the alpha. It should cover your graphic completely. Then, place the layer above the pre-comped layer.
Set the track matte to alpha matte, so that when the graphics come from left to right, whatever is on the left will be occluded by the empty space of the alpha matte layer.

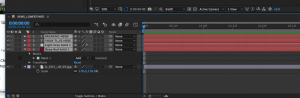
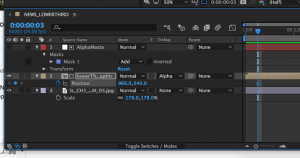
Step10: Animating
Select your lower third graphics composition, and bring out the position attribute. [shortcut P] Click on the stopwatch icon on the left of the attribute name, and it will turn blue, which indicates that there is animation on this particular attribute. At the same time, a diamond will appear beneath the layer in the timeline. That is a keyframe, which means this attribute’s value at a particular time. To animate, simply move your playhead to another time of the composition, and then click on the diamond icon on the left of the position attribute to set another keyframe.
Set a keyframe on 48th frame (roughly two seconds in) when the lower third is completely in frame. Then move the playhead to the first frame, set another keyframe, and then move the lower third graphics to the left until it is out of the frame. When you play this composition, the lower third will be animated!
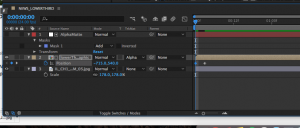
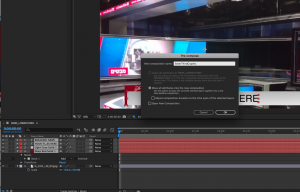
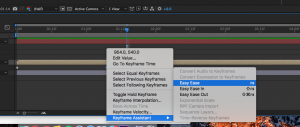
Step11: Adding Ease
Right now the lower third graphics slide from left into the frame, but the motion of the transition stops abruptly. Adding a ease will create the effect where its velocity decelerates as it comes to a stop, which is a more satisfying motion. To add a ease, simply right click on your diamond keyframe, and choose keyframe Assistant – Easy Ease.
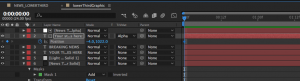
Step12: Create News Ticker
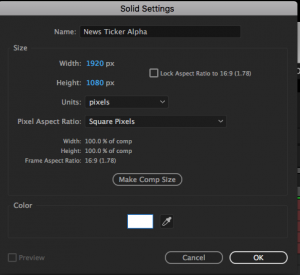
Now we are going to create a news ticker at the bottom of the lower third graphics. Create a solid with dark grey color, and then use the mask tool to draw a long rectangular box beneath the lower third graphics.
Similar to how we created an alpha matte for the lower third graphics, we are going to create that for the news ticker text as well so that it can scroll within the dark grey news ticker bar. Create a solid named News Ticker Alpha and use the mask tool to draw a box that’s the same size as your news ticker solid. Then, use the text tool to add your news description on the news ticker. Lastly, move the text layer beneath your news ticker alpha layer and set the track matte to alpha matte.
Step13: Animate the News Ticker Text
This is the last step! Similar to how we animated the lower third graphics from left to right on the screen, we are going to do the same thing with the news ticker text. Select the text layer and bring out the position attribute [shortcut: P]. Set a keyframe on the first frame and position the text so that the beginning of the news ticker text is just about to enter the frame.
Then, move your playhead to the end of your composition, and then set another key and move the text all the way to the left so that the text is no longer visible on the screen.
That’s it! You should now have an animated lower third graphic in the style of CNN.