Topics
Here’s a quick tutorial on how to connect to a remote server with Cyberduck, a free FTP client for both Windows and Mac.
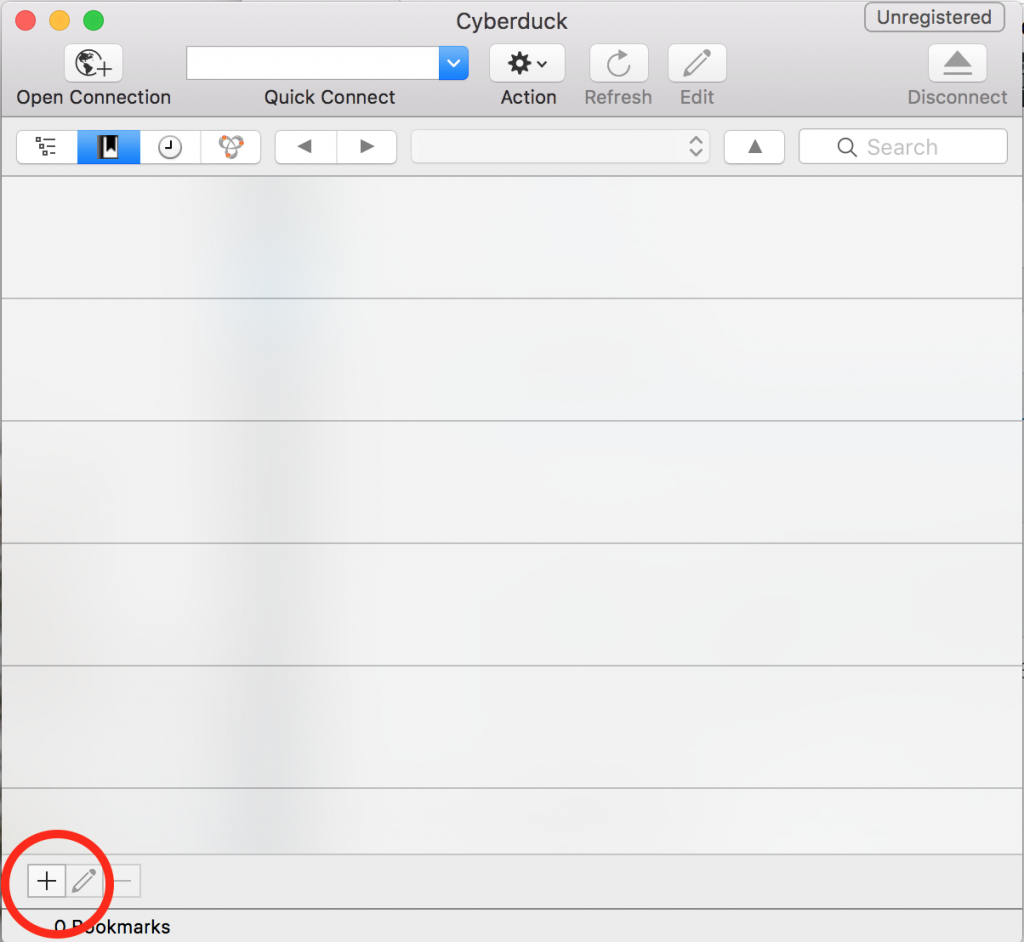
Add a Connection Point
After launching Cyberduck, click on the + sign (circled in red) in the bottom left hand corner.
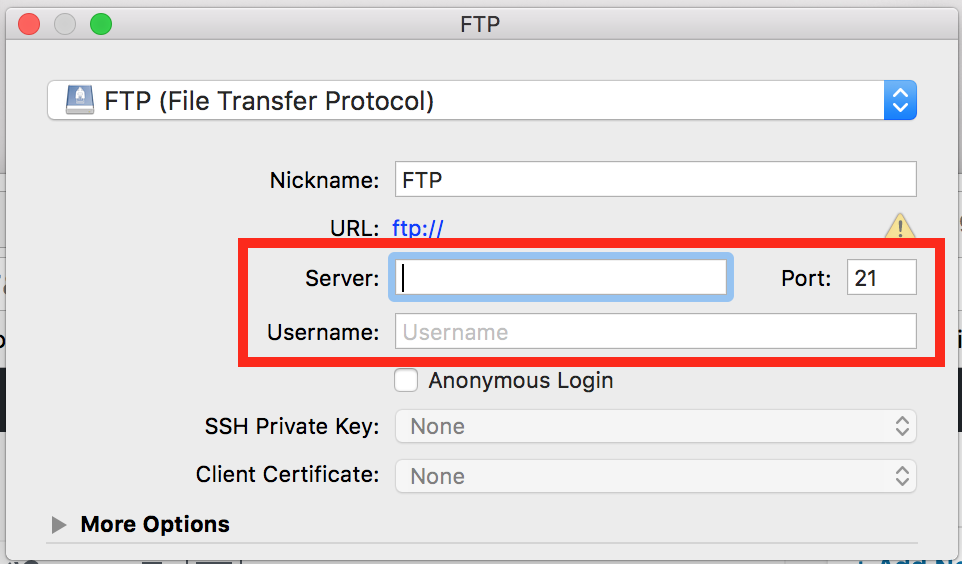
Make sure to use FTP (File Transfer Protocol)
Make sure the dropdown menu at the top shows you’re using FTP.
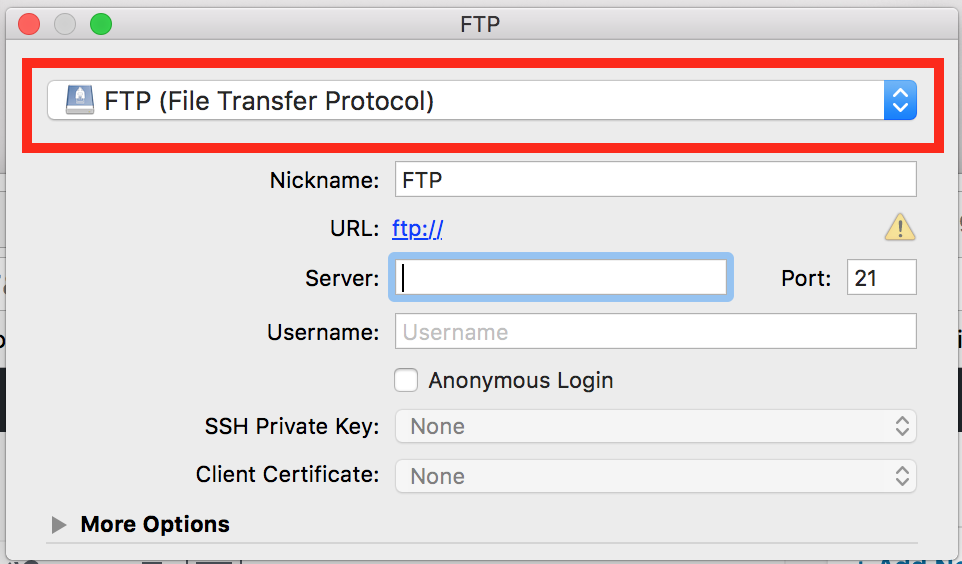
Enter your FTP Server and Username
For FTP Server, it is often ftp.yourwebsite.com. In this example, we’ll use USC’s Storyspace server: ftp.uscstoryspace.com. Other courses may be using ftp.offthefreeway.com.
For your FTP username, if you’re on Storyspace, you will have received an email with these credentials. Your username will be the prefix of your USC Email (i.e., if your email is ttrojan@usc.edu, your username is ttrojan).
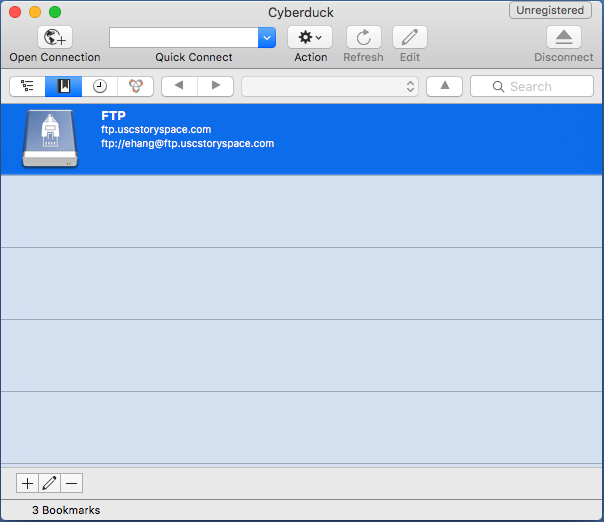
Then close out the window.
Open FTP Server
After you close out the window, you should see your FTP server saved in your list as pictured below. Double click on it.
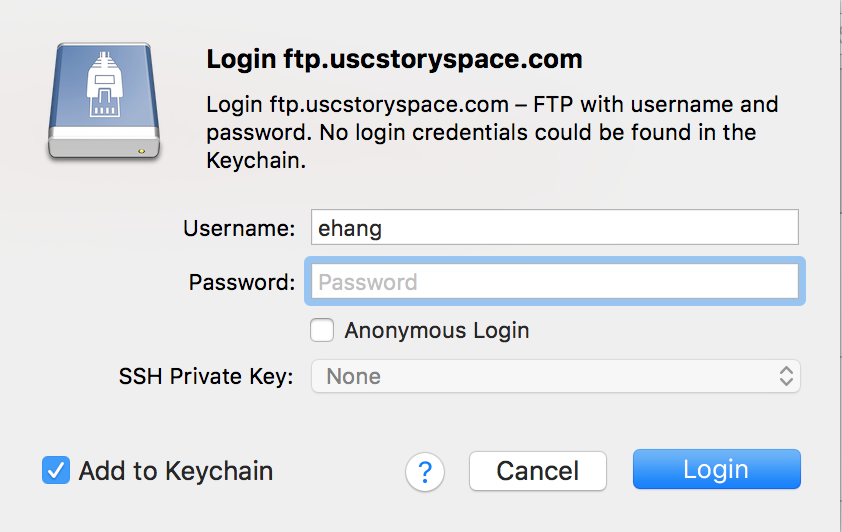
Enter in FTP Password
It will then prompt you for a password. Type in your password and click Login.
Note: You may get a dialog box that says “Unsecured FTP Connection” and ask you to switch to FTP-SSL, click on Continue.
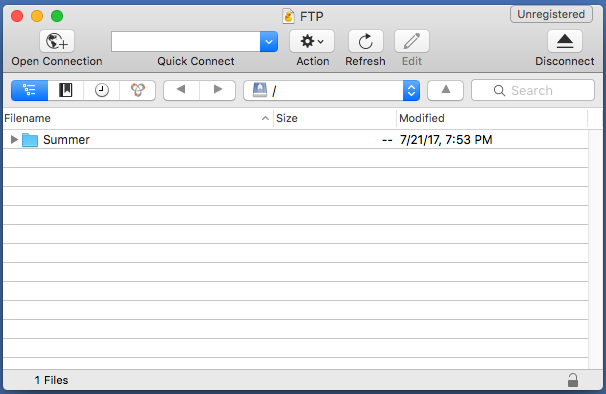
You’re In!
Congratulations! You should now be in your folder, ready to rock. Storyspace will have your course folders ready to go. Other courses may be empty, but that’s okay – it’s still ready for you to drag files in to upload to the server.