


Topics
Let’s use a mask tool in After Effects to get rid of stuff in our video we don’t want!
Download the Tutorial File
Download the video above here: Sample File Video.mp4 (18mb) to follow along.
Start a New Project & Import the Files
Open up After Effects and start a new project.
Import the video file by dragging them into the Project tab. You can also use Command i to open an import window and navigate to your files, or use FILE > IMPORT > FILE…

Start a New Composition
Now we will create a new composition the cool way: click and drag the video file into the new composition button at the bottom of the Project tab like so:
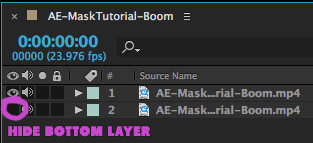
Duplicate It Then Hide the Bottom Layer
Now we have the sequence created and the video in the timeline below. For starters, let’s DUPLICATE the video layer by selecting it and hitting Command-D. You could also use EDIT > DUPLICATE.
HIDE the bottom layer (for now) by hitting the eyeball to the left of the track.
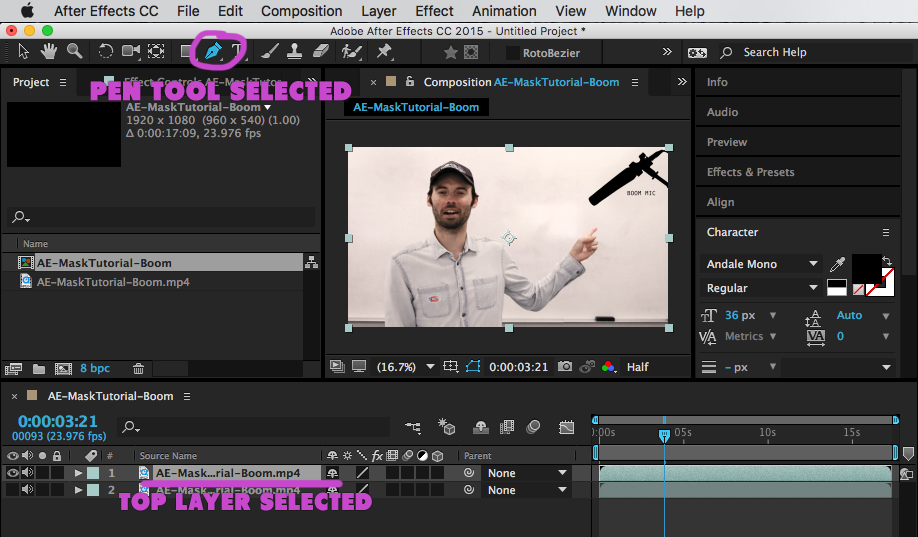
Use the Pen Tool to Mask Out Boom Mic
Select the top video layer and click on the PEN TOOL.

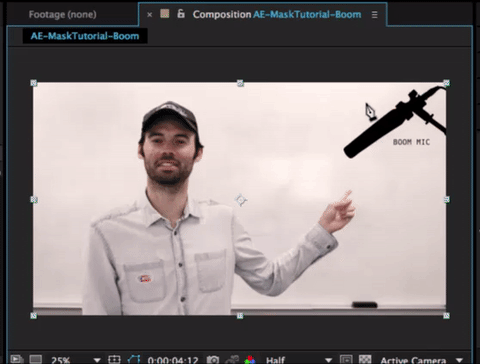
SCRUB THE PLAYHEAD to the middle of the clip so you can see the boom mic in the shot.
Using the pen tool (shortcut G), draw a series of points that outline the boom mic and completes a shape around it. It should go something like this:
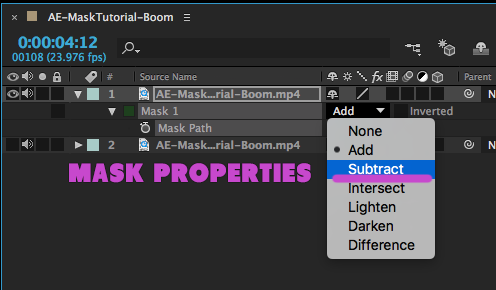
Adjust The Mask Settings
Once you close the mask by setting the end point at the start point, you’ll see by default After Effects will mask out the outside of your path. Jump down to the MASK options (use the shortcut M) and change the ADD to SUBTRACT.
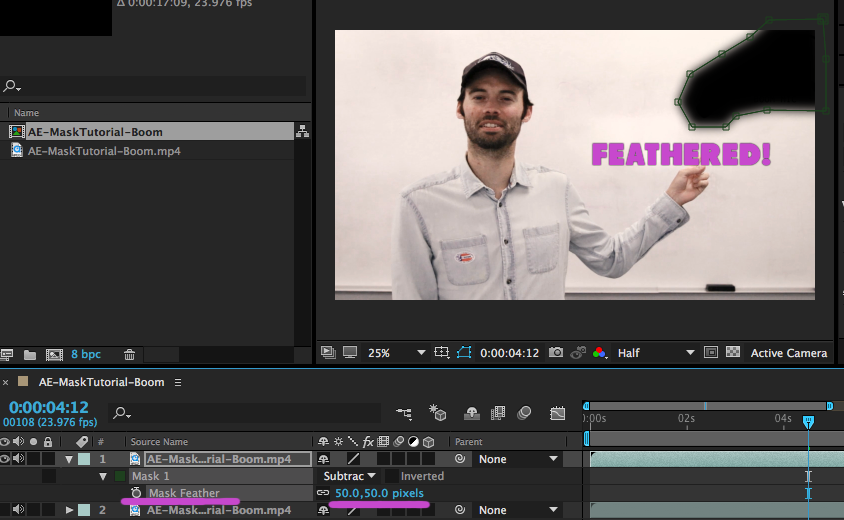
This will cut out the inside of your path now. Next, you’ll want to FEATHER the mask so it fades into the background more smoothly. Use the shortcut F to bring up the Mask Feather properties. 50px should suffice:
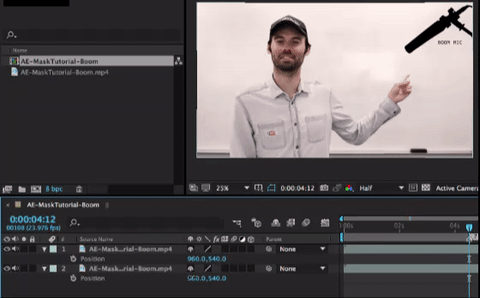
Show The Bottom Layer & Re-Position It
Now we’ll want to make the bottom layer visible – hit its EYEBALL to bring it back. Oh no, the microphone is back! Don’t worry, we can just slide this bottom layer over to show the white board in back instead of the microphone.
Open up the POSITION options for the bottom layer by hitting the shortcut P. Drag the X coordinate higher – up to around 1450 will do the job:
If all went well, you should be good to go! Watch my finished version here:
A Word On This Method
Obviously this is a very basic way to mask things out of your video. This particular file was blessed because the background is a basic solid whiteboard and is easy to replace cleanly.
Your footage may have a more complex background, or tougher yet, your camera may be moving/handheld/zooming. These compound the difficulty, of course, but the solution will still follow this same principle – replace the unwanted region with “clean” footage. Scour your footage for frames where the mic isn’t there, and use a mask to ADD this clean region on top.
When in doubt, Google is your friend.
Meanwhile, congratulations, from The Great Gatsby himself, Mr. Leonardo Di Gatsby!
