


Topics
Creating a Building
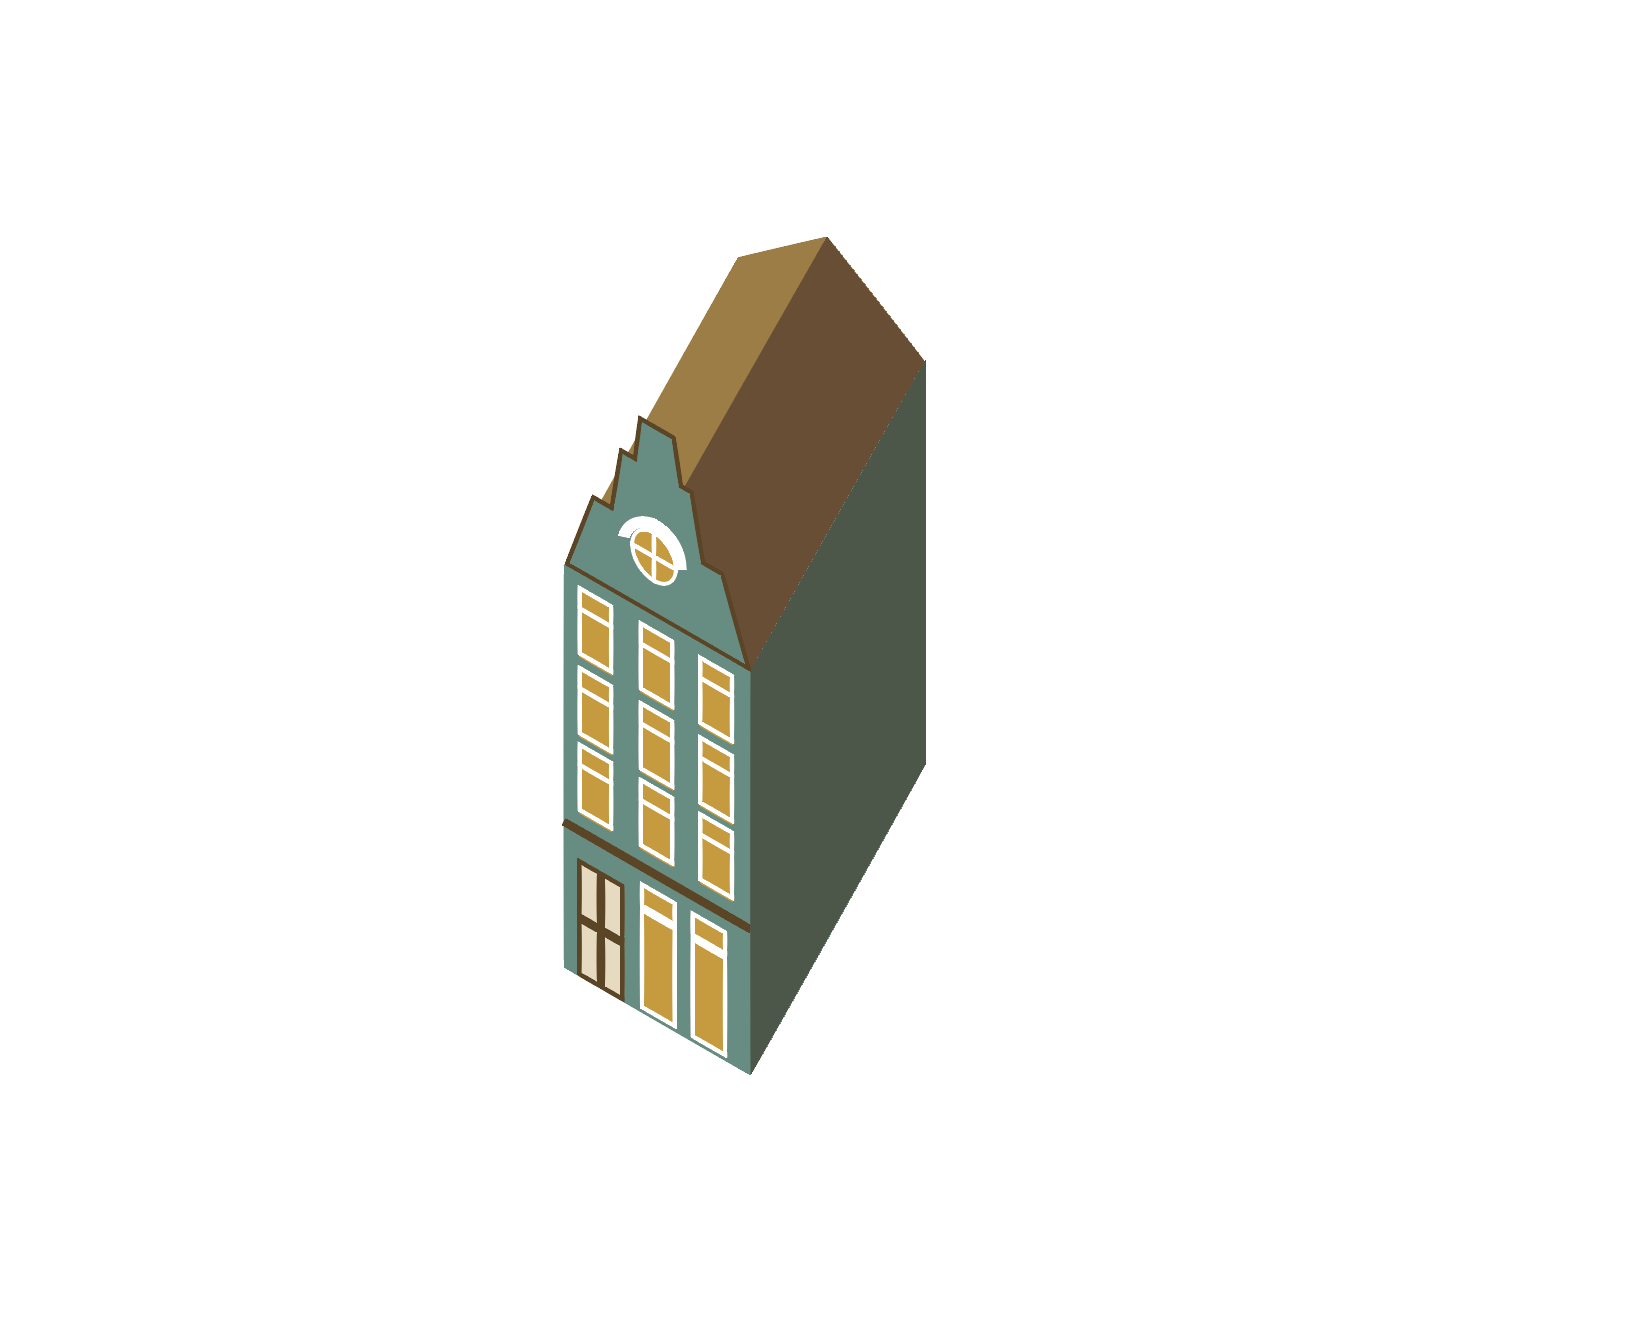
In this tutorial, we’ll be learning how to create 3D buildings with the Free Transform Tool in Illustrator.
We’ll practice by recreating this building.
Roof
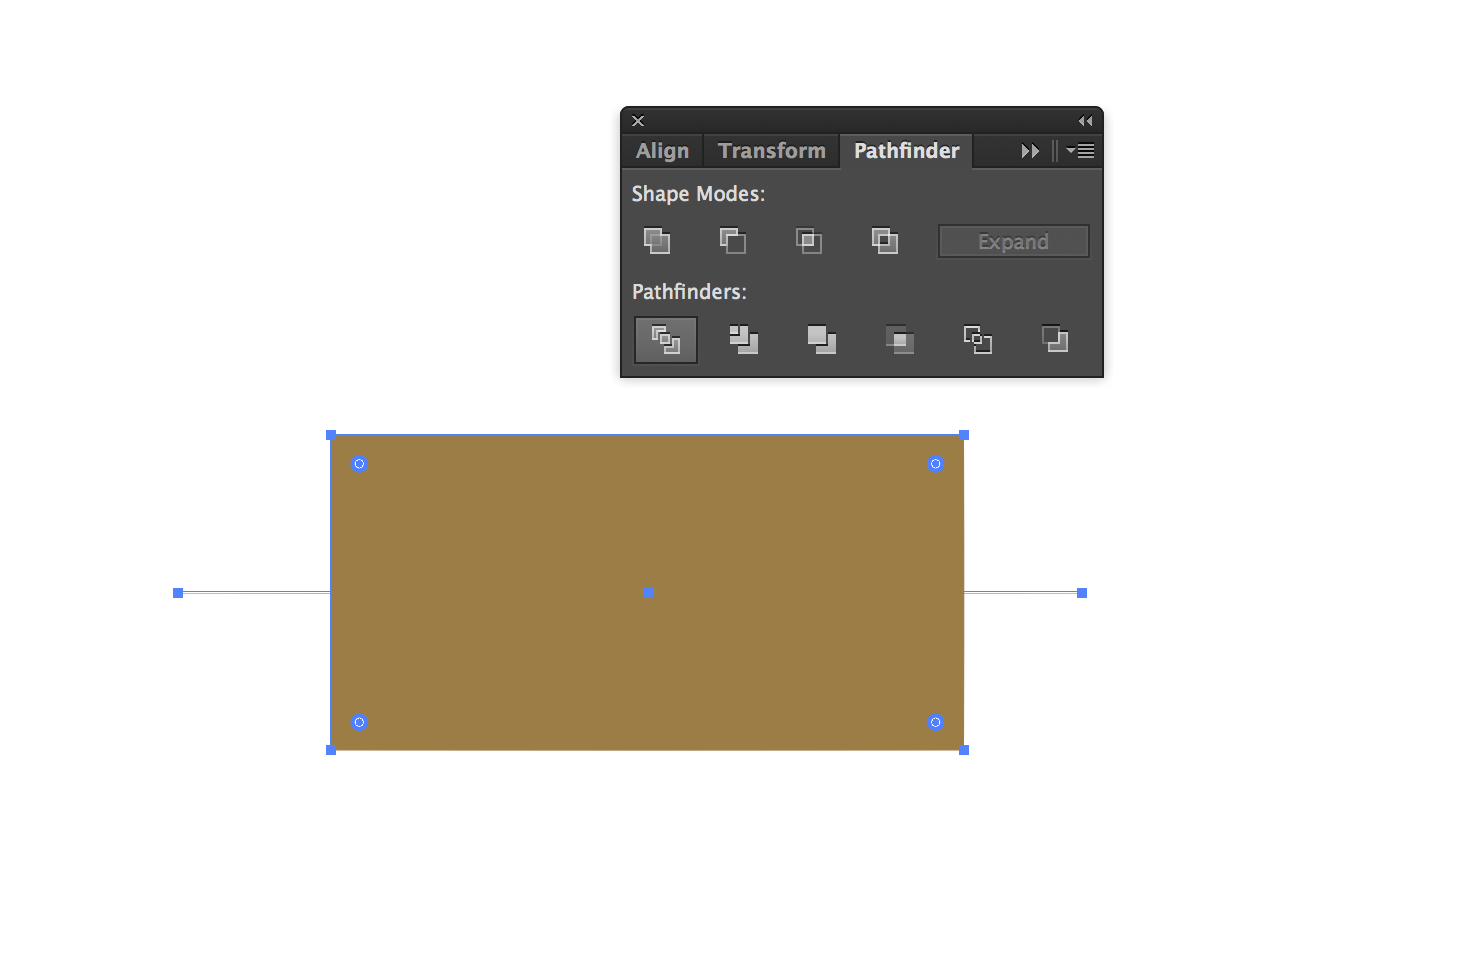
To begin, open up a new document in Illustrator and create a rectangle with the Rectangle Tool (M). Keep in mind, the length and width of the roof will match the width and length of the building so size accordingly. With the Pen Tool (P), draw a line length-wise down the center of the rectangle.

Next, open up your Pathfinder Panel, which can be found under Windows > Pathfinder. Select the line and rectangle and hit Pathfinder Divide.
Building Façade
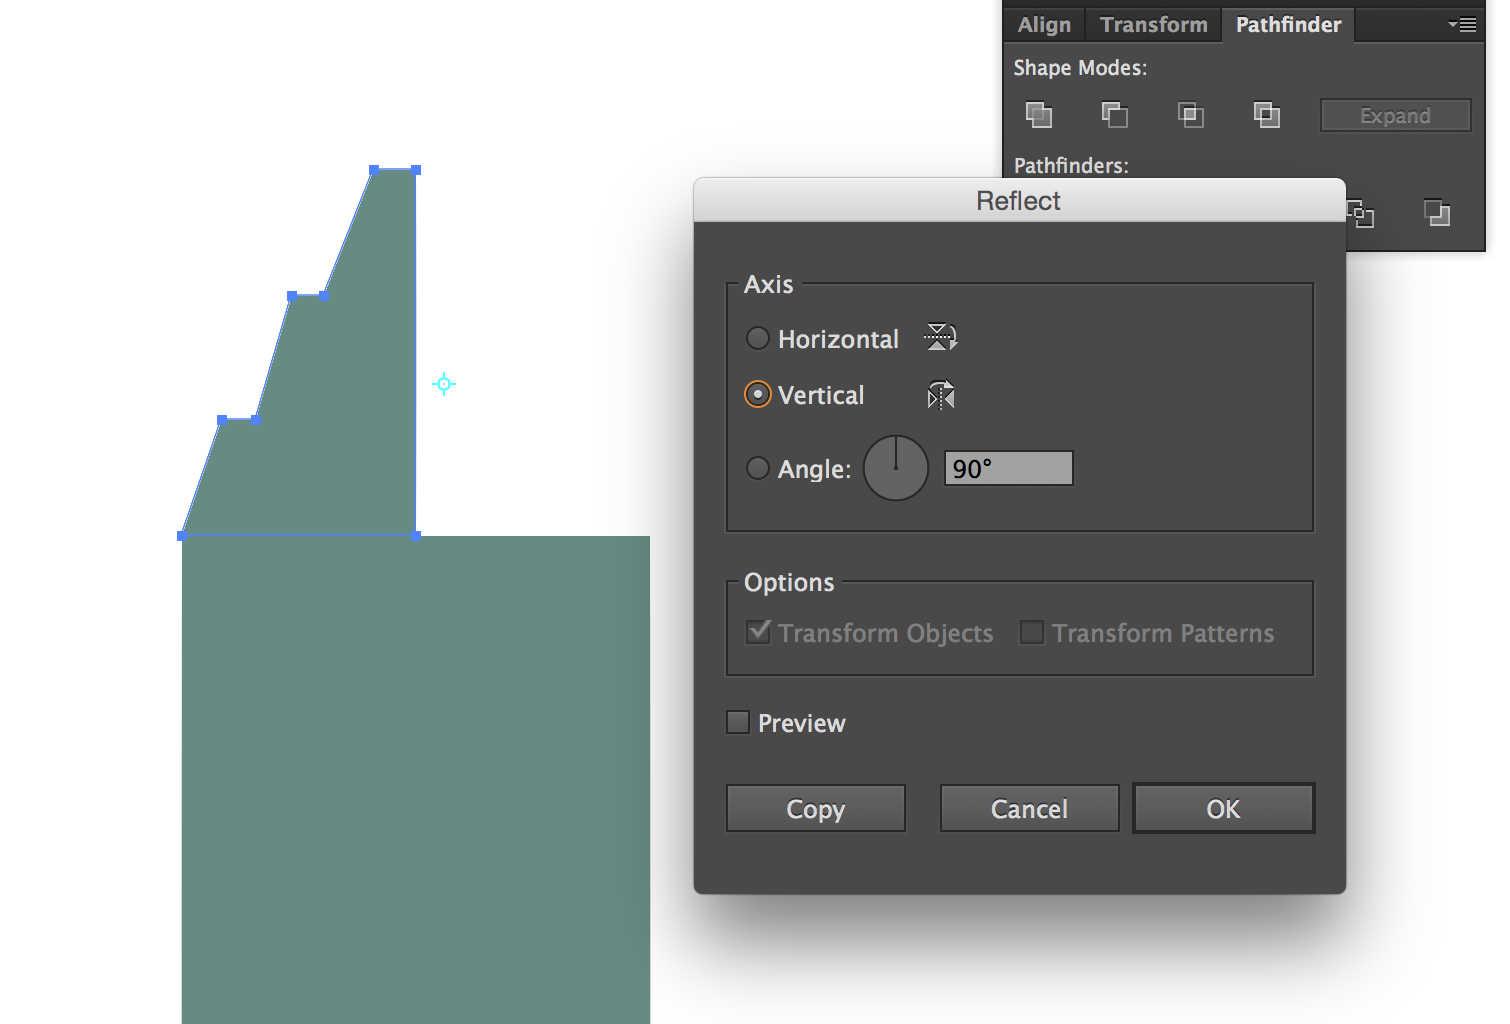
Create a new rectangle with the Rectangle Tool (M). Above that rectangle draw a stepped shape with the Pen Tool (P) that ends at middle of the rectangle like so:

Select the stepped shape and hit the Reflect Tool (O). Alt/Option click any space to the right of the shape. An option box will pop up and make sure to select Vertical Axis and then hit copy.
Drag the reflected stepped shape over to the original shape and align them above the rectangle. Select all three shapes and hit Pathfinder Unite. We now have the windowless face of our building.
Windows
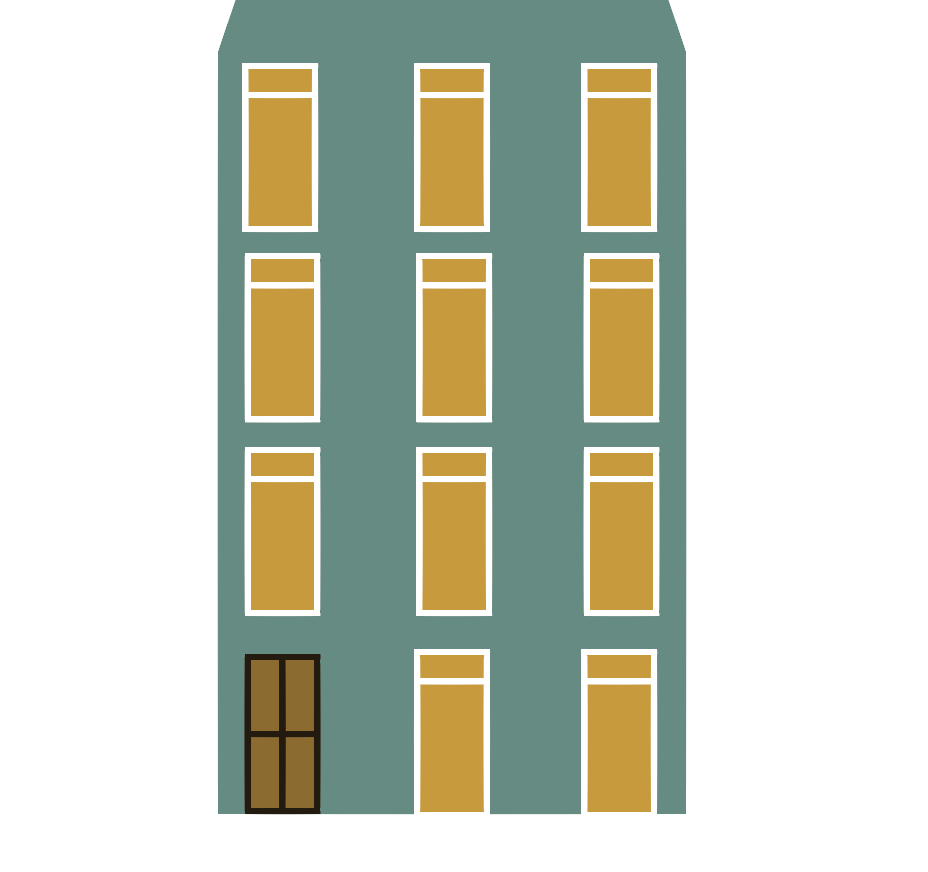
To create windows we will use the Rectangle Tool (M) with a white stroke. And using the same technique as our roof, we’ll use the Pen Tool (P) and Pathfinder Divide to create a window divider.

Copy and paste our window twice to create a row of three. Group these windows (cmd G). Copy and paste the group twice to create three rows of three windows.

Ground Floor
All we’re missing is our door and a couple ground level windows. Our door will be a rectangle with a dark stroke and two bisecting lines forming a cross in the center of the door. This will of course be done with our friend, the Pathfinder Divide tool. By now, you’ve all become experts in using the Pathfinder Divide tool which is good because we’ll be using it a few more times.
Circular Window
To create our circular window frame we’ll be using the Ellipse Tool (L). Hold down Shift and drag to create a perfect circle.
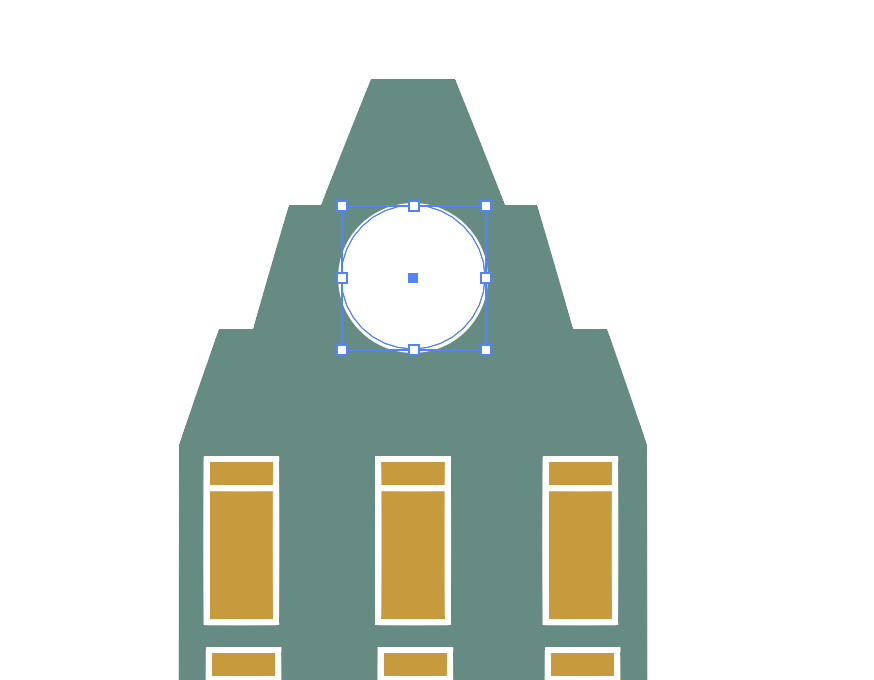
Grab the Pen Tool (P) and draw a horizontal line down the center of circle and Pathfinder Divide. Double click on the bottom half of the divided circle to enter Isolation Mode and select the bottom half once more and hit delete.
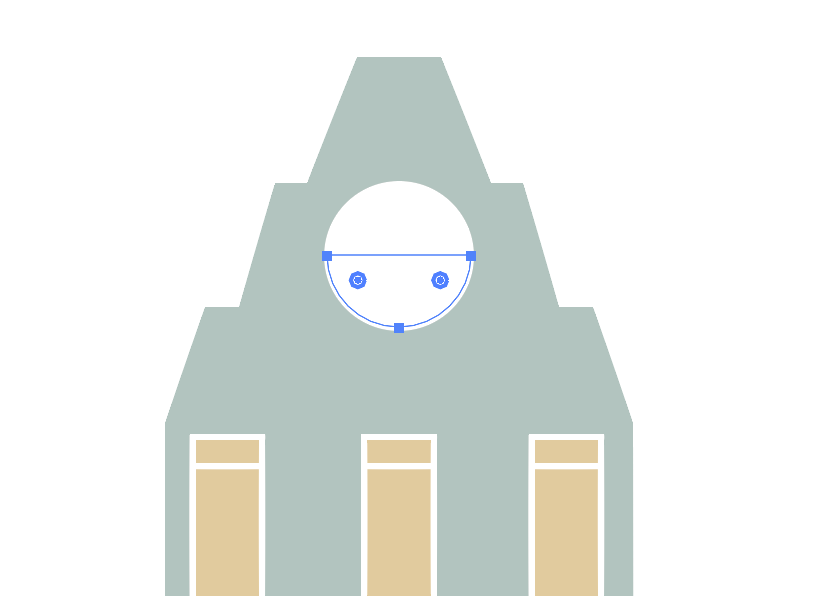
Place the semi-circle in the center of the stepped shape. To create the actual window we’ll use the Ellipse Tool (L) one more time and create crosshairs with…you guessed it, Pathfinder Divide.
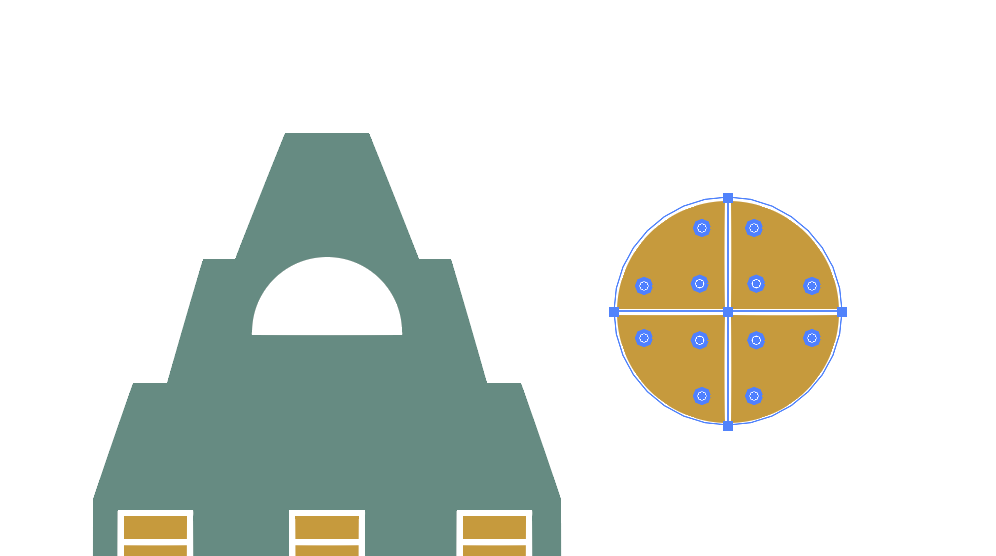
Resize and center the circular window.

Once finished, select all the windows, door, and front wall and group it (cmd G). We are finally done with our building façade!
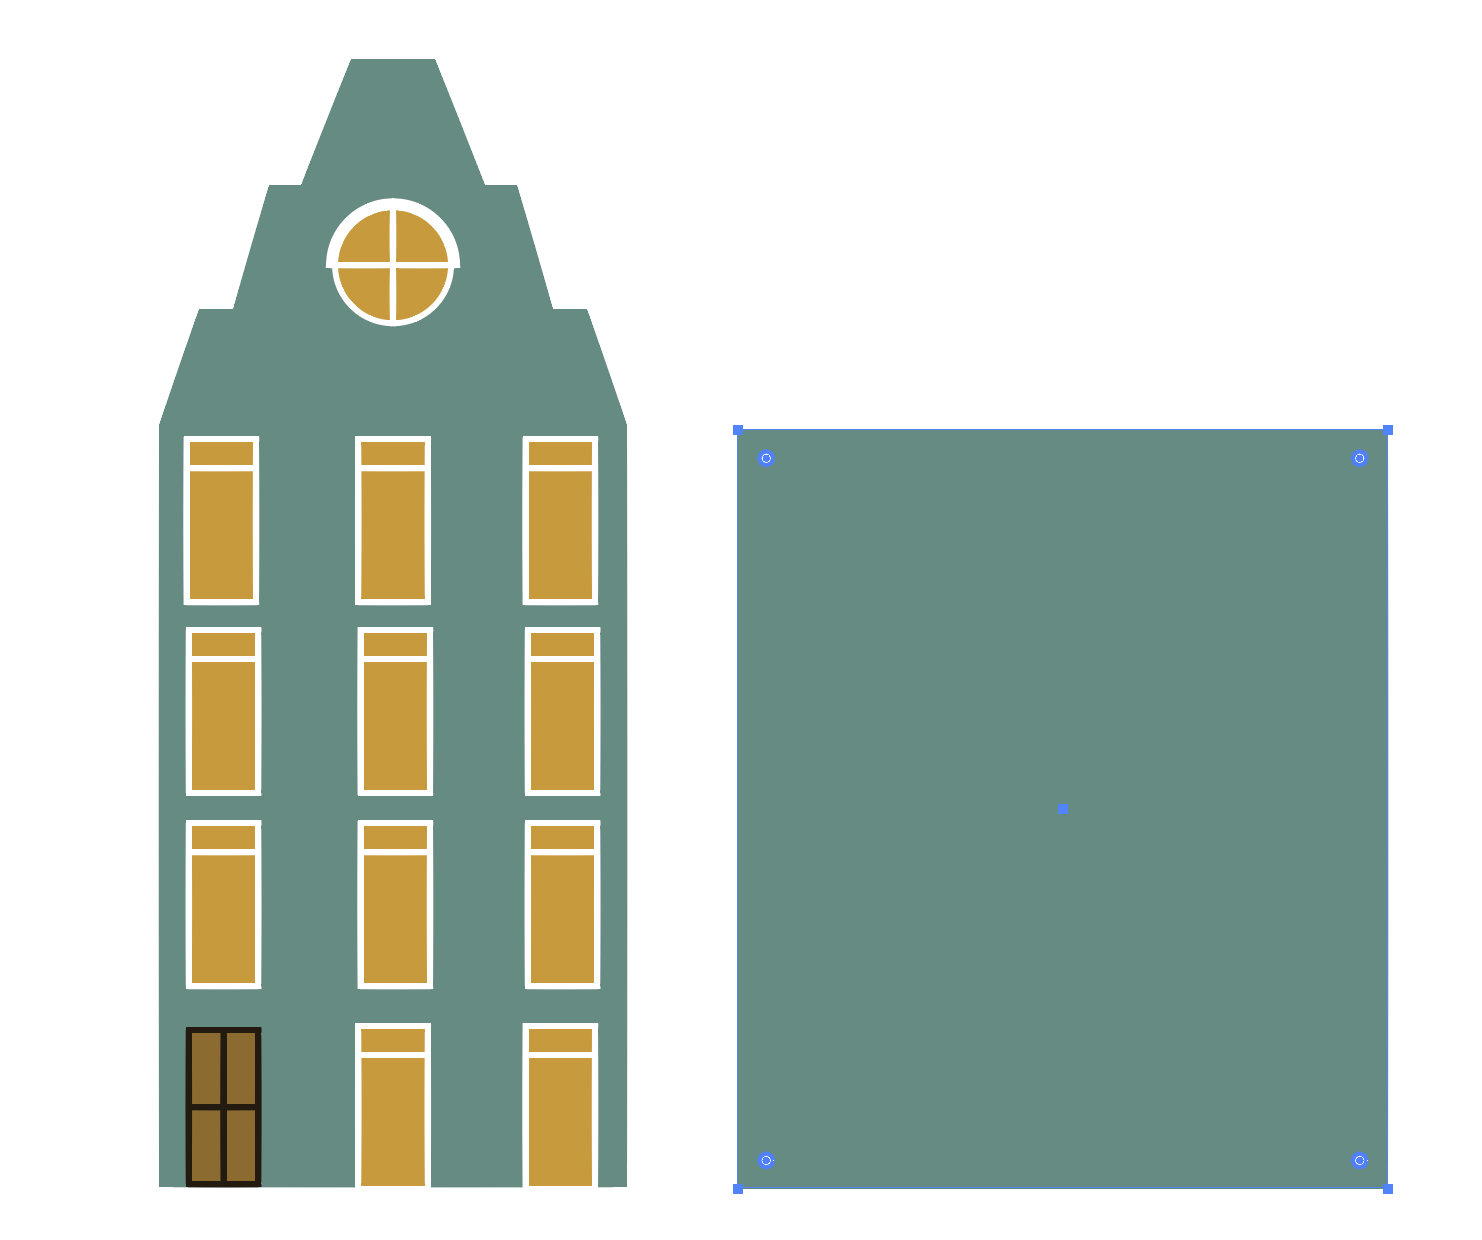
Building Side
To make the side of the building, just use the Rectangle Tool (M) to create a rectangle that has the same width as the room and matches the height of the building façade minus the stepped shape.
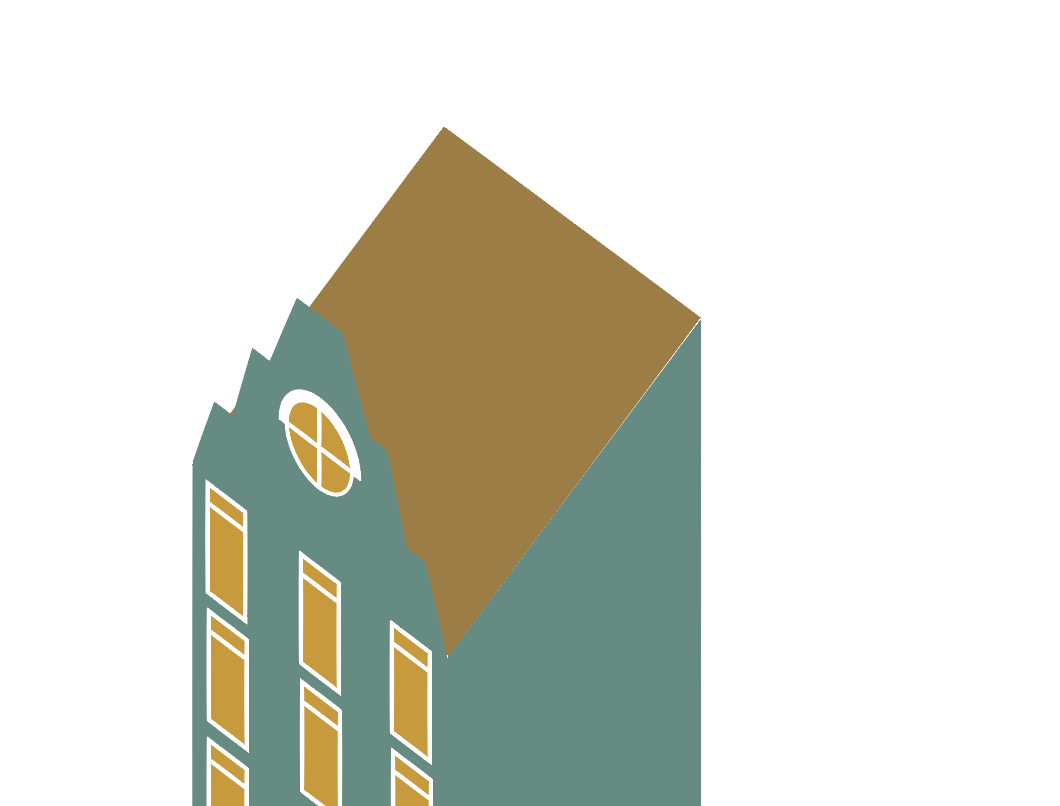
We are so close to using the Free Transform Tool. But first we must angle our building. Rotate the roof in any direction and degree that you want, I angled mine to around 55 degrees. Drag the roof so that the corner pointing downwards is flush with the inner corner like so:
We are now READY.
Using the Free Transform Tool
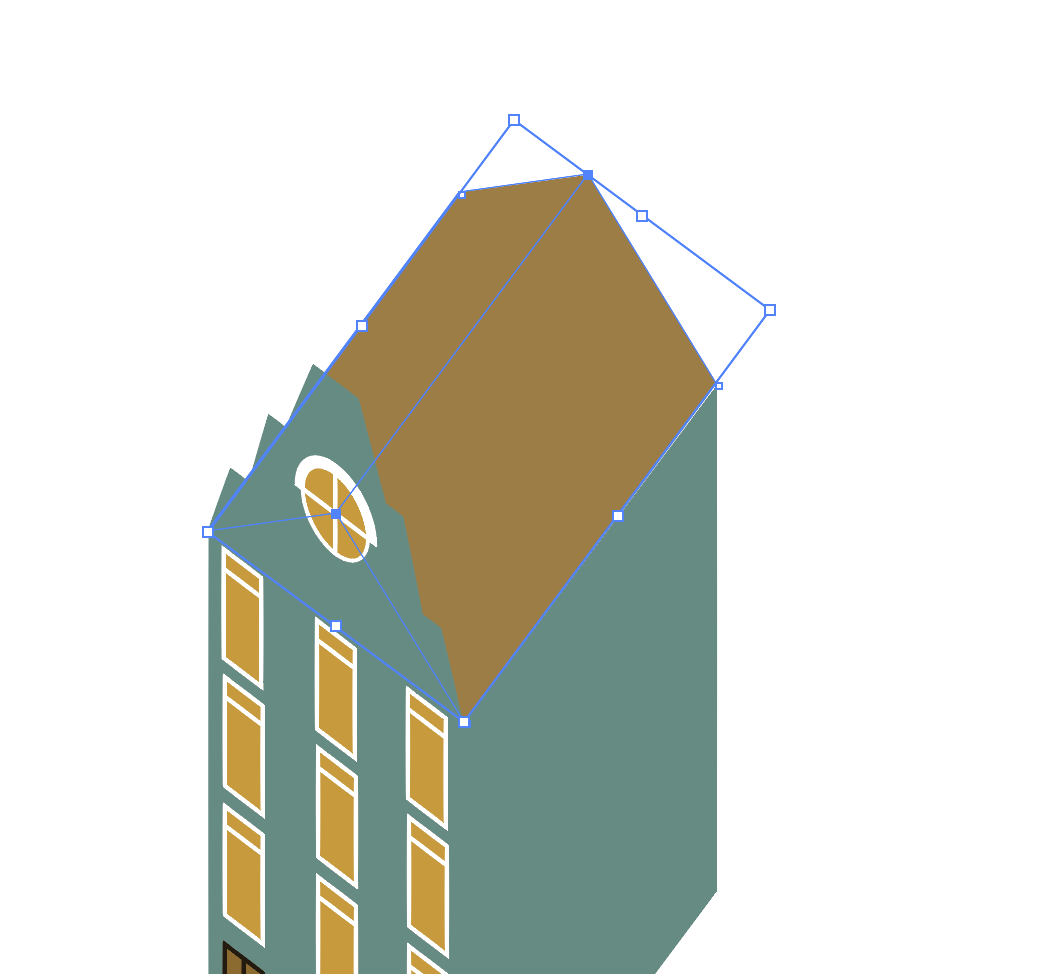
First select the building façade and then hit the Free Transform Tool (E). Click on the center left node and then your cmd key. You should now be able to shift the left side of the building forward and backwards. Line the façade up to the roof and likewise with the side of the building.
![]()
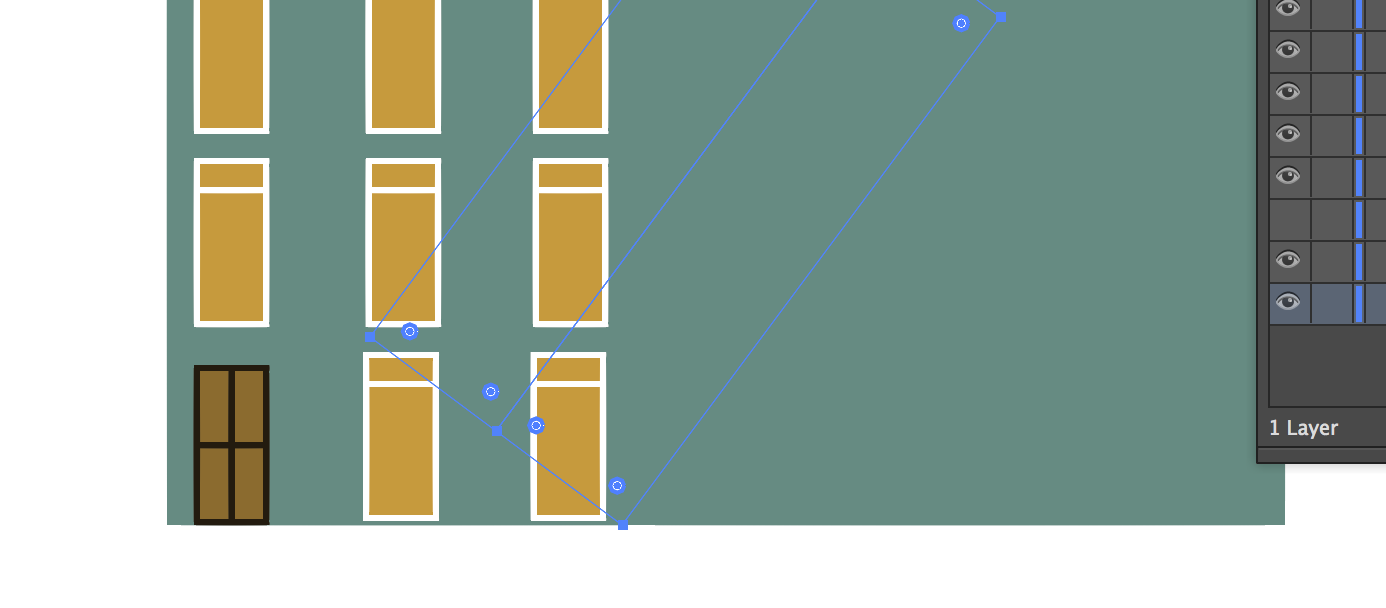
Select the roof, hold down shift, and drag it to the top. Hit your Lasso Tool (Q) and circle the center nodes.
Click on your Direct Selection Tool (A). Select one of the highlighted nodes and drag up while holding the Shift key.
Creating Shadows
If you want to add shadow, be consistent with your light source. I want my light to shine from the upper left corner, so my building will have a darker right side and a shadow casting to the right. To change color just use your Direct Selection Tool (A) and click on whatever shape. For the building’s shadow, grab the Pen Tool (P) and draw a quadrilateral at the base of the building.
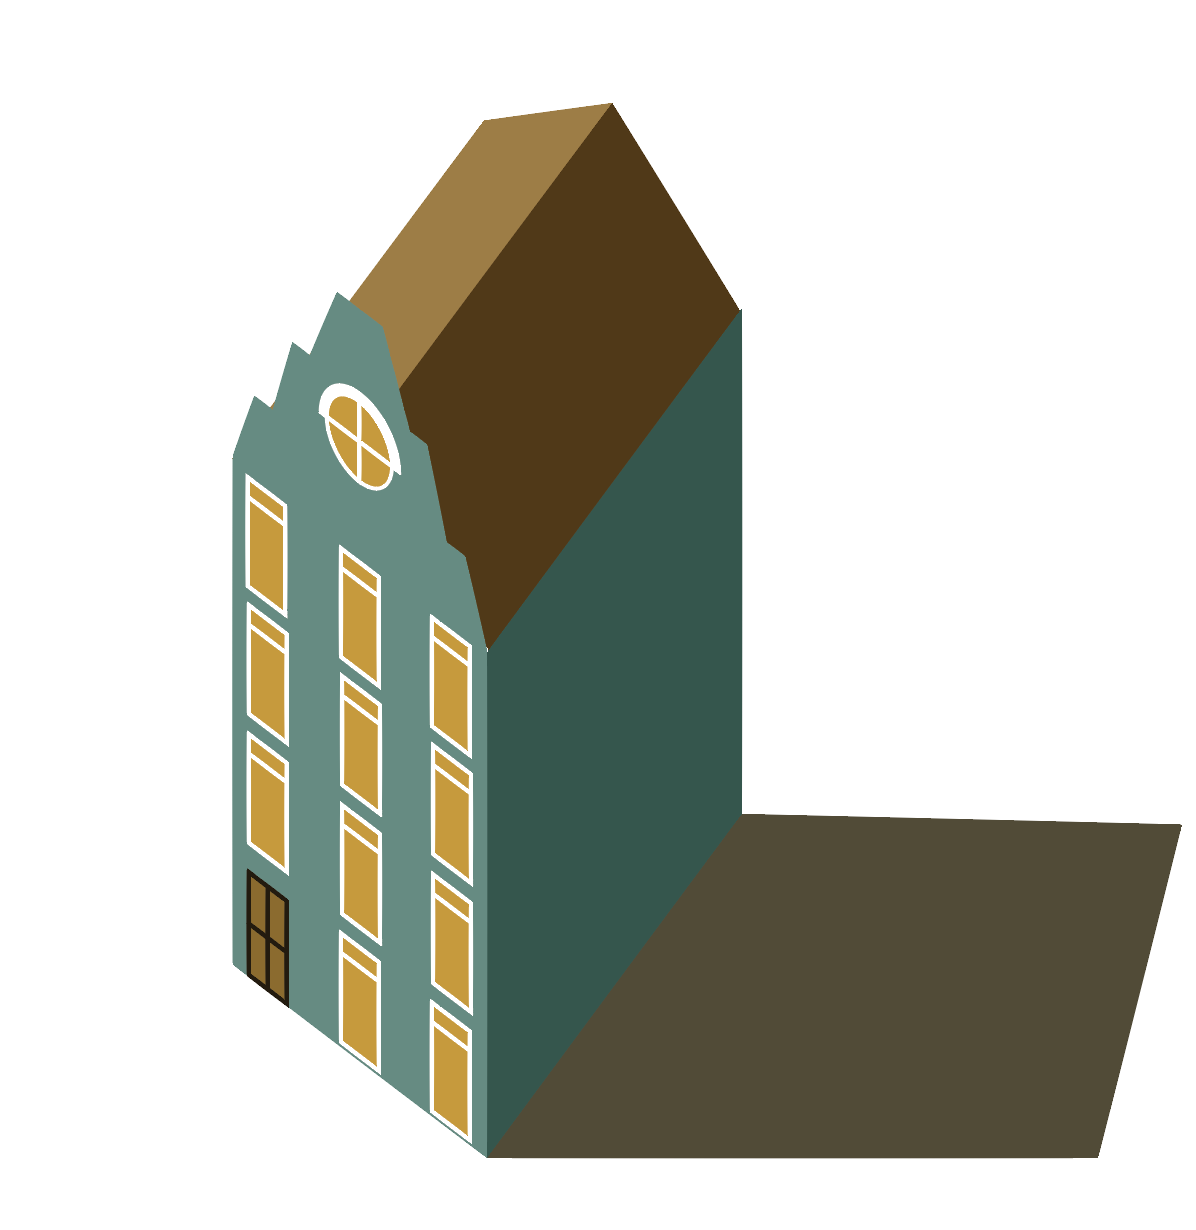
Congratulations! You’ve successfully created your first 3D illustrated building!