


Topics
Let’s use a motion tracker in After Effects to track the path of a moving target, and then map a layer to follow that tracker path!
Download the Tutorial Files
Download the video above here: Sample File Video.mp4 (38mb) to follow along.
I also will be using this cutout of Bert from Sesame Street. Feel free to drag him to your desktop!

Start a New Project & Import the Files
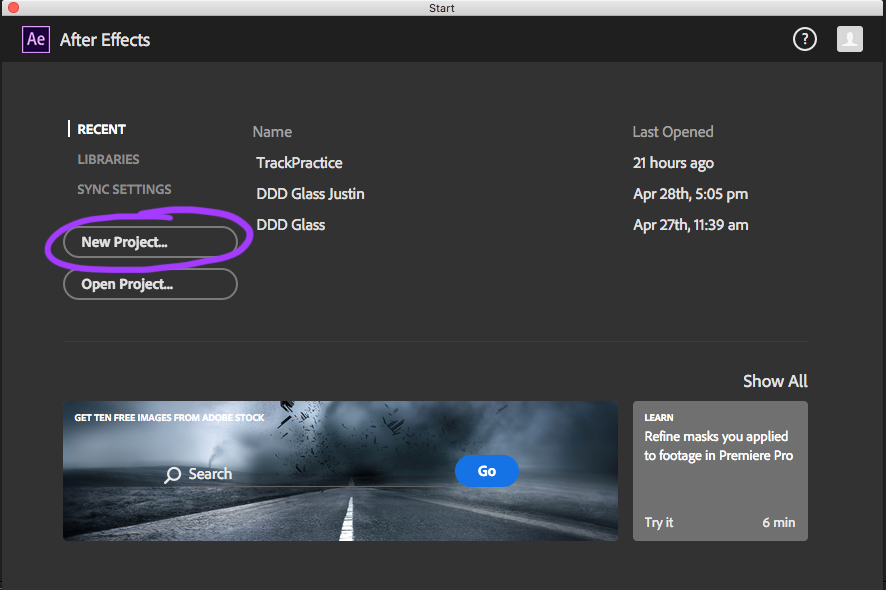
Open up After Effects and start a new project.
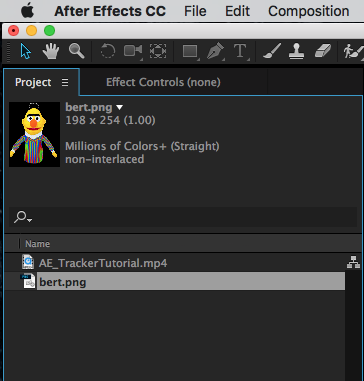
Import the video file and the Bert.png by dragging them into the Project tab. You can also use Command i to open an import window and navigate to your files, or use FILE > IMPORT > FILE…
Start a New Composition with the Video File
Now we will create a new composition the cool way: click and drag the video file into the new composition button at the bottom of the Project tab like so:
Add a Motion Tracker to Target
Now we have the sequence created and the video in the timeline below. Go ahead and grab the blue playhead and scrub around the 7 second mark – when I put up the yellow post-it with the X marker.
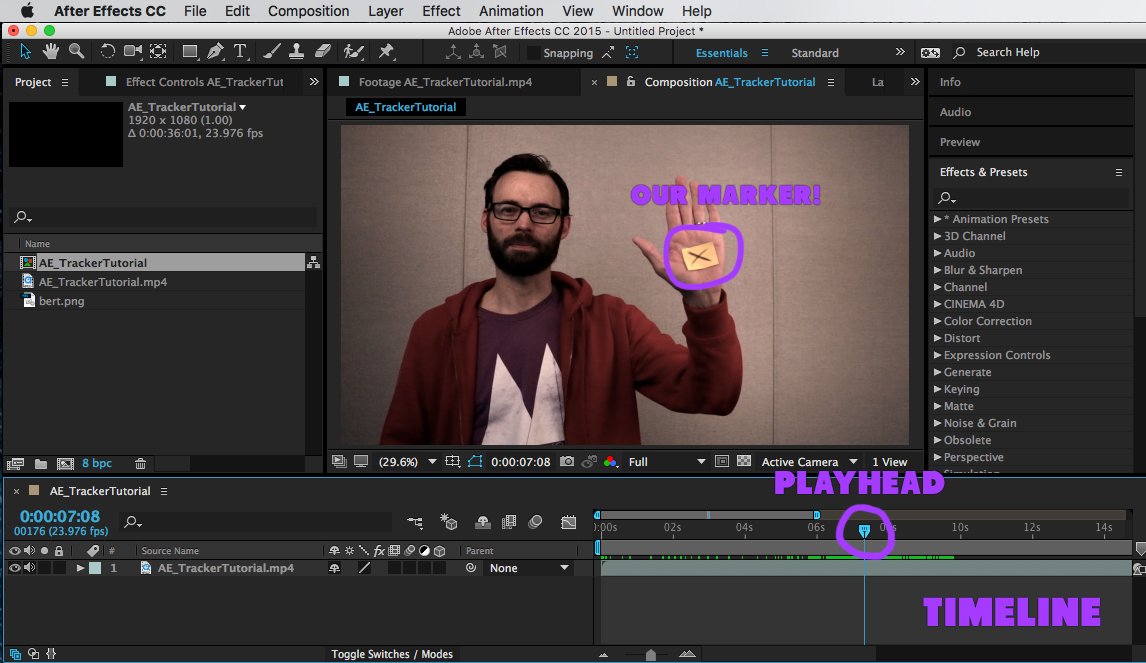
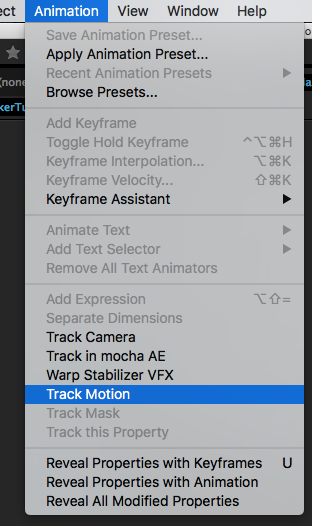
Select the video layer by clicking on it in the Composition window, or click the layer itself in the timeline. From here we can add the motion tracker under the ANIMATION MENU up top, TRACK MOTION, or by right-clicking:
This will open up your TRACKER TOOL in the preview window with TRACK POINT 1 in the middle. Drag this to the middle of the X. It can be a little stubborn finding the move arrow, so feel free to ZOOM IN with Command +. After Effects will magnify the image so you can place it exactly in the middle:
![]()
Once it’s in place, expand the inner square to define what you want to track – the X in our case. After Effects will attempt to find this set of pixels across every frame.
Expand the outer square to define the size of the region After Effects will search – just like a search radius. Keep in mind, the bigger this search radius is, the more time it will take to scan for your inner square’s selection across each frame. I had success making the region a little bigger than the size of my palm.
Set The Options & Let After Effects Work!
Once your tracker is in place, let’s look at the TRACKER TOOL OPTIONS panel to the right.
Click the OPTIONS to set it to track RGB (since the yellow and black X contrast so well) and hit OK.
![]()
![]()
Now let After Effects go to work by hitting the PLAY button in the ANALYZE row:
![]()
You should see After Effects go frame by frame and follow the X, creating a motion path. Be patient, as this can take some time depending on your processor.
You may see the tracker lose sight of your target. Feel free to hit STOP and reposition the tracker. It takes a little babysitting, to be sure.
When it’s done analyzing to your satisfaction, you should see a ton of key frames in the Motion Trackers dropdown:
![]()
Add a Null Object & Target It
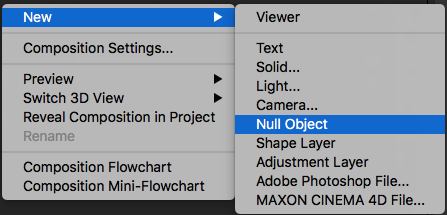
Let’s add a Null Object Layer so we can assign our motion path to a target. Do this with LAYER > NEW > NULL OBJECT.
Double-click on your video layer again to open Tracker options and click EDIT TARGET to launch this window:
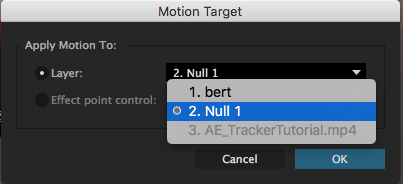
Choose the Null Object. Hit OK.
Now hit APPLY in the Tracker options. This will bring up another options window:
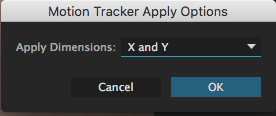
Go ahead and accept X and Y as the dimensions. Hit OK.
Add Bert & Parent Him to Null Layer
We can add Bert to follow along the Null Object’s marching orders. Go ahead and drag the Bert.png down to our layers, making sure he is the top-most layer.
Parenting is handy for making child layers follow the rules already set up for their parents. Parenting options are found in the timeline below, at the right end of the layers.
Go ahead and click on None in Bert’s layer to open the dropdown where you can select the Null Object:
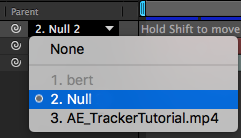
Voila, now Bert should follow the motion path of the Null Object!
Transform Bert and Add Motion Blur
As you might have noticed, Bert is a little small here. You can drop down his Transform options to make him bigger and slide him up or down to fit over my hand better.
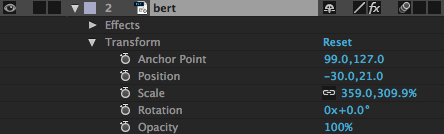
FYI – this is why you have the middle-man of a Null Object Layer. You can adjust these Transform options without messing up the motion path.
You will also want to add Motion Blur to make Bert’s motion feel smooth rather than just some sharp pixels flying around the screen perfectly. Turn it on just above the layers:
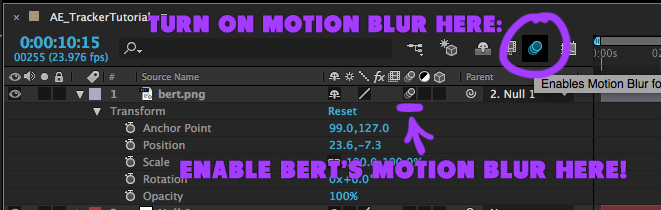
Now enable Bert’s Motion Blur layer by checking his Motion Blur box.
If all went well, you should be good to go! Watch my finished version here:
Congratulations!
