


WordPress now uses a block editor when you edit your posts. In this tutorial we will go over certain features of the block editor to help you use your editor with ease.
First, take your WordPress url and add on /wp-admin to the end of it.

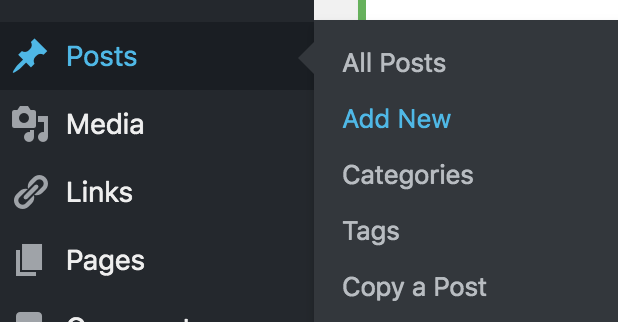
If you would like to add a new post, go to Post > Add New.
It will take you to an empty post that will look like this:
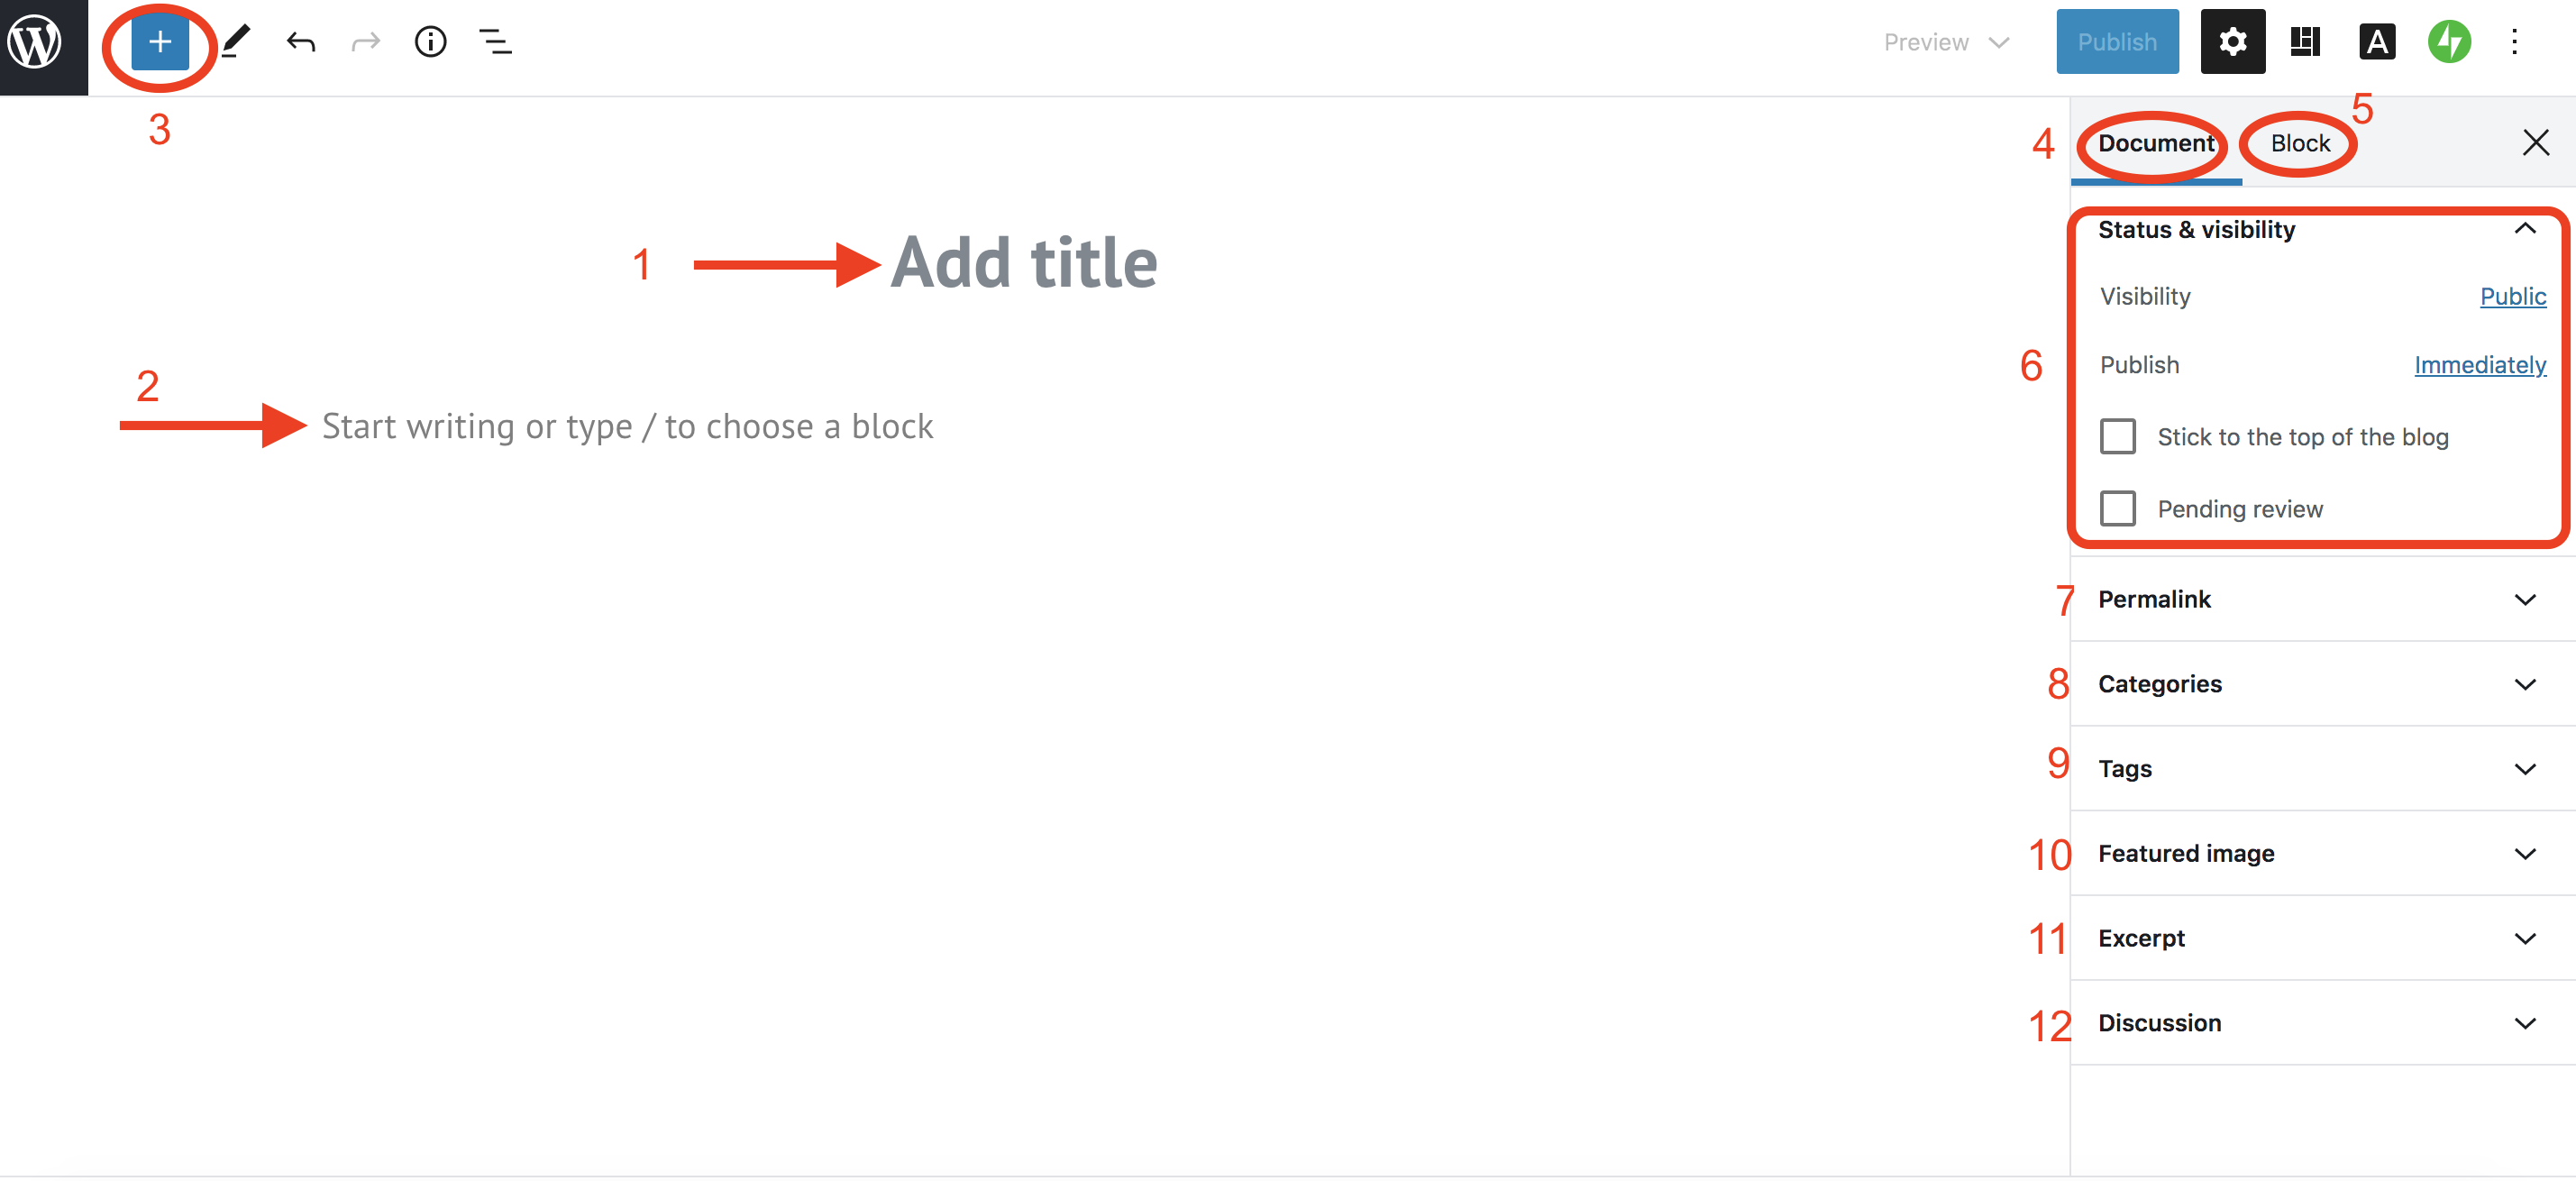
- Title: This is where you will type in the title of your post. This affects your Permalink section (#7) which will be explained later.
- Body: WordPress here has automatically inserted a paragraph block already for you. You can just start typing or copy and pasting any text you want within your post. This is also the body area of your post where you can add different types of blocks.
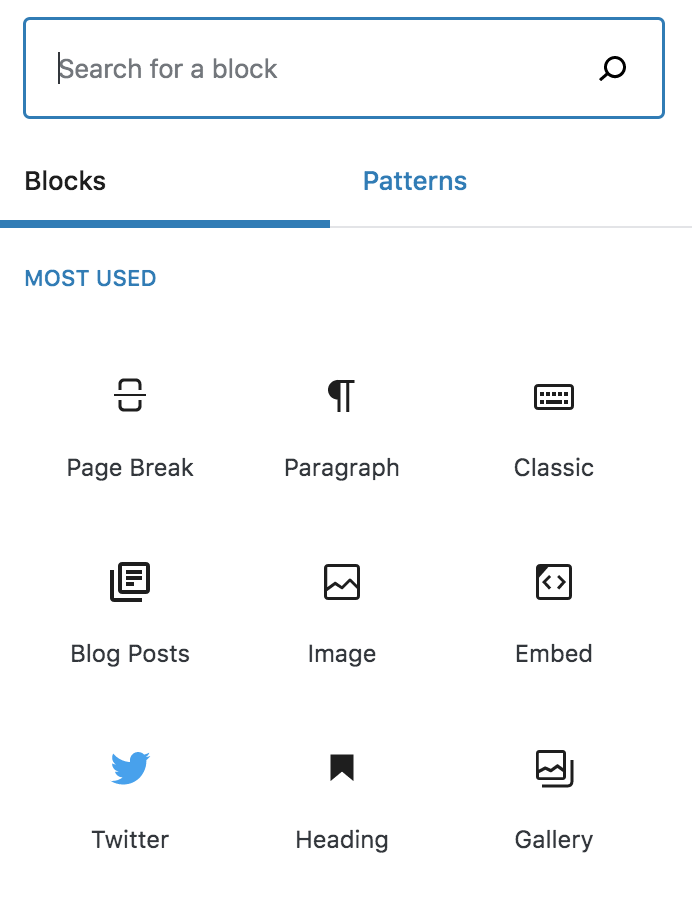
- Add a Block: If you see any square icons with plus signs in them, click on it to get different types of blocks to add to the body of your post. There are many different blocks to choose from and we suggest looking through and exploring all the different options!
- Document Tab: On the right side of your page, you will see two tabs. The document tab includes a lot of options and features that affect how your document will be published and displayed.
- Block Tab: This other tab allows you to edit any features within the block you have selected. For example, if you want to edit a paragraph block, this tab will allow you to change the font size and color.
- Status & Visibility: This section is where you can choose to make your post visible or private. You can also choose when you want your post published and if you would like to pin it to the top of your blog.
- Permalink: Permalink is the link to this specific post your editing. For example, if you name your post “Intro” then your permalink will be whatever your website’s address is with /intro added onto the end. You can change your permalink here.
- Categories: In this section of the menu you can create new categories or add previously existing ones. Categories help organize your posts and will be helpful when creating your menu.
- Tags: Tags is similar to Categories because it helps you organize but Tags lets you describe a post in more detail.
- Featured Image: This is where you can upload an image to represent your post. It will be the thumbnail image on your main site and header image once you click on the post.
- Excerpt: This is if you want to add a short excerpt to give a little preview of what’s to come in your post.
- Discussion: You can toggle whether or not you want to allow comments on your post.