


Topics
Have you ever wanted to create your own basic Spotify playlist cover? Well, this tutorial will show you how by using Photoshop masks! Masks are used to apply something to a specific area of your image. In this tutorial, we’ll be dealing with two different masks: Layer Masks and Clipping Masks.
Step 1: Create a new document
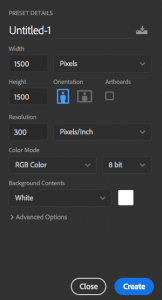
Since we are making an playlist/album cover, let’s make the dimensions 1500×1500 pixels. From here you can drag the image file you want to use and edit into the Photoshop icon in your doc. Then just drag the image into your new document.
Step 2: Use a Layer Mask on the background
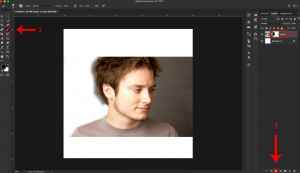
So what do masks exactly do? Well, we’ve just imported a pensive photo of Elijiah Wood, but we don’t want that ugly gray background. So we’ll use a layer mask to get rid of it!
Option 1:
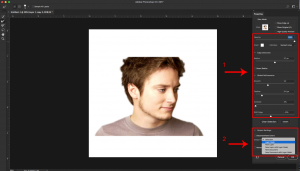
First look to the right most side of Photoshop where the Layer Panel is. At the very bottom you’ll see several icons. Click the one arrow #1 is pointing to. Now look at where square #2 is. A white box has been added to the Elijiah Wood layer. This is your layer mask. To actually start getting rid of the background, go over to the toolbar on the very left. Arrow #3 is pointing to the brush tool. When that is selected, you can basically erase the background.
Option 2:
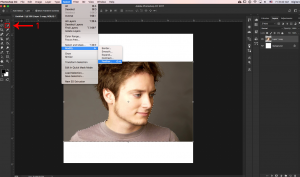
You can also make a Layer Mask in a different way. Select the Selection tool from the toolbar on the left (arrow #1). Now you can draw over and select Elijiah Wood’s head. If the edges are too harsh you can blur them a little by going to Select > Modify > Feather.
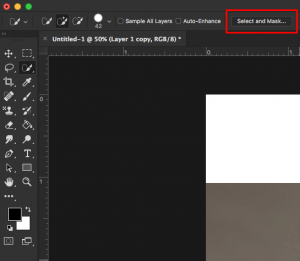
Once everything is selected, go to the top of the window and click the option Select and Mask.
A new window will pop up on the far right. In the box arrow #1 is pointing to, you can adjust the sliders to refine the edges of your selection. Then in the box arrow #2 is pointing to, select Layer Mask and click Ok.
Step 3: Use Clipping Masks to add flare
Now we have a photo of Elijiah Wood’s head with no background. We want to make a playlist image though, so now drag in any photos you want add.
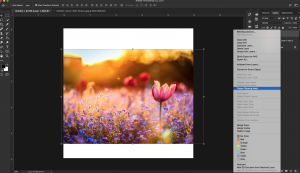
I’ve dragged in an image of a field of flowers. On the right in the Layer Menu, right click (or control click) the layer and select Create Clipping Mask. 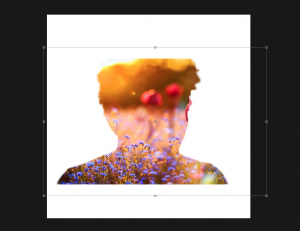
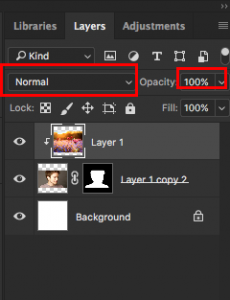
Elijiah should now be a silhouette of flowers. In the Layer Menu the flower layer should be slightly indented with an arrow pointing down to the layer below. This means it is a clipping mask. So the clipping mask only affects what is visible in the layer it is modifying (the layer below it). At the top of the Layer Menu you can find a dropdown menu that says Normal. These are the Blending Modes for that layer and affect how the two layers interact with each other. I suggest trying out different blending modes and see which you prefer. Then you can also adjust the Opacity of the clipping mask.
Step 4: Add a Gradient Map
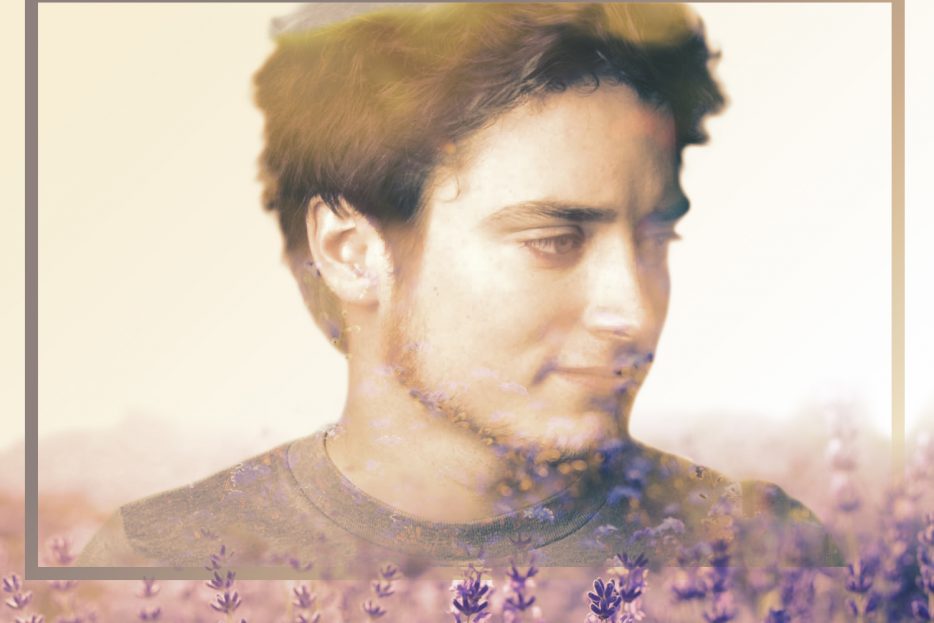
So right now we have a nice photo of Elijiah with some flowers. But he needs more. Since the original photo cuts off the top of his head and the bottom of his shoulders, let’s add a rectangular frame around him.

Go to the toolbar and press the Shape tool (arrow #1). Drag a frame around Elijiah. The shape might be a solid rectangle at first, but if you go to arrow #2 you can adjust the Fill and Outline of the shape. After that you can add whatever you want. I added some more flowers and text using Clipping Masks. Then to create an overall cohesive look with your colors, you can add a Gradient Map.
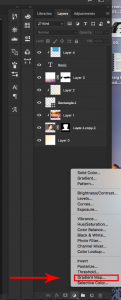
First you can go down to the bottom of your Layer Menu and click the little circle icon on the bottom middle. Then that pop up menu will show up and you can click Gradient Map. However, if you want to mess around with the other options feel free. You might find something you like.
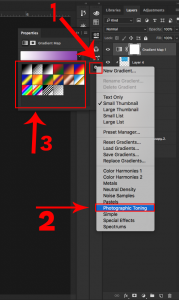
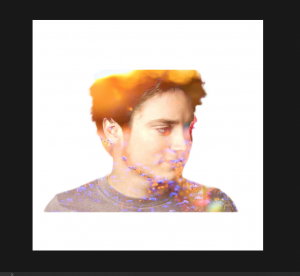
Now to achieve a basic color palette for our basic image, we first want to press the little gear button that arrow #1 is pointing to. This will give us a drop down menu. Then press Photographic Toning, arrow #2. This will change the set of colors in the box that arrow #3 is pointing to. Choose any you like and it will change the overall color scheme of your image. You can then adjust the opacity or the blending modes to get a look that you are satisfied with. You will get something like this! Hope that helps!
