


In this tutorial, we’ll try to break down the complexities of Premiere in order to give you the basic tools you need to get started on video editing.
Let’s start with a “New Project”:
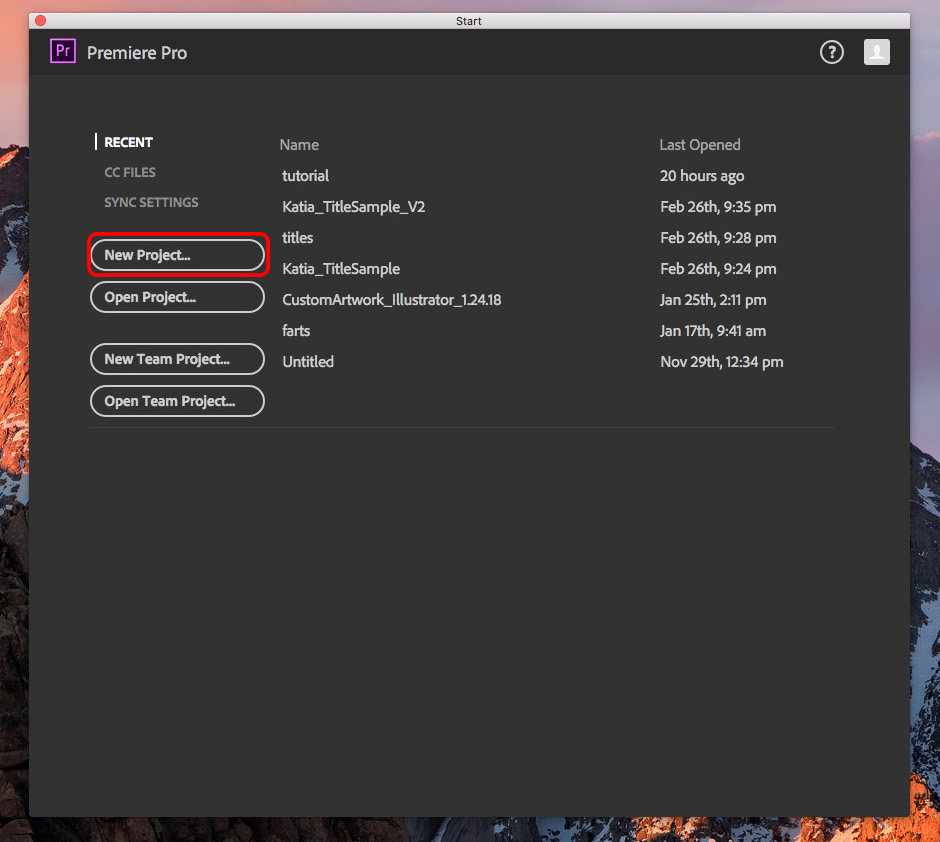
Name your project and choose where you end up saving it by clicking “Browse…”
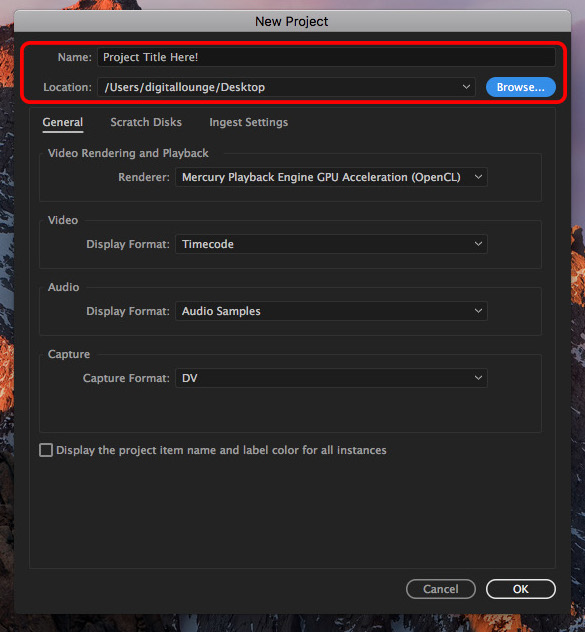
I saved my project to my desktop.
Just for the sake of having our window setups mirror each other, let’s go to Window –> Workspaces –> Editing (if you have your own setup that you’re comfortable with, feel free to skip this step)
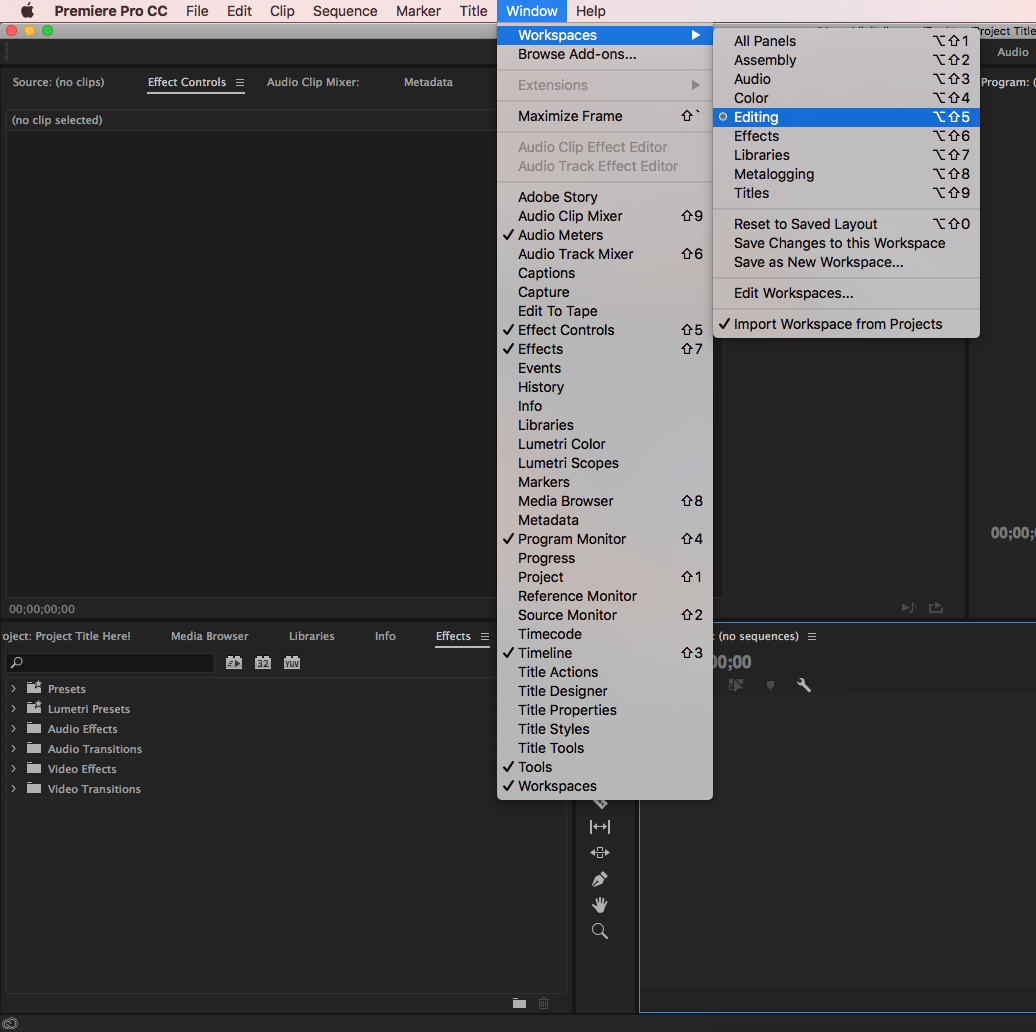
Great! Your workspace should look like mine!
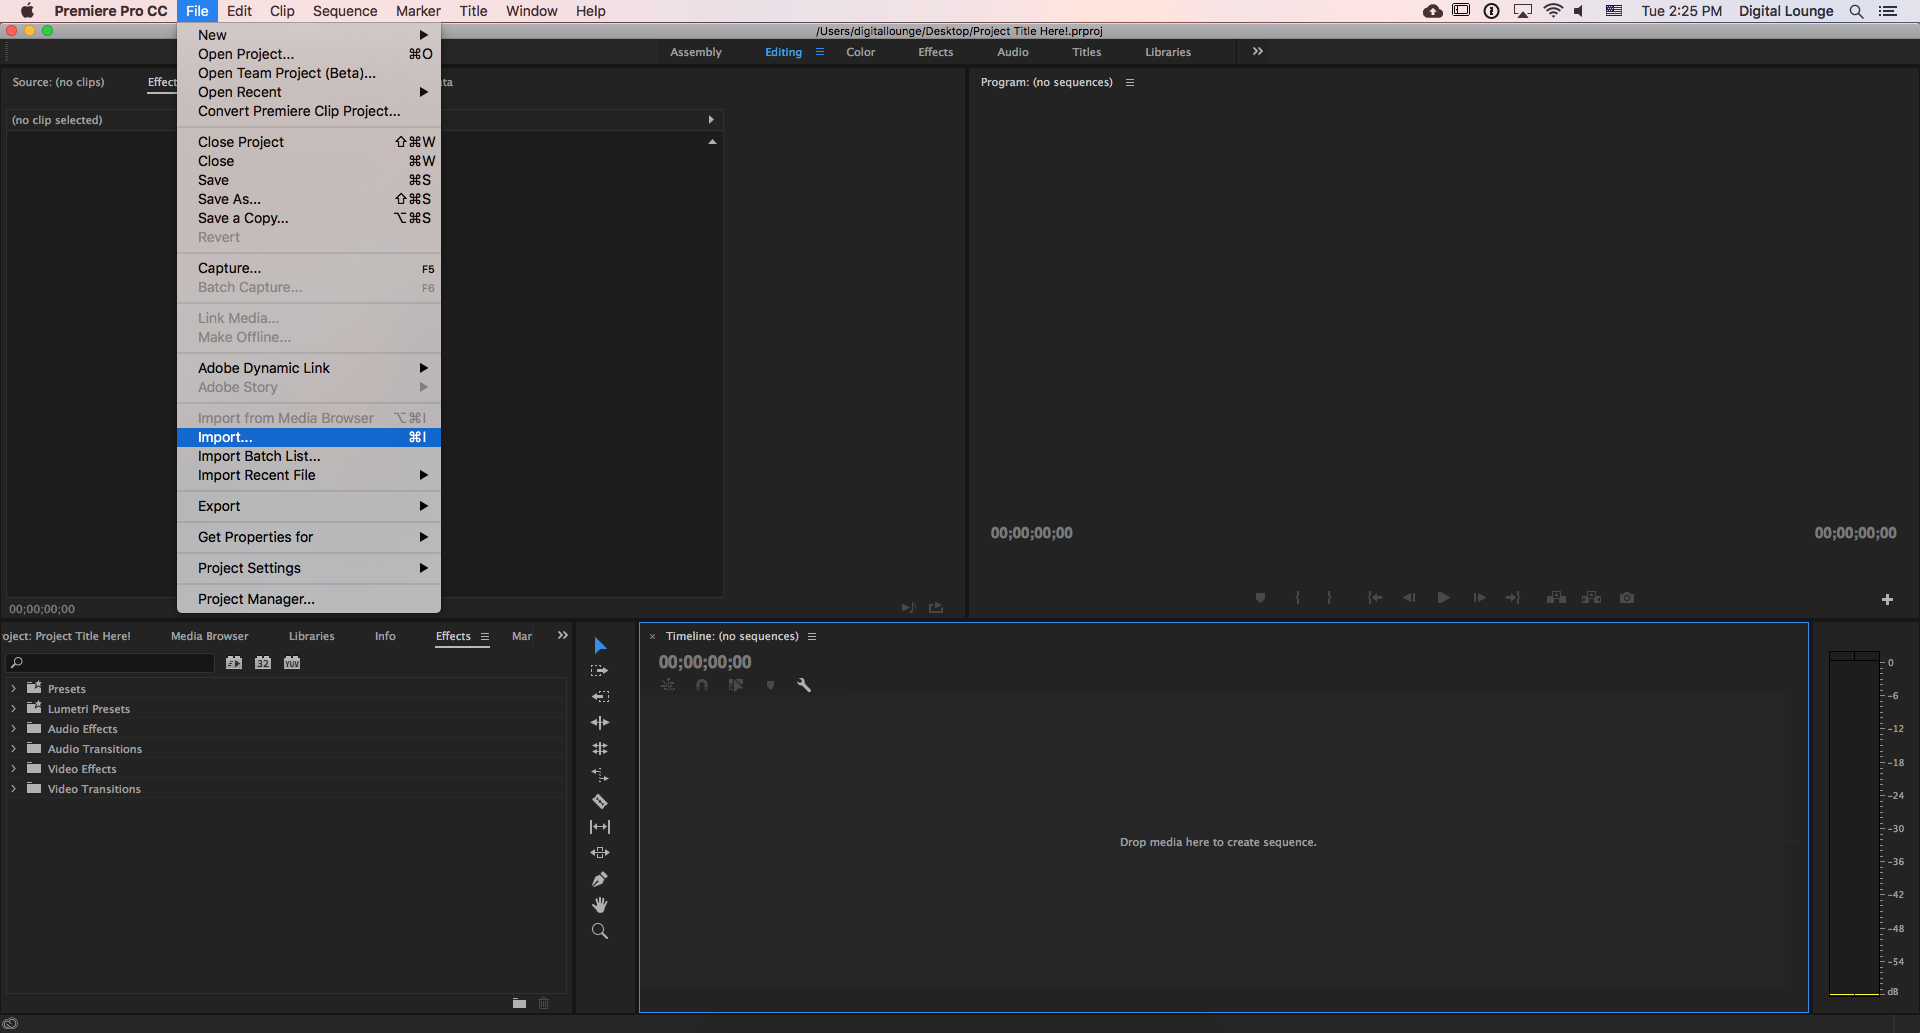
Now, let’s import video or image files that we can work with. Go to File -> Import and bring our media into the project.
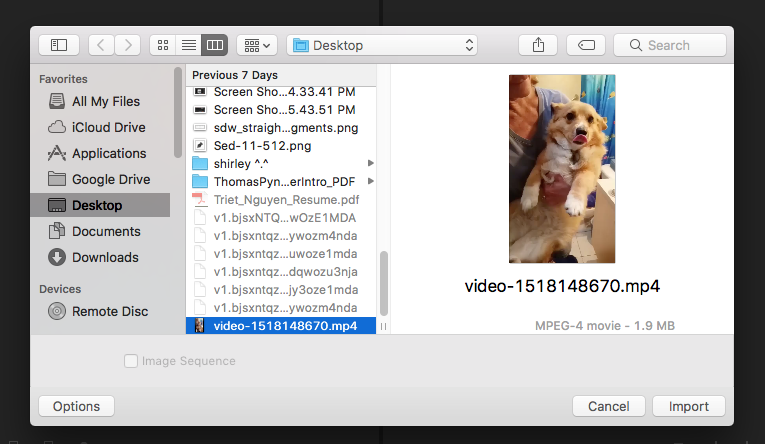
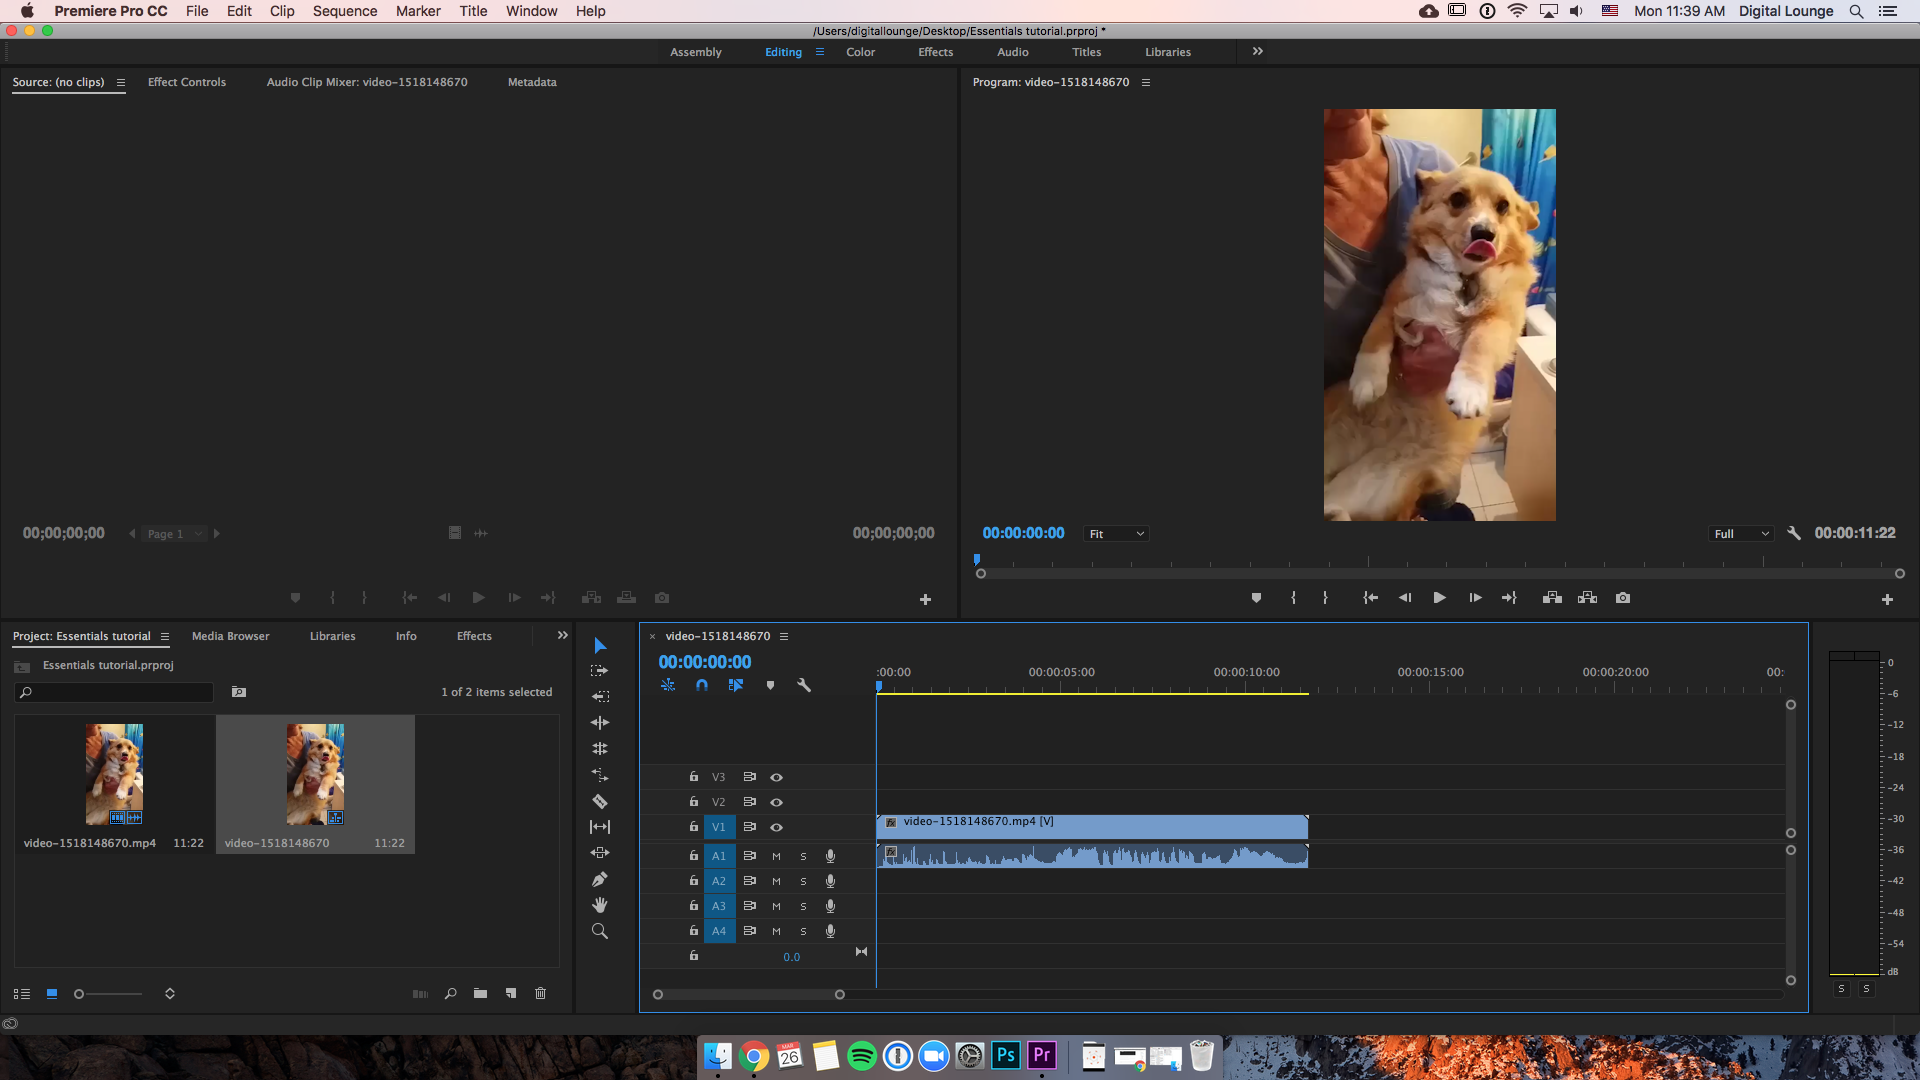
Choose your footage or images, then open the “Project” tab to view your footage.

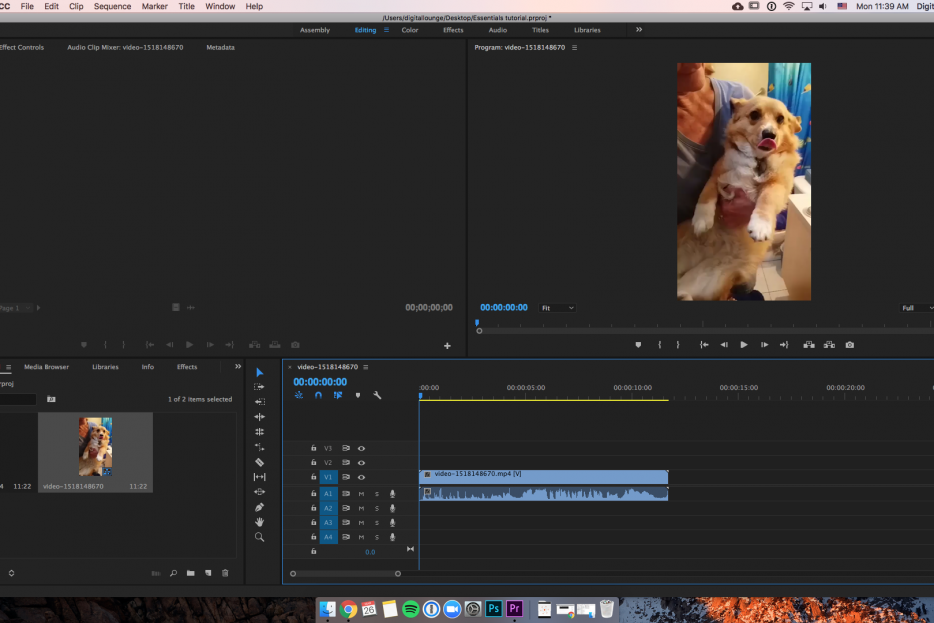
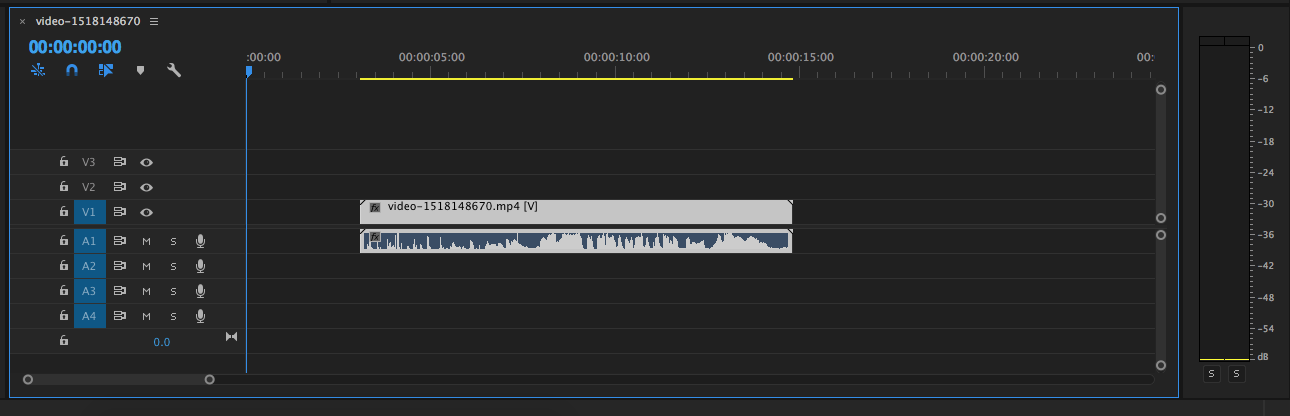
Now that everything is loaded into our project, we can start putting our videos and images into the Timeline. Just drag and drop these files into the Timeline in order to work with them.
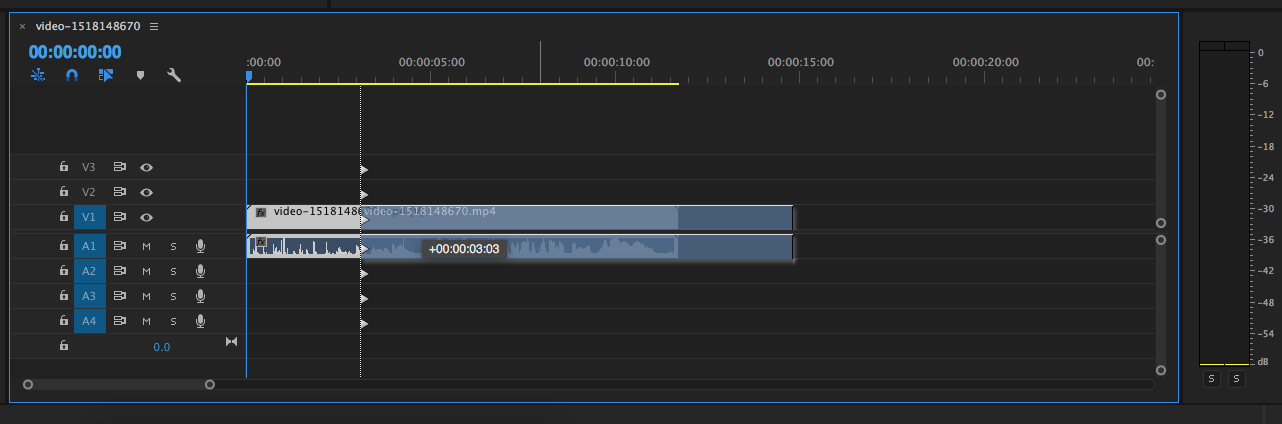
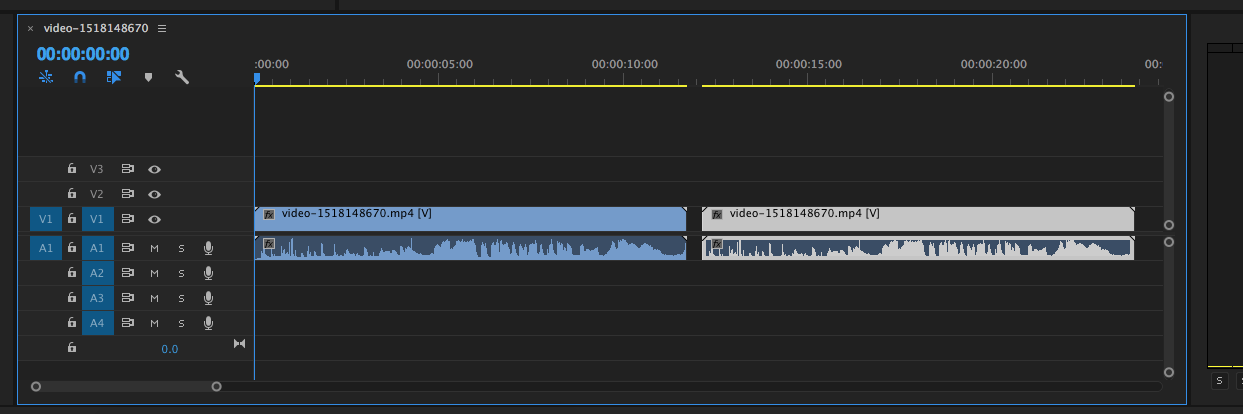
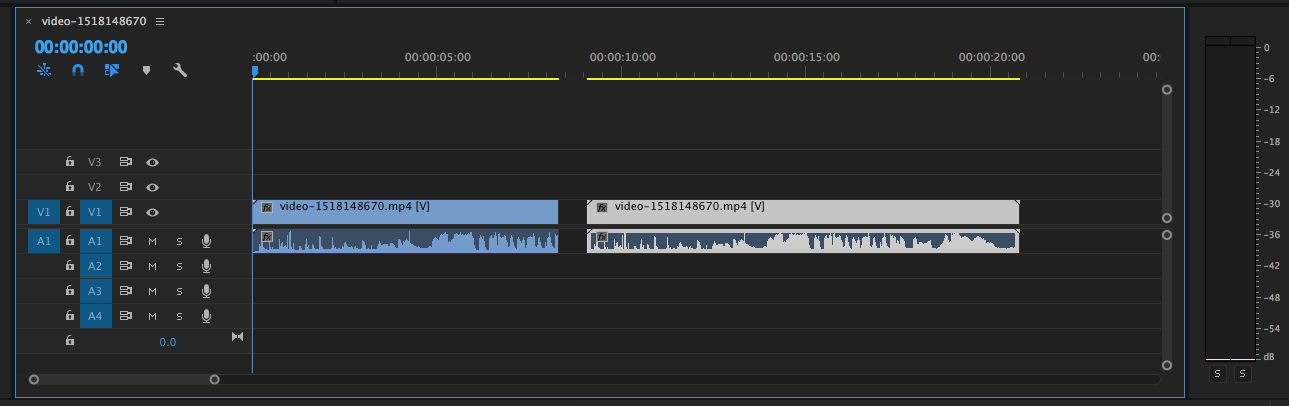
Sweet. We can drag around/move footage in the timeline by clicking on the middle of these colored blocks and moving our mouse.
Be careful. If video files overlap on the same layer, they will clip each other, deleting whatever footage is overlapped on the video you didn’t move yourself.
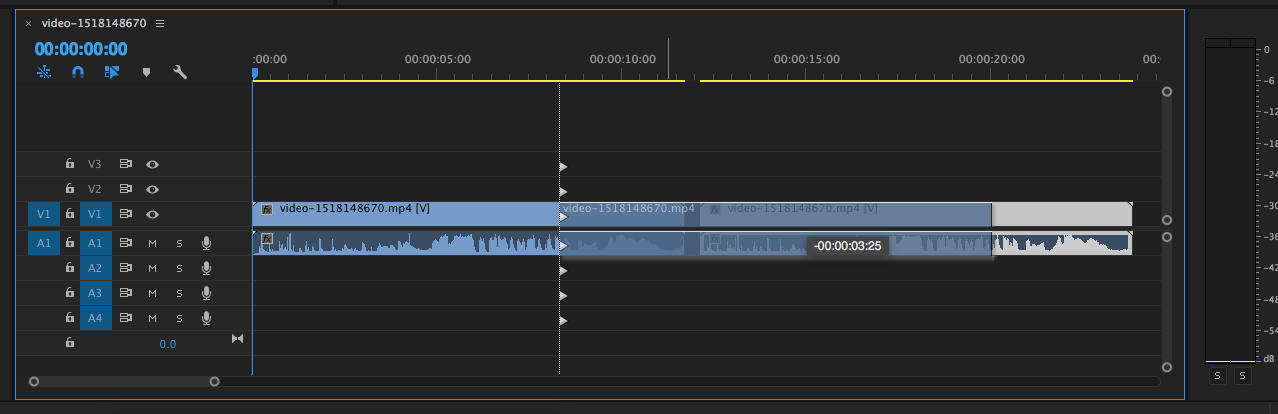
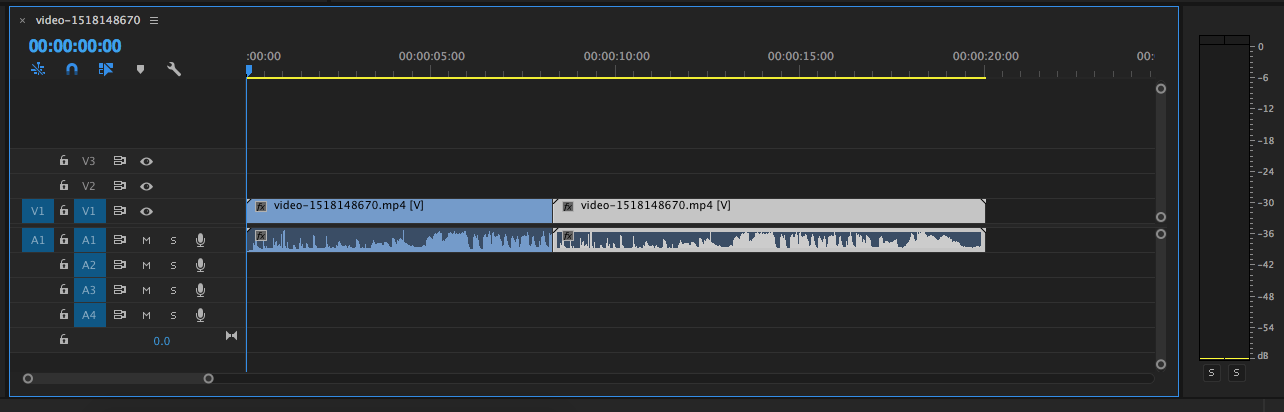
You can recover this footage loss by expanding the footage from its sides. Click and drag out the clip from the end where it was cut short.
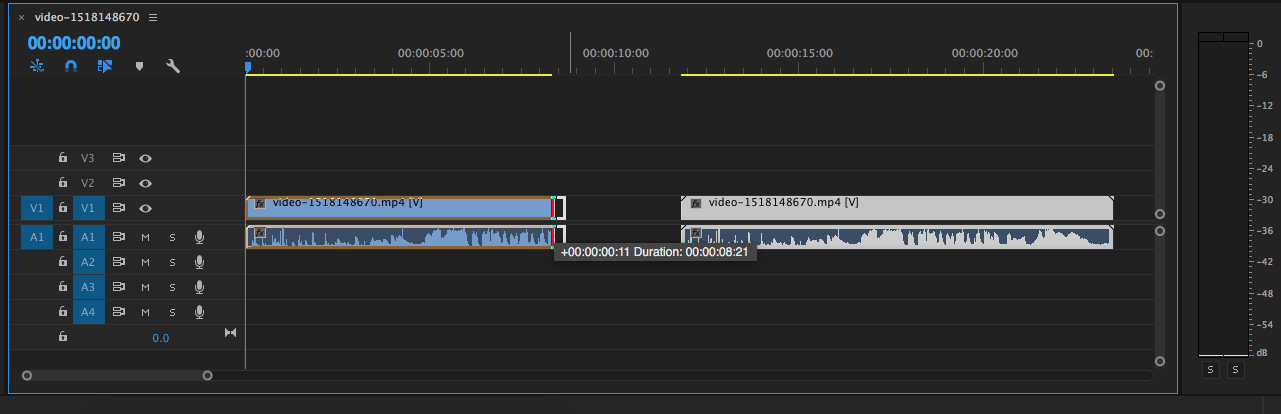
It’s back to normal!
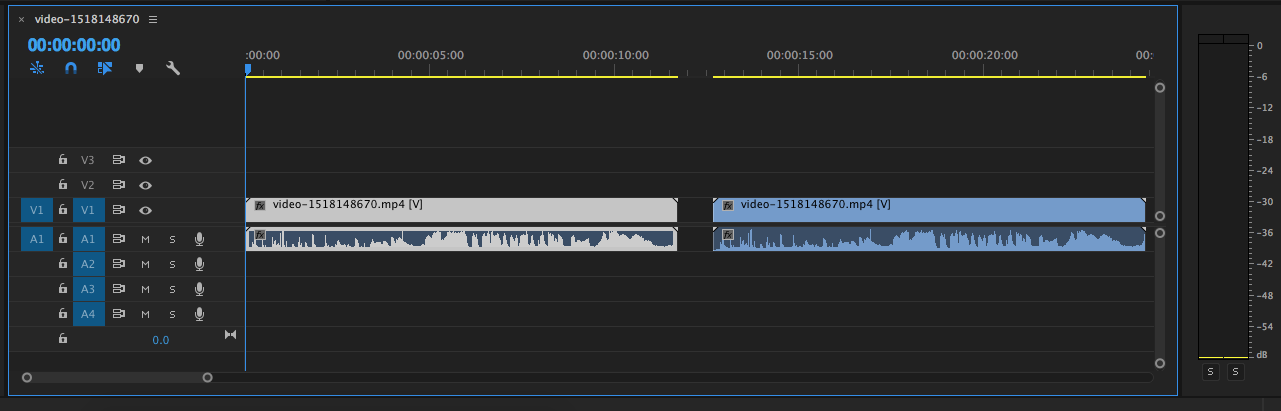
You can also shorten the footage in your timeline by clicking and dragging the ends of these footage bars.

Super simple, super useful.
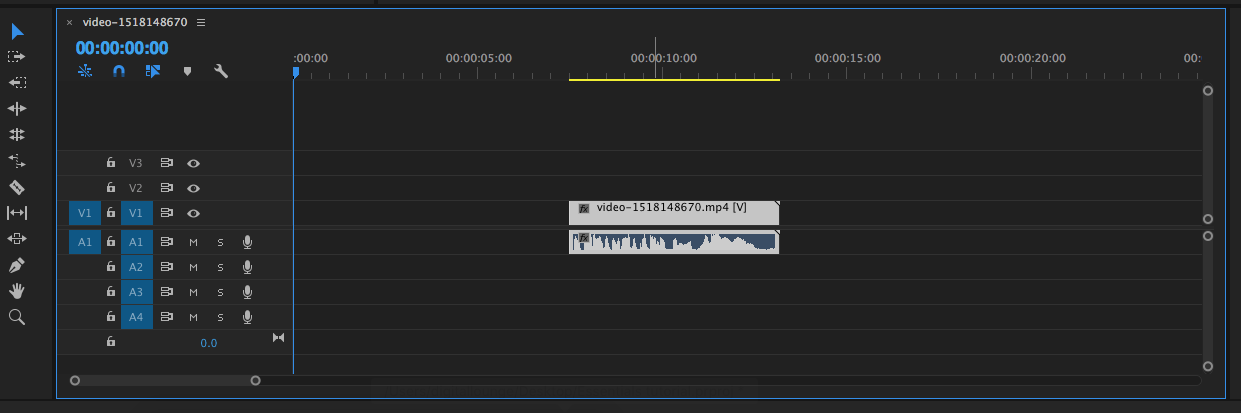
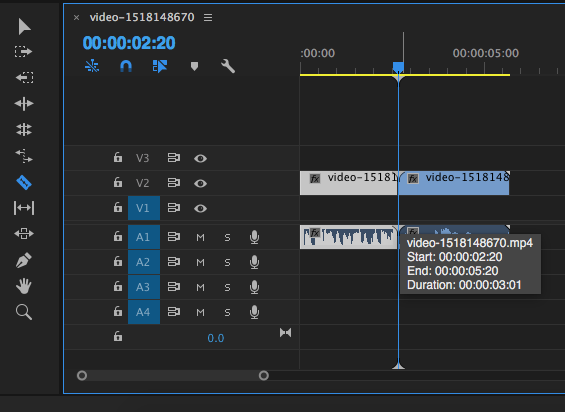
Another tool you’ll probably need is the Razor Blade tool. You can use this tool to cut footage into two individual pieces. Select the razor blade in your tool bar(the diagonal rectangle thingy) and click on the part of the footage where you want to cut it. 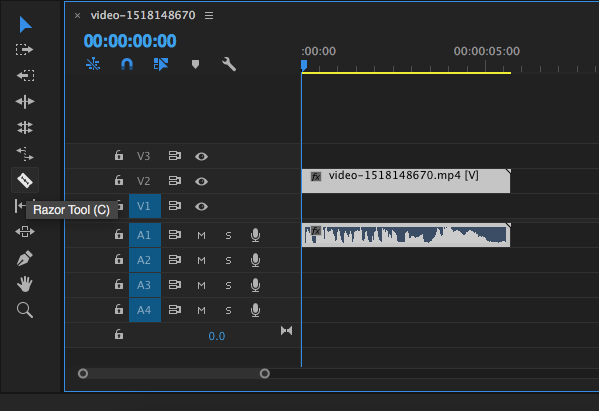
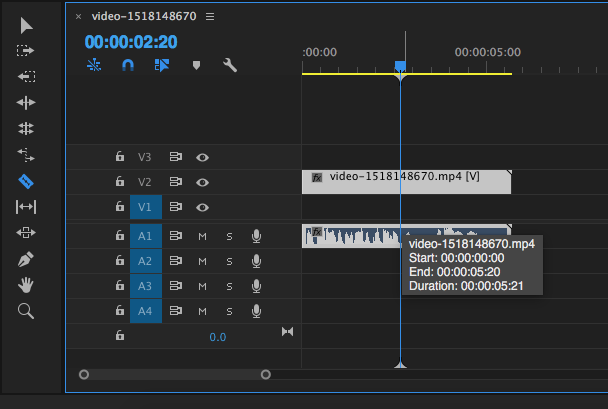
Having the blue timeline bar hover over the place where you want to split your footage helps with the precision of the cut, if you need to specify which frame you want to separate it on.

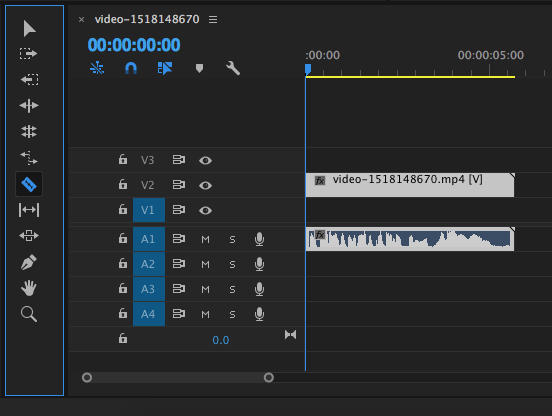
Use the Select tool to move the clips around in your timeline.
The Razor Blade tool is useful if you want to cut out parts of footage that you don’t like. If my B-roll has a bit in the middle that I don’t like, I can just cut it out and use the other clips that I like.
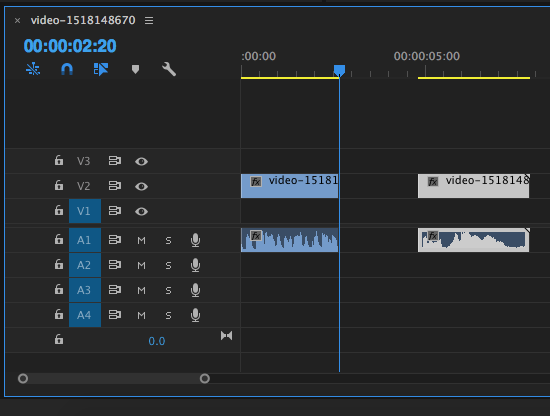
Layers are also pivotal to editing in premiere. Instead of having clips flush together on one layer, you can stagger them in different layers or have them overlap without cutting each other out.
I’ve imported an image file instead of another clip into our timeline. If I wanted to keep the audio of the original clip, but change the image that goes with it, I can just put my new image on the layer above the corgi video.
Now let’s move our blue timeline bar over the overlapping footage to see what our final image looks like.
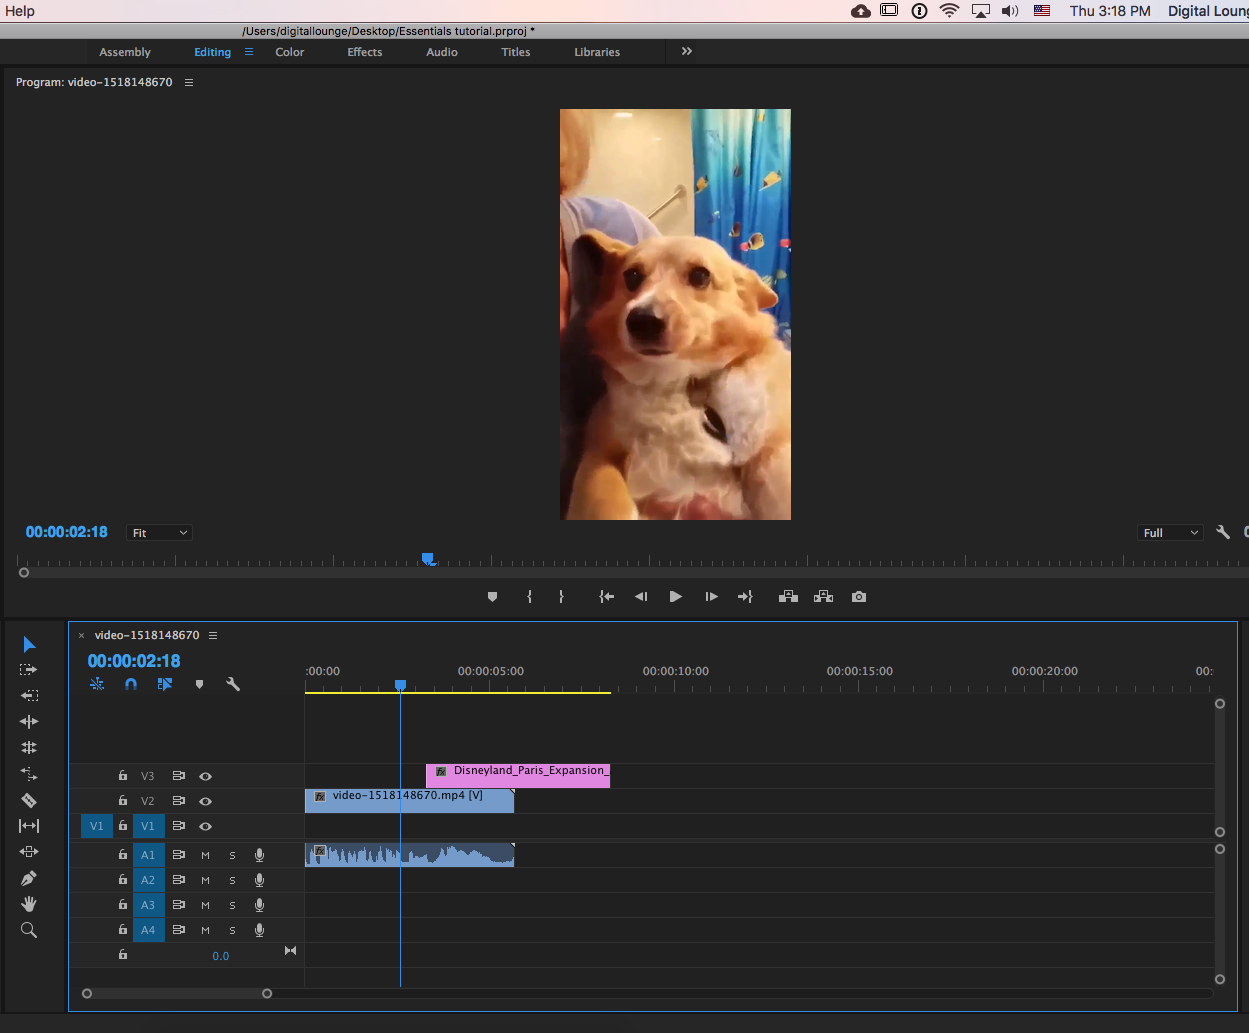
Okay, yuck. I just picked random stuff so it looks gross, but you get the picture. You can even see the corgi video playing under the image of Disneyland Paris. An important function to use depending on the circumstances. Let’s see what we can do to this footage to make it less… weird.
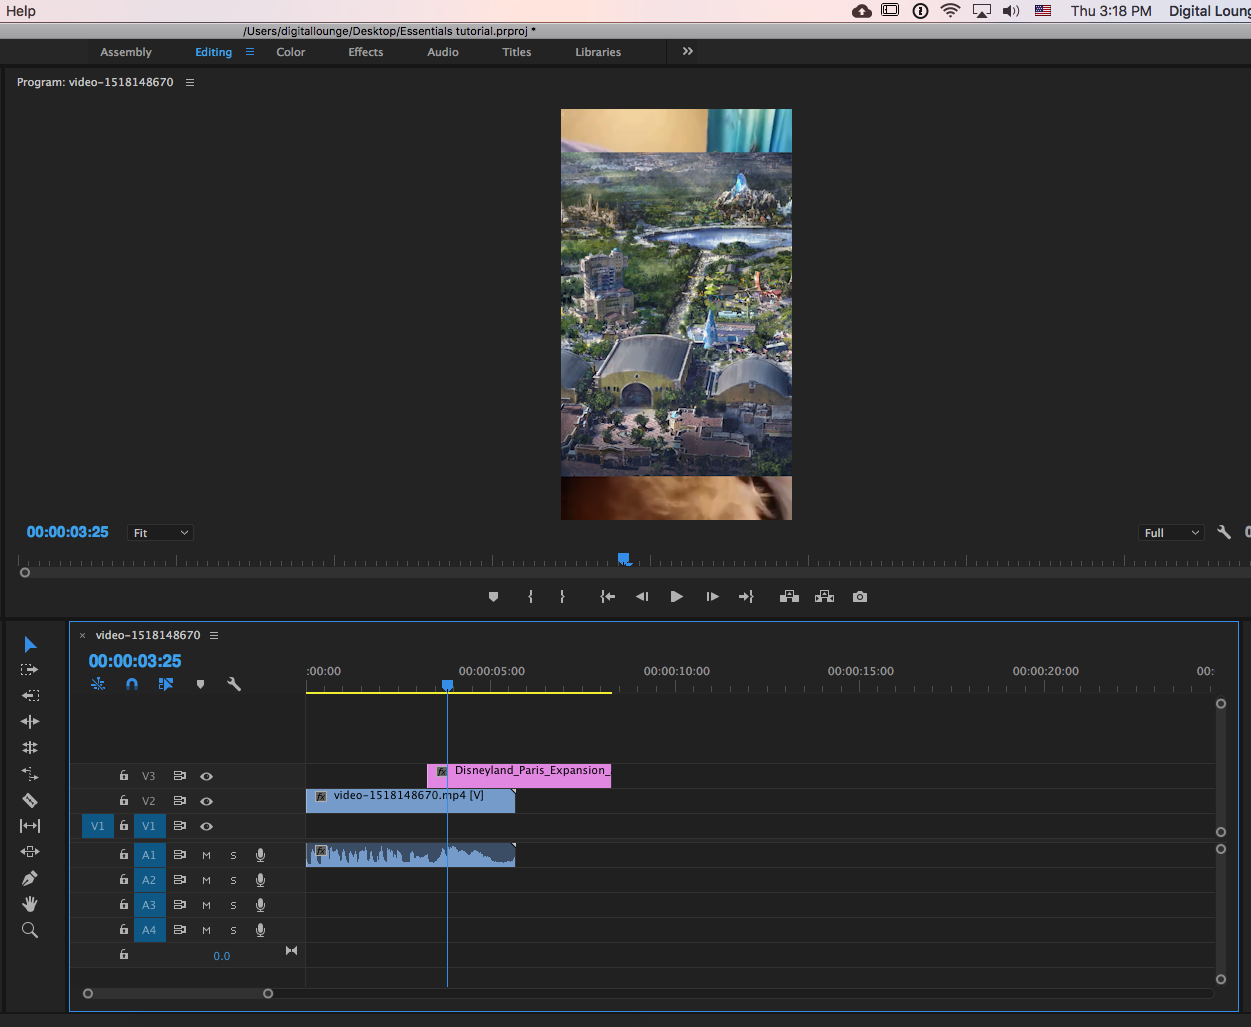
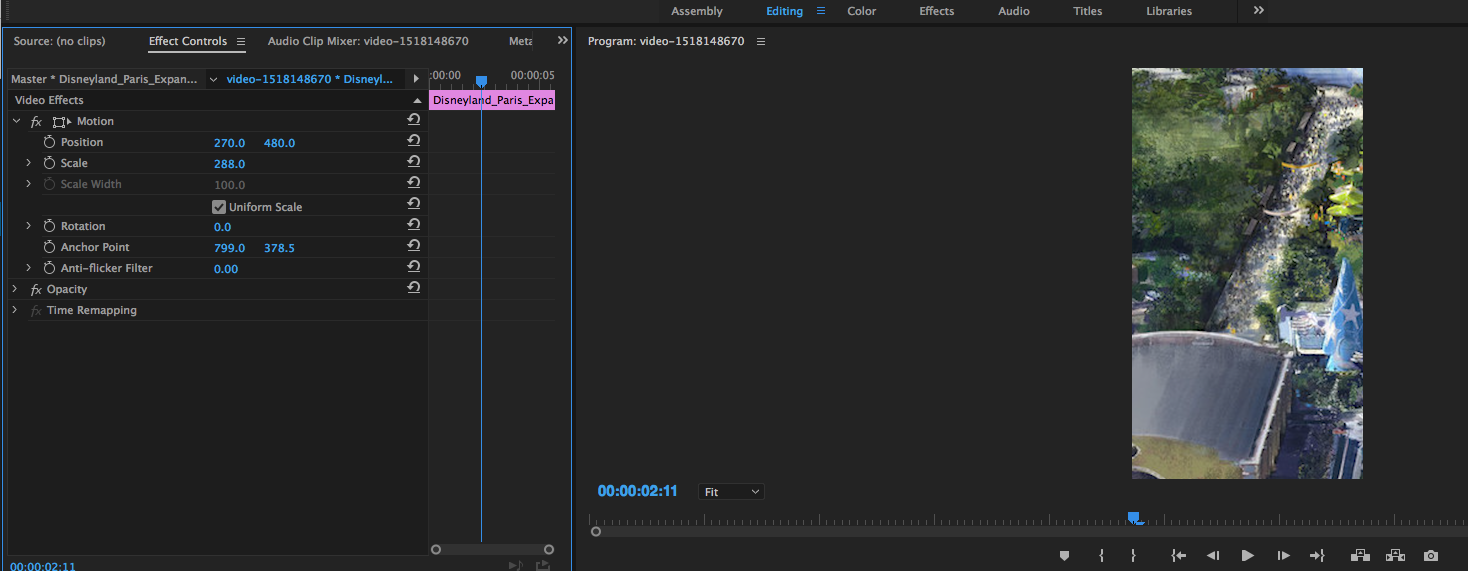
Effect Controls are the last thing that we’ll cover in this tutorial. Within the effect controls tab there are a few simple, but super useful tools that you’ll need to use eventually in Premiere. I made the Disneyland image the same length of the corgi video by stretching it out. Here’s what it looks like.

Yeah. Not a big fan of that. Let’s select the Effect Controls tab in the upper left hand corner of our workspace.

If you have no clip selected, nothing will show up. Use the select tool and make sure you highlight the clip on top and make it all white. The Effect Controls tab will be full of fun stuff now.
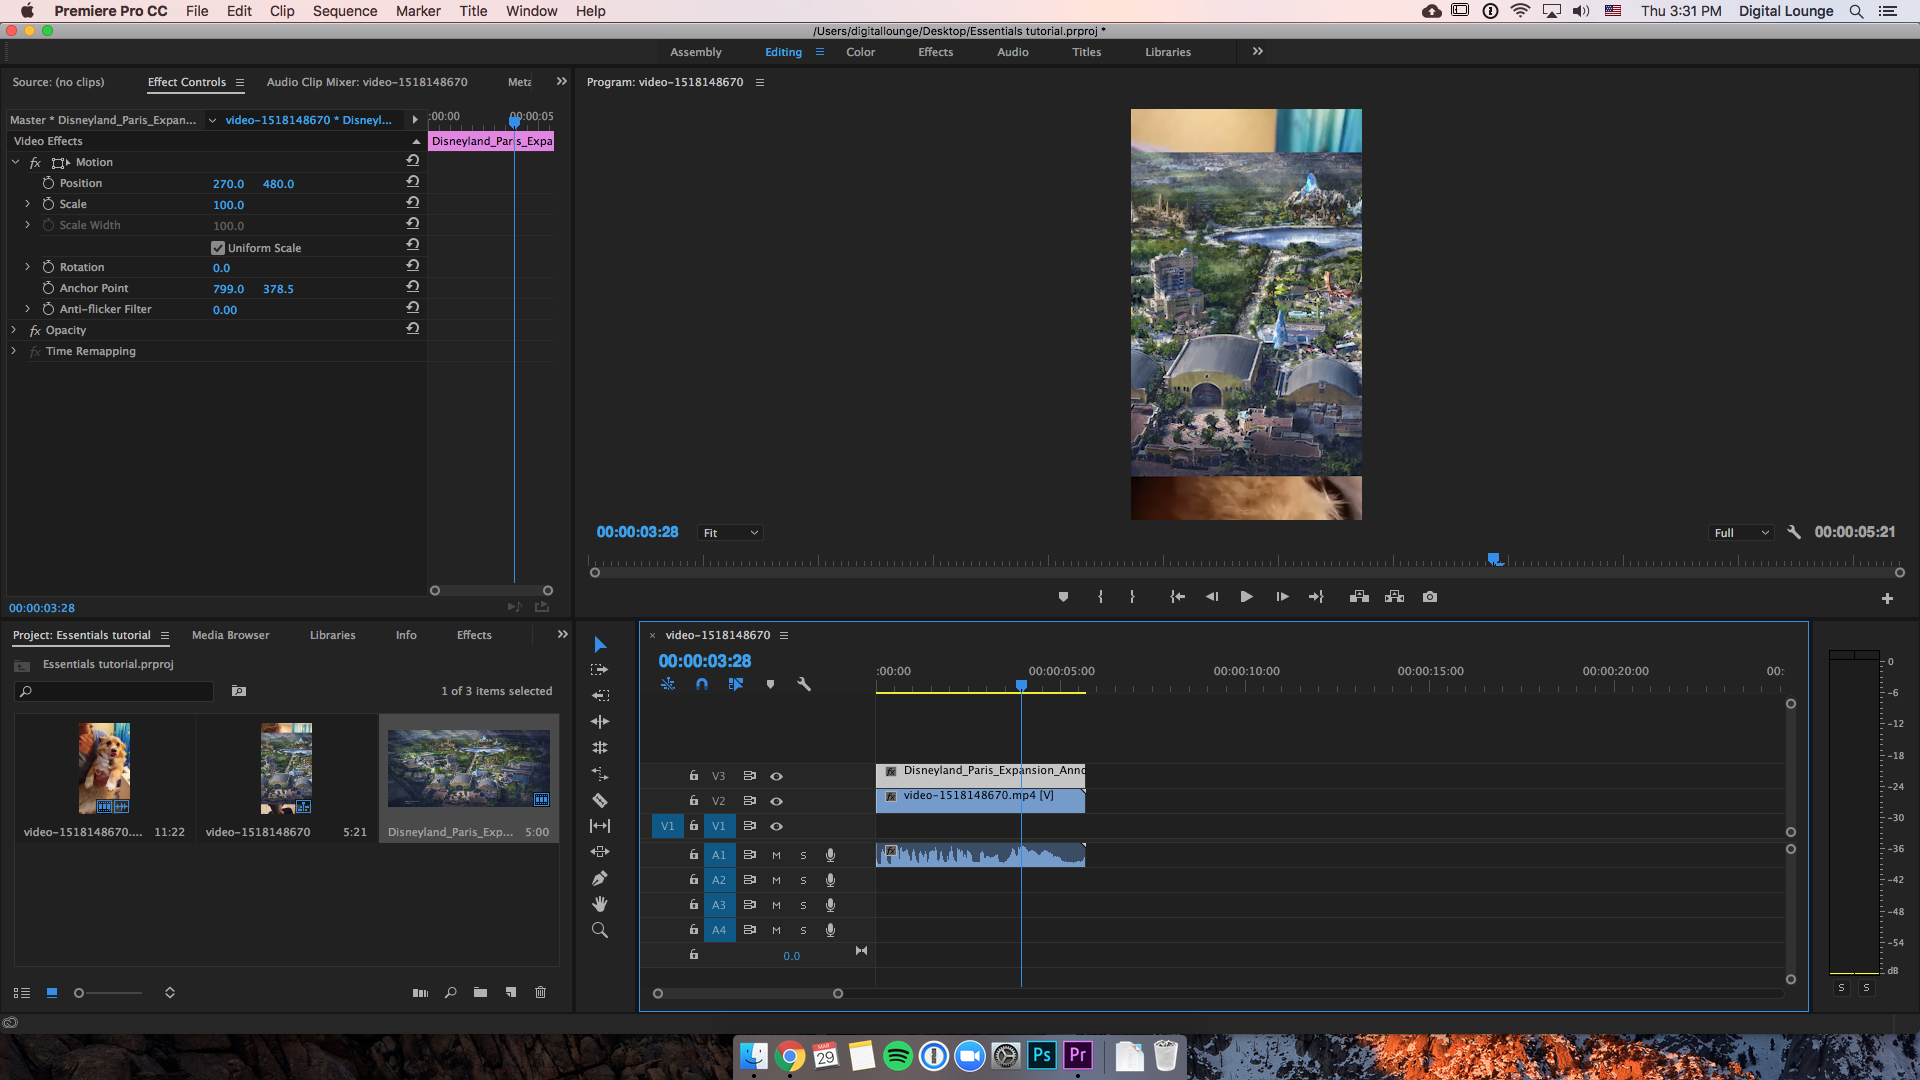 Cool. Okay, so there’s a bunch of stuff to play around with here.
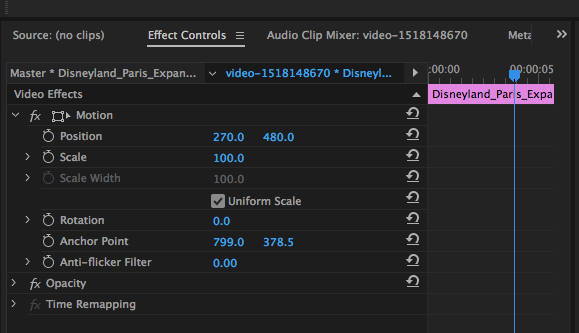
All of these toggles can be controlled by clicking and dragging left or right on the blue numbers or inputting exact numeric values in their place. Changing these numbers will have various There’s a short timeline on the right side of these toggle controls and a row for each toggle underneath the video clip.
The Position toggle controls where your footage is in the frame. We can move it on the y-axis(up and down) with the numeric value on the right,
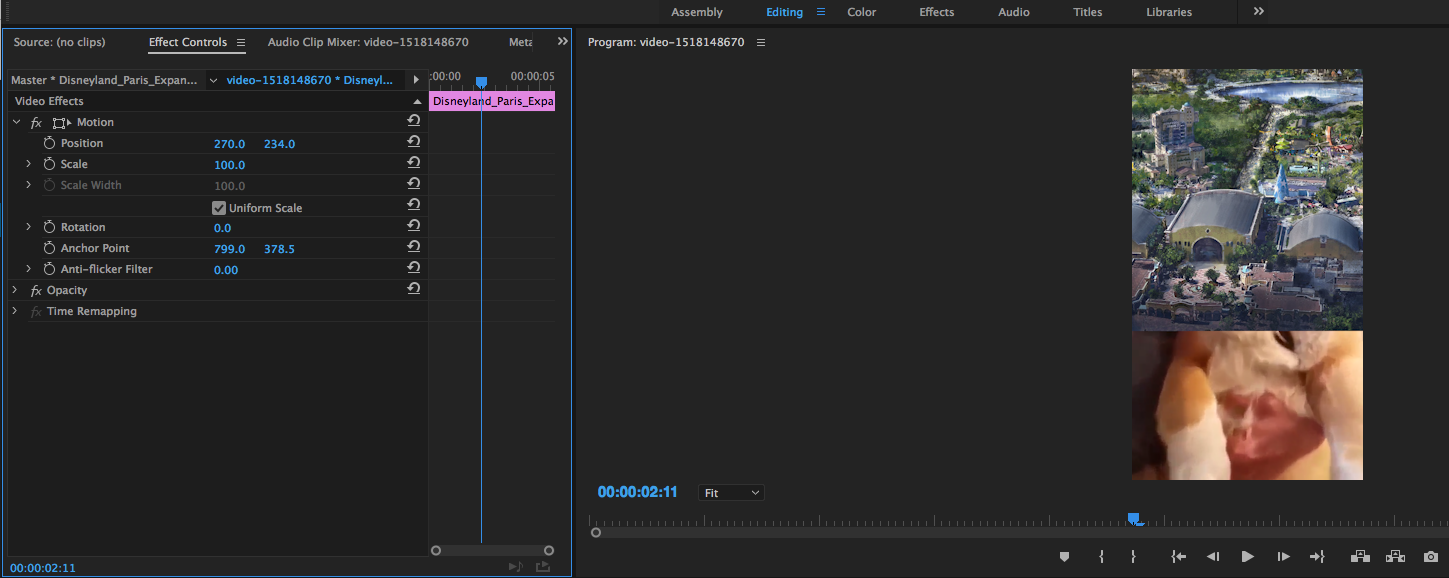
And move it on the x axis(left and right) with the numeric value on the left.
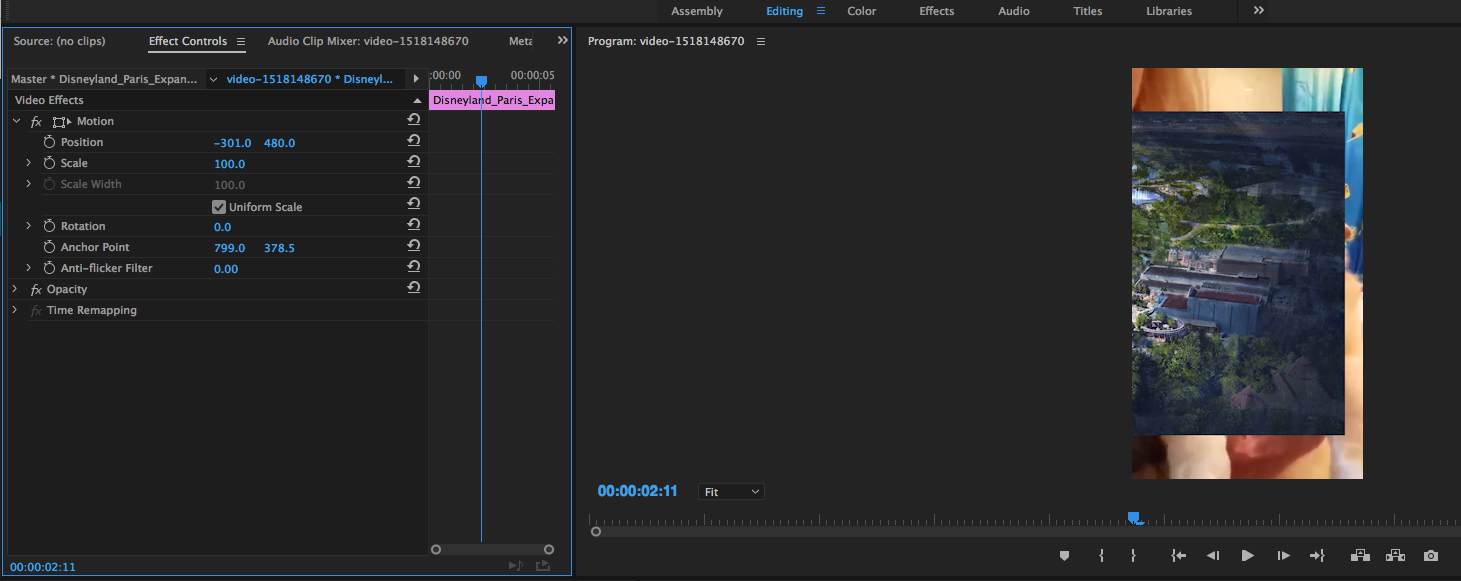
The “Scale” toggle can make things bigger or smaller.
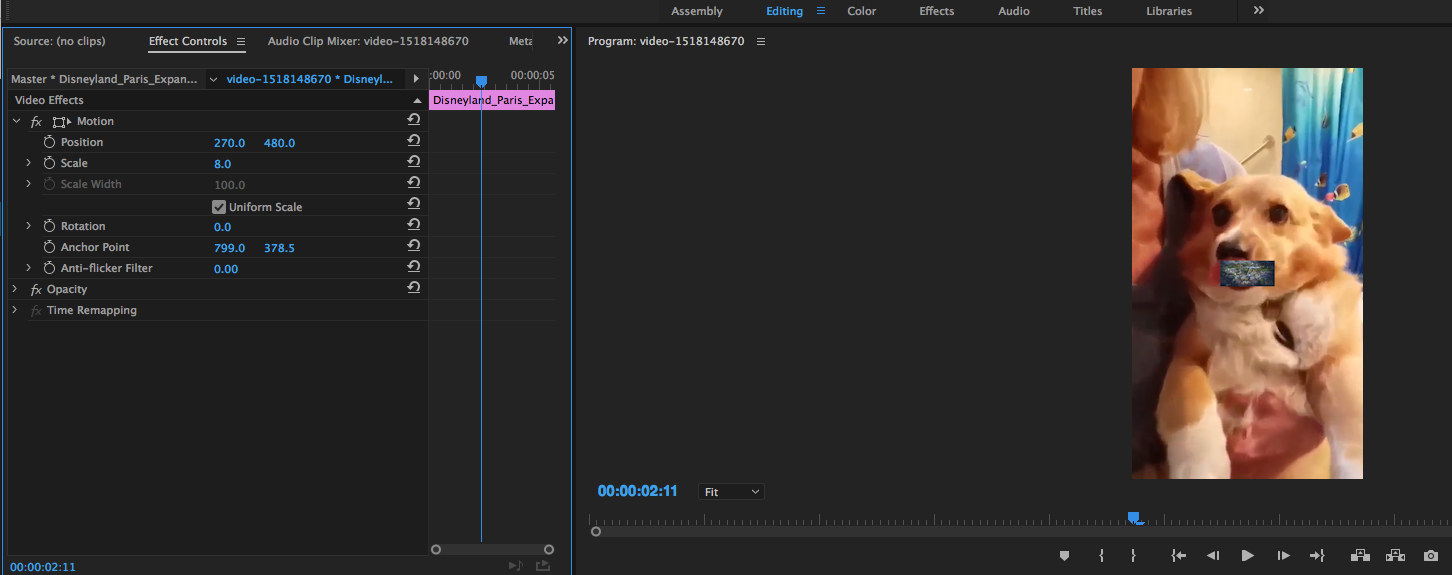
You get the picture. The other toggles aren’t usually as important, but we can look at “Opacity” for our next segment.
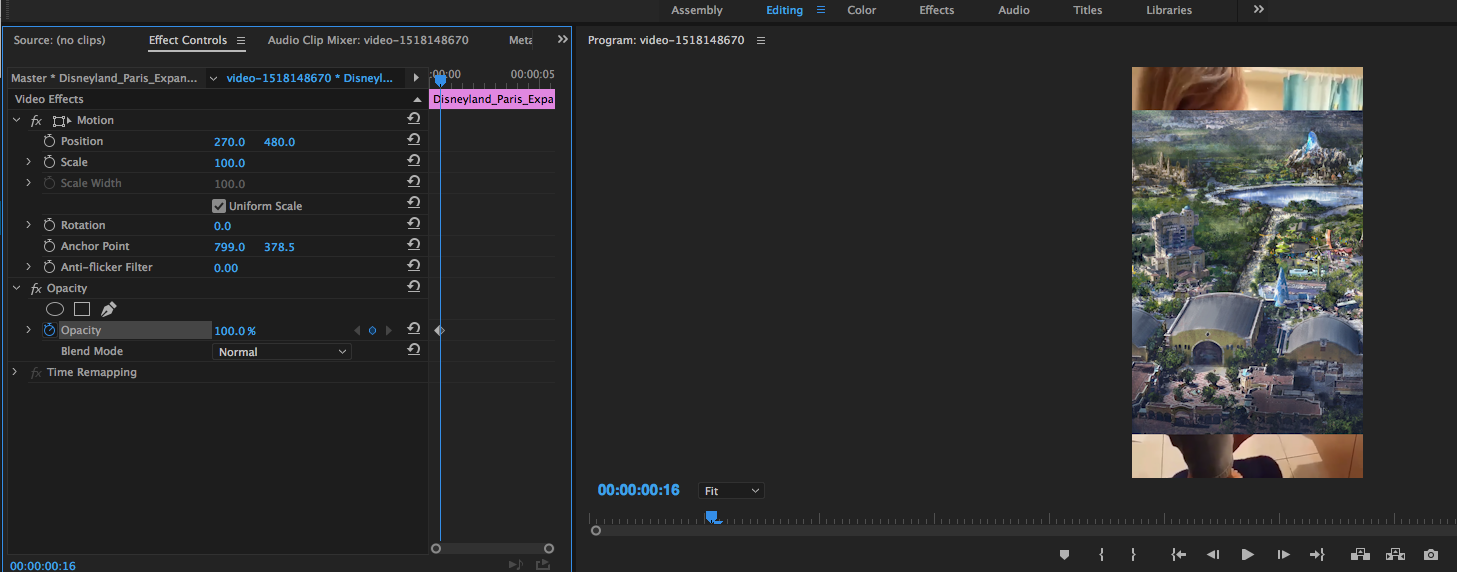
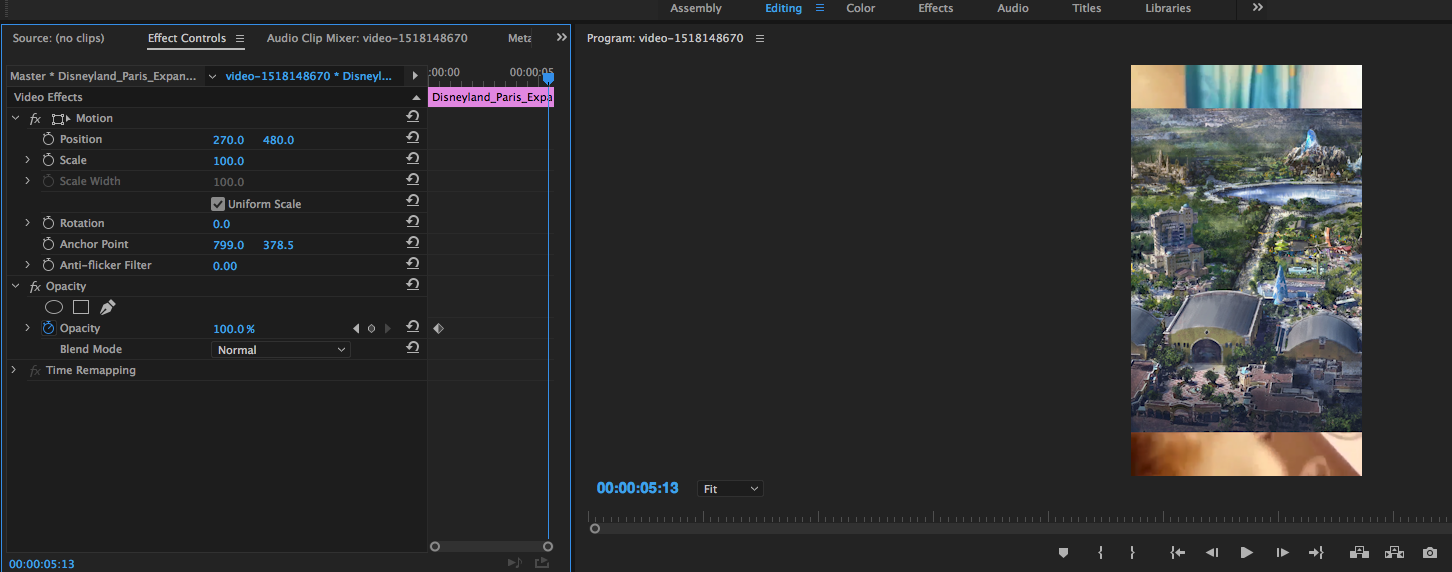
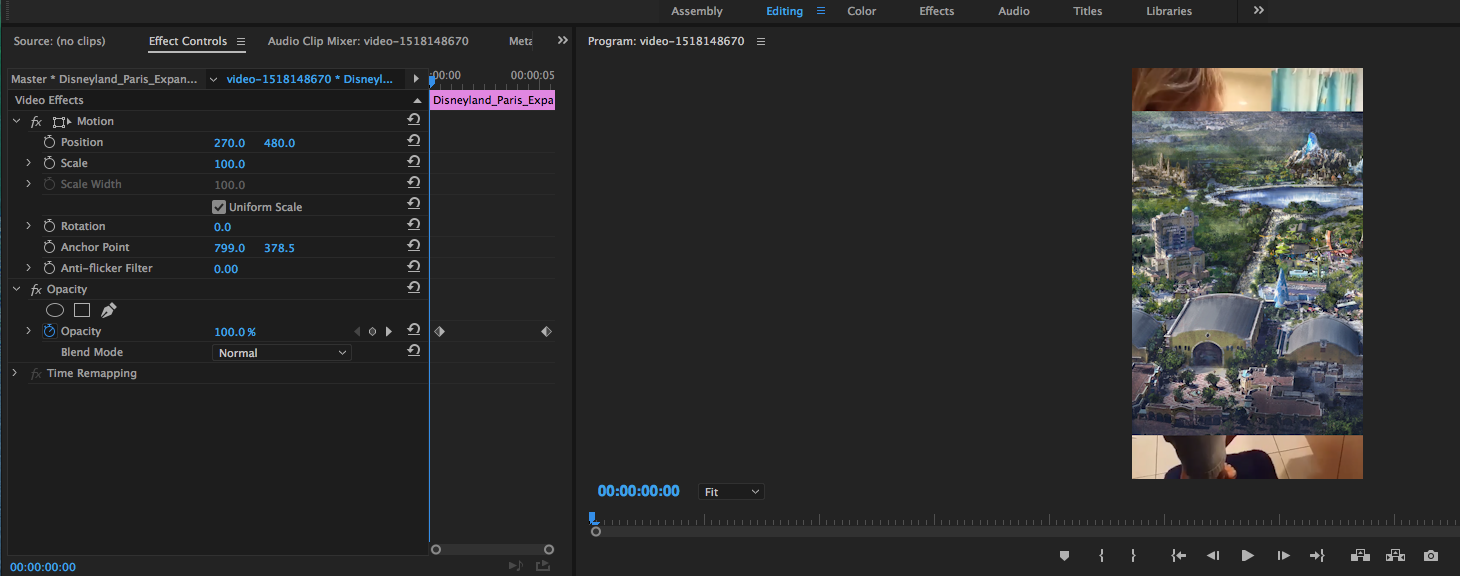
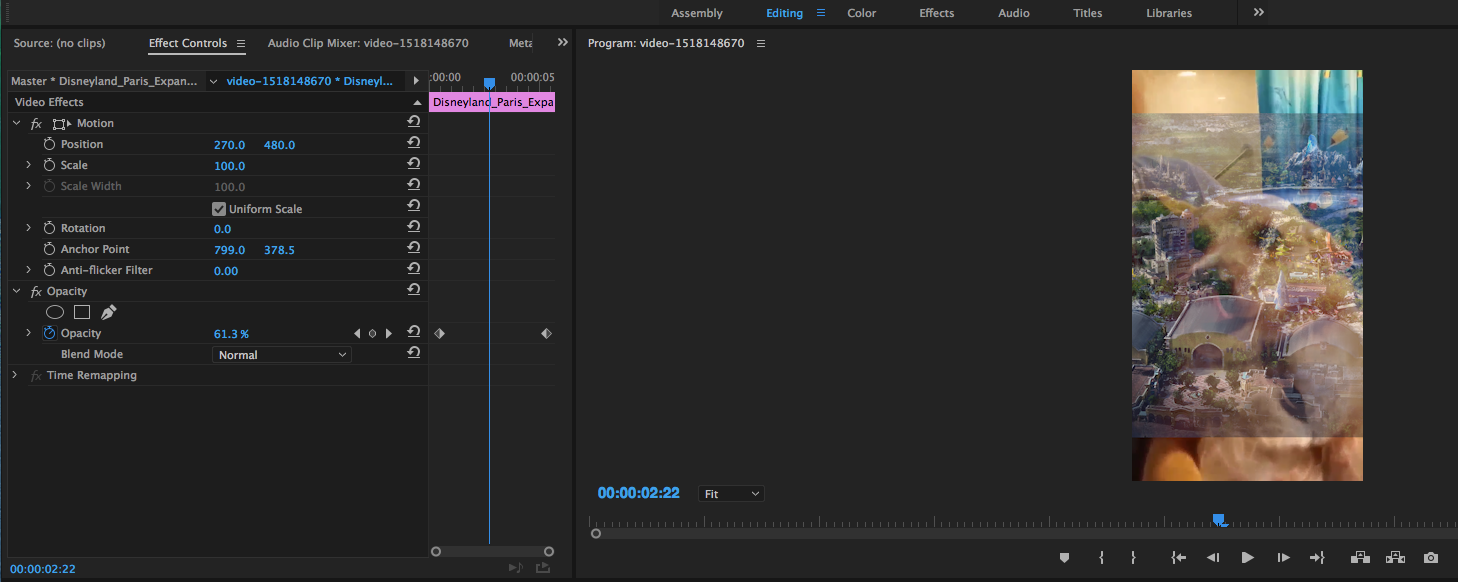
The last thing we’re gonna cover is Keyframes. There’s a little stopwatch on the left of every effect control. If we click on it, we can set a keyframe for our effects. They look like diamond on the small timeline on the right side of the video effects box. Let’s set one on Opacity for 100% close to the beginning of the clip. Click the Stopwatch to set the first keyframe. A small diamond will show up on the timeline when you click the stopwatch. This is a marker that tells you where the image or footage changes when you toggle the effect control.
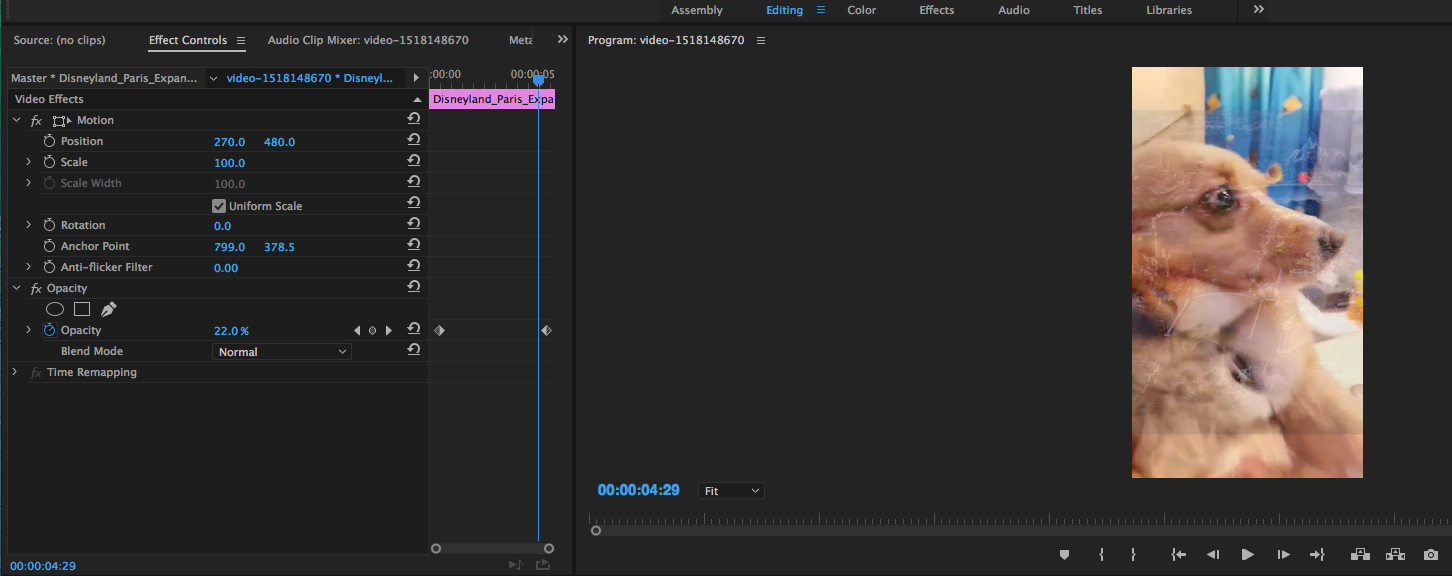
Cool. Now, drag the blue timeline bar to the end of the clip and then change the opacity to something small like 15%. You can also input the value by clicking on the blue numbers and typing it in manually.
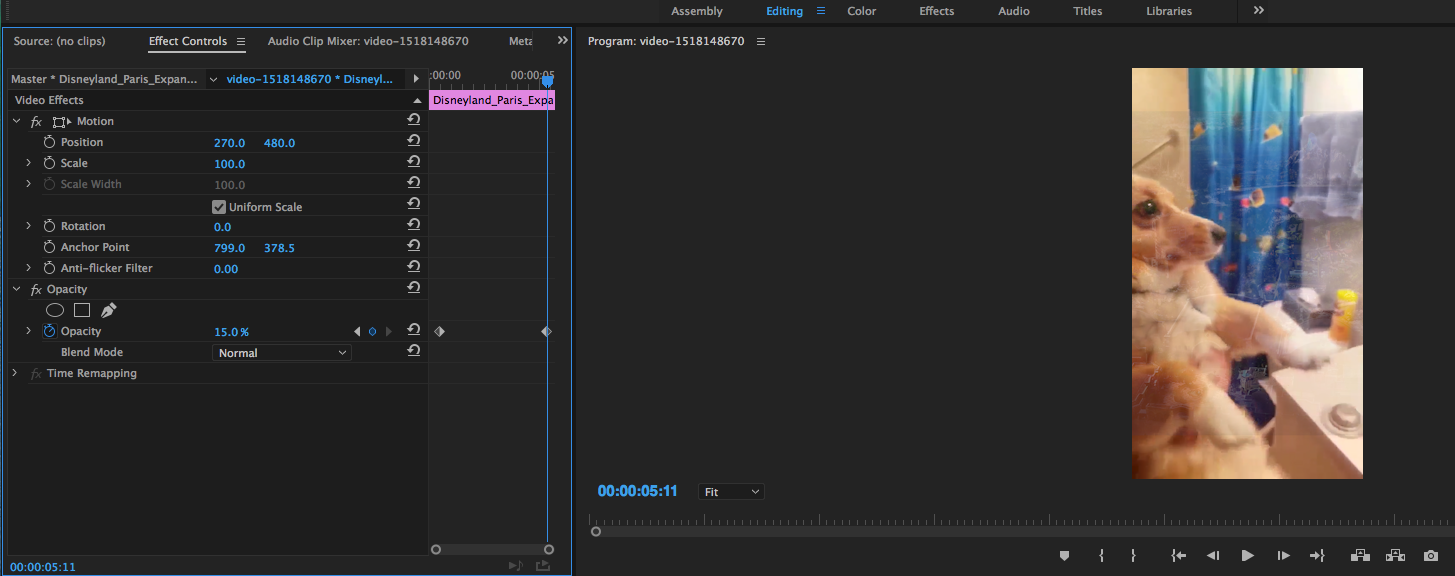
Sweet. Now if you play through that clip, the image/footage will slowly fade away. Here are some screenshots to show the progression of the change in opacity.
Sweet. These are the basic tools I use to edit animatics, film, and other cool stuff. These are the building blocks of editing and should prove useful when you put them to the test. Hopefully these tools help you with your experience with Premiere. Have fun!