


Topics
Using Your Zoom Account
Zoom is a powerful video conferencing tool that is used to hold classes and meetings online in the event that you cannot meet in person. In this tutorial we will go over scheduling a meeting/class and using key features to make your meetings run smoothly. If you don’t have a Zoom account yet, you can go to this tutorial here to create your USC Zoom account and download the app.
*Since this is a long tutorial, use the table of contents to the right to jump to certain sections
Scheduling a Meeting/Class
There are 3 ways you can schedule a meeting or class in Zoom. You can schedule one through your desktop app, through the online webiste, or through Blackboard. For every different class section or meeting you have, you want to schedule a different meeting for each. If you want to have recurring meetings with the same class section or people, you only need to make one meeting link.
Through the Desktop App
First, find Zoom.us in your Applications folder and open it. Once the application opens, you will be taken to its home page (pictured below):
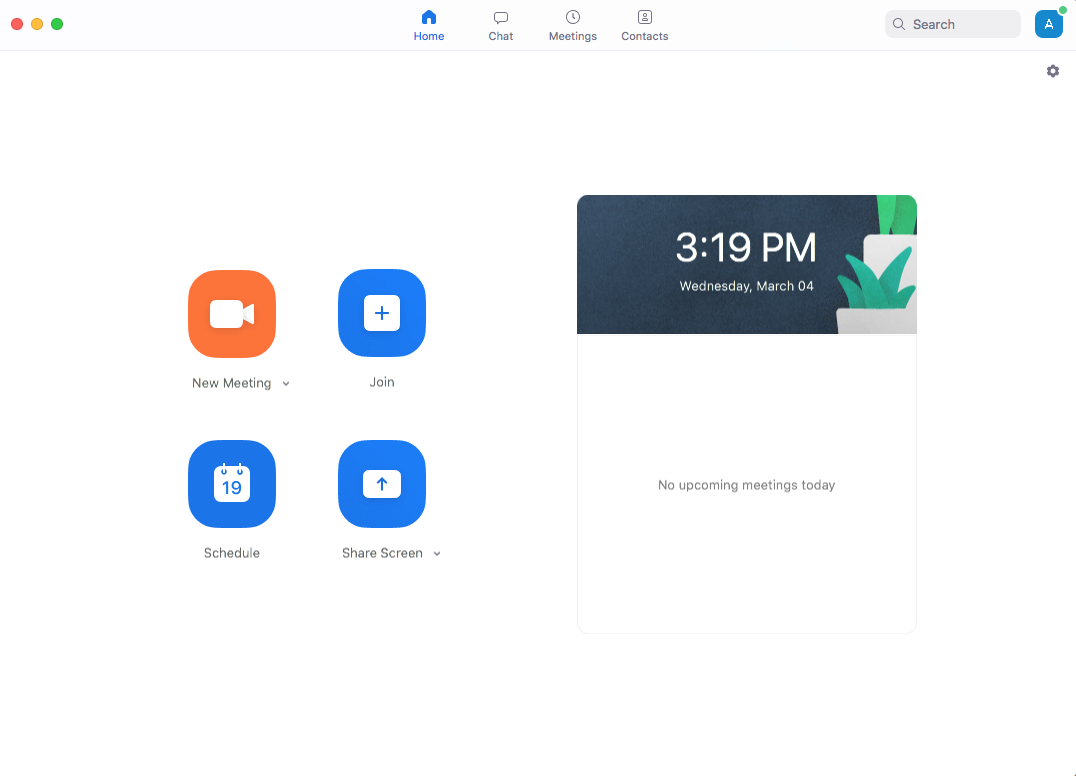
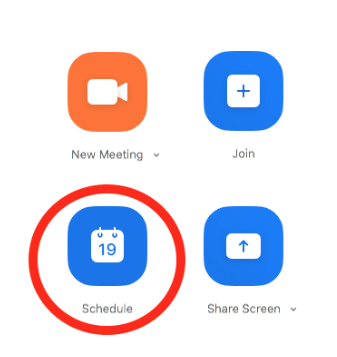
You will see that there are 4 large square icons in the main area of the window: “New Meeting”, “Join”, “Schedule”, and “Share Screen”. If you would like to host a video immediately without scheduling it at all, you can select “New Meeting”. If you have a meeting ID and want to join an ongoing meeting, select “Join”. However, for our purposes we want to select “Schedule”.
After selecting the “Schedule” button, a new window will pop up where you can fill out all of your info. At the top of your window you can rename the class/meeting to whatever you seem fit. For example, if you’re making a class meeting for your Tuesday section of ASCJ 200 then it would be appropriate to name it something in the realm of “ASCJ200 Tuesday Section”. If it’s a general meeting, you can name it something like “General Staff Meeting”. After you decide your title, you can decide the date and time:
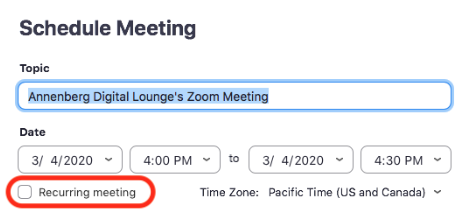
*In the image above, “Recurring meeting” is circled in red. You do not need to check this. The link the meeting makes will be reusable for future class meetings.
Next, leave “Meeting ID” on “Generate Automatically”. The personal meeting ID is like your personal phone number and is for if you want to have a one-on-one conversation with someone.

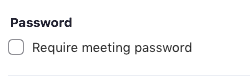
Then under “Password”, be sure the box next to “Require meeting password” is checked. This will help ensure the security of your meeting and allow you to control who will be able to participate by requiring a password to join.
Then under “Video” change both “Host” and “Participants” to On. This is so you can see everyone in the conference. If you decide to change your mind later on in the video chat, you can easily turn off and on anyone’s camera and mic (we will go over this later).

The “Audio” and “Calendar” sections you can leave as is.

Then at the very bottom, you will see “Advanced Options”. Click the little arrow to the right of the title and additional settings will reveal themselves. Check “Enable join before host”, “Mute participants on entry”, and “Automatically record meeting”. The waiting room and joining before host don’t matter too much, that’s just up to the host’s preference. Muting participants on entry is good practice because it limits the amount of noise and feedback you hear when everyone joins. If you are a professor teaching a class, you must check “Automatically record meeting” and then select “in the cloud” for ADA compliance. If you are staff, this is not required.
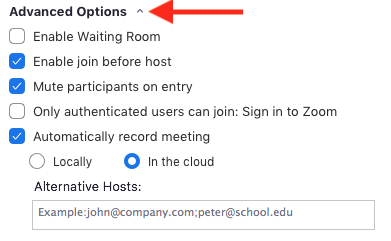
You will also see options for “Alternative Hosts”. Only put in an email of someone who is co-hosting or co-teaching the meeting. If you have a TA, we suggest making them a Co-Host which you can switch in the meeting.
Once all that is done, you can go ahead and schedule your meeting!
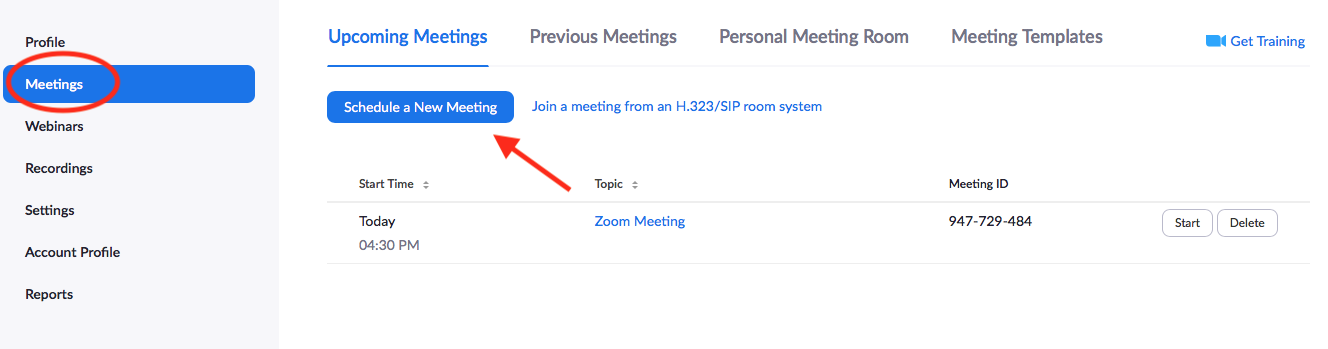
To view your scheduled meeting and copy the meeting link so others can access it, go back to the home page and select “Meetings”.
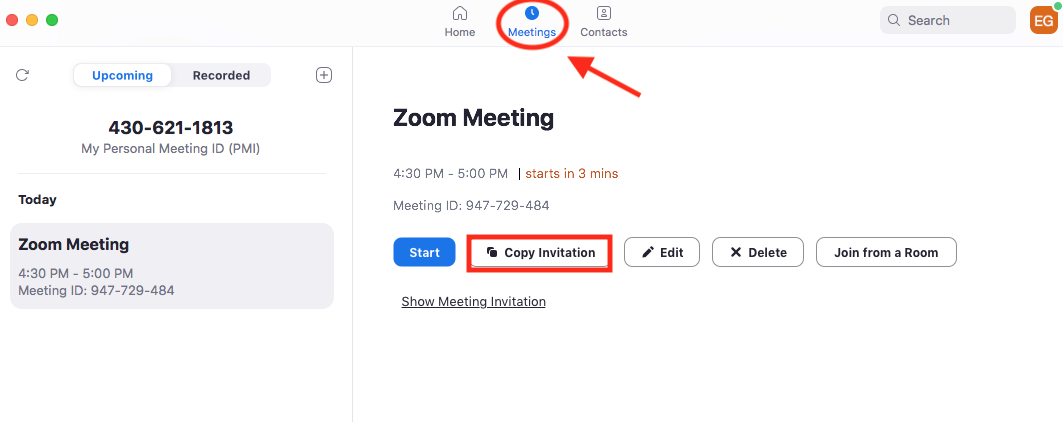
On the left-hand side you will see your personal meeting ID and all your scheduled meetings. Select the meeting you want and choose “Copy Invitation”. This will copy all the info needed for your students or other teammates to join the meeting at the designated time.
*On the day of the meeting, go back to this section and click “Start” to start your meeting.
If you are faculty, log into blackboard.usc.edu and select the class you just made the meeting for. Once you’re in the page for your class, look to the left-hand sidebar and select “Announcements”.
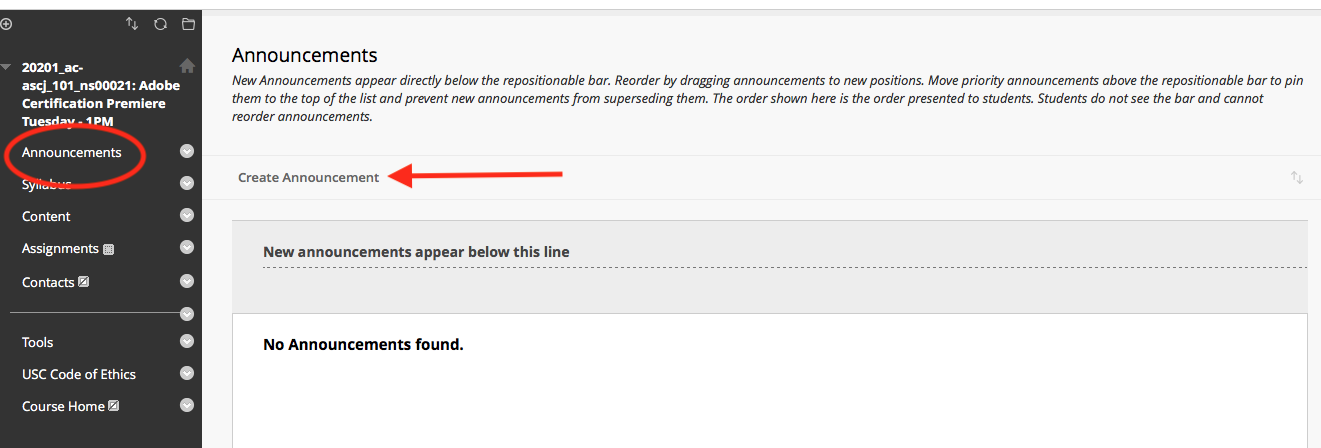
Then select “Create Announcement”.
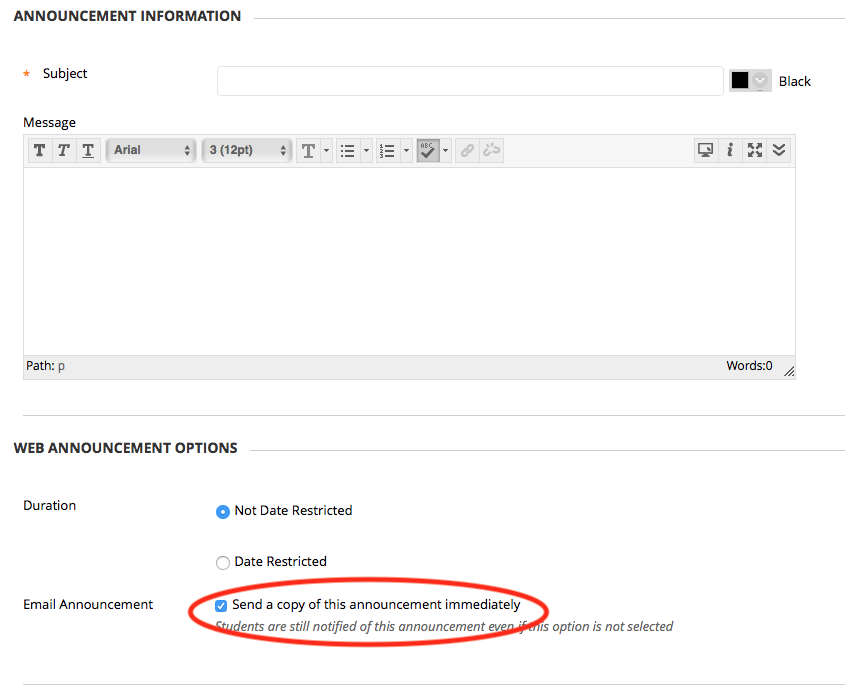
In the subject line, let your students know this is the link for your class’s Zoom meeting. In the message section, paste your copied Zoom link. Scroll down and under “Email Announcement” check “Send a copy immediately”. This will notify your students of the Blackboard announcement through their USC email. Then click “Submit”.
Then you’re all set!
Below are ways you can schedule a meeting through the usc.zoom.us website and through Blackboard (if faculty).
Through the Zoom website
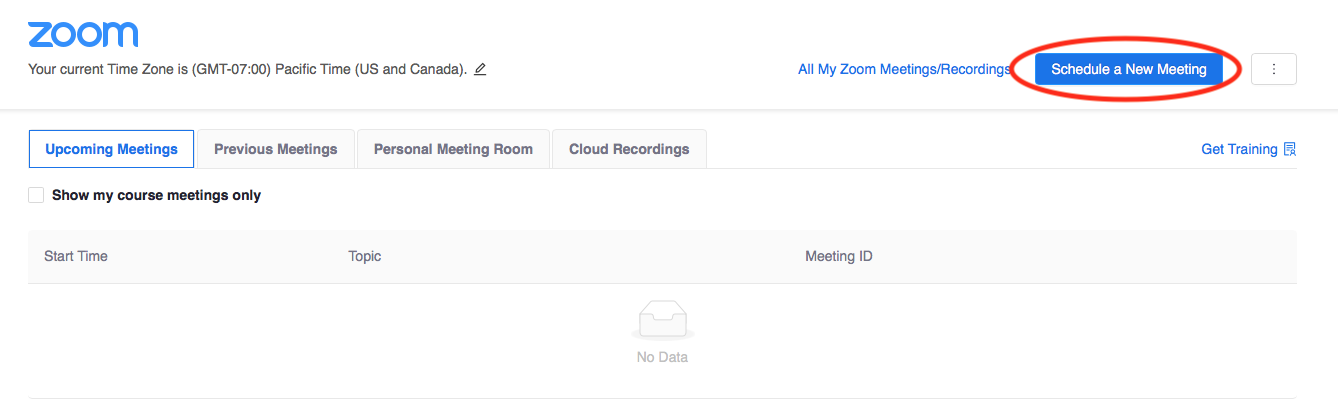
Once you’re logged into the webiste, go to the sidebar on the left and select “Meetings”. This will take you to a page where you can see all of your scheduled meetings. When you want to make a new meeting, select “Schedule a new Meeting”. Then all the settings will be the same as before.
Through Blackboard
Log into Blackboard and select the course you want to create a Zoom meeting for. Select “Tools”.
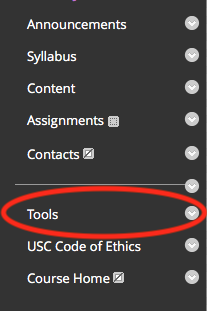
Then scroll down until you find “USC Zoom Pro Meeting” and select it.

You will then be led to a new page where you will see any scheduled meetings. To schedule a new meeting, select “Schedule a New Meeting”. All settings will look the same as previously discussed.
In Your Zoom Meeting
Once you start your meeting, your Zoom.us desktop app will open up and you will see this window:
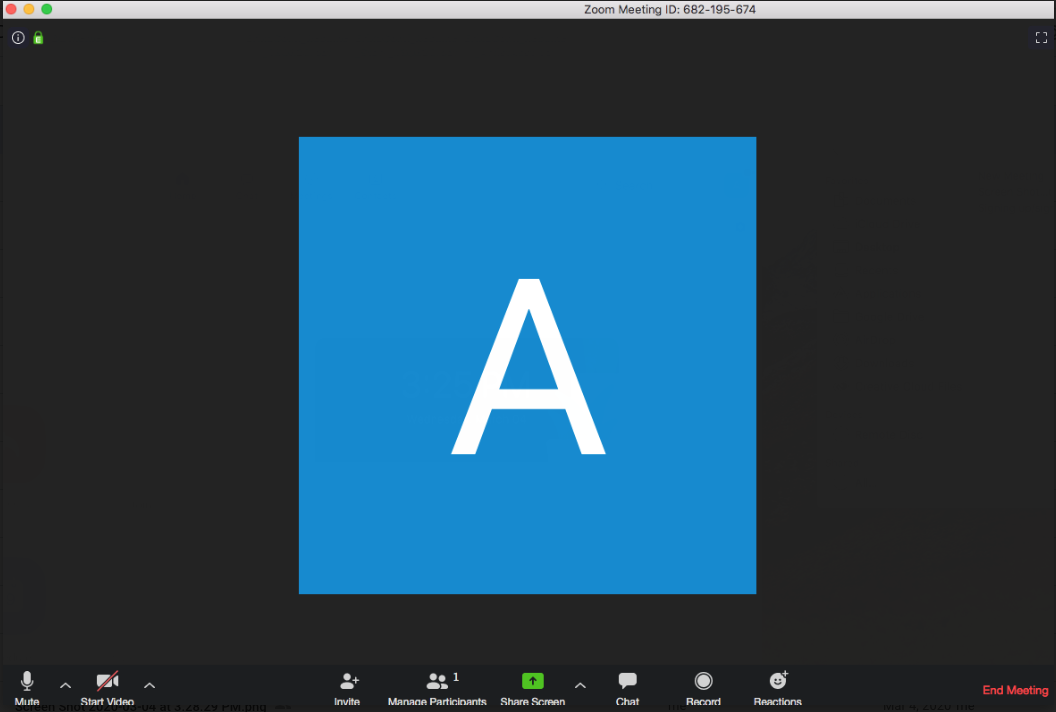
At the bottom you will see your dock with will disappear with inactivity. To get it to show up again, just move your mouse around.
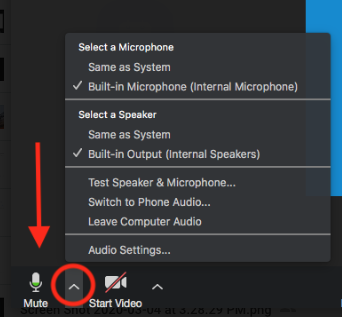
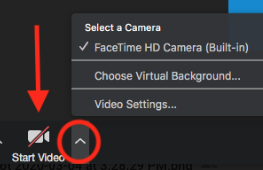
Microphone and Camera
In the lower left, you can control your microphone and video. Clicking the icons will turn them on and off. Selecting the little arrow to the right of each icon will give you more options. The default settings should be fine, but feel free to play around with the different options.
Invite
Next, you can invite participants by selecting the “Invite” button and either finding their name in the already given list or sending them an email. This is for if you’re already in a meeting and one of the participants for some reason didn’t receive your link. Then you can just manually add them.

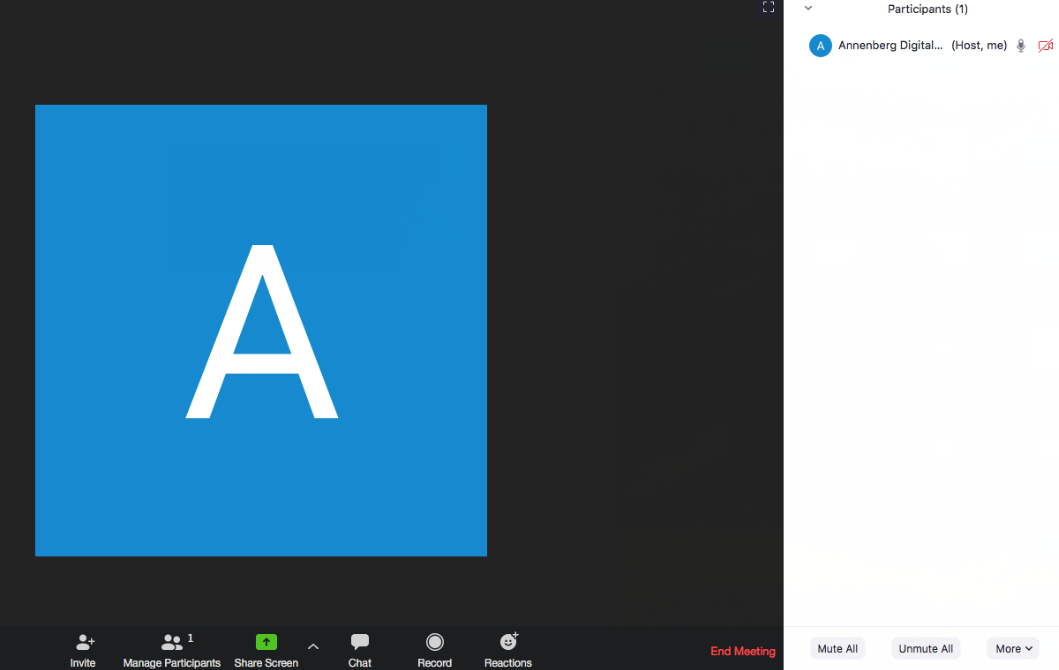
Manage Participants
The button next to invite is “Manage Participants”. This is an important one that you will be using throughout your whole meeting. Selecting this button pops up a new window to your right. You will be able to see all participants in the chat and turn on/off their camera and mic if need be. On the participant’s end, they will see little icons that allow them to react to what you are saying or raise their hand.
Share Screen
In the middle of the buttons is the bright green “Share Screen” icon. When you click this a new window will appear. You can choose to share your full computer screen (recommended), a virtual whiteboard, your phone screen, any open windows you have on your computer, or files. Remember to select both options at the bottom of the window: “Share computer sound” and “Optimize screen share for video clip”.
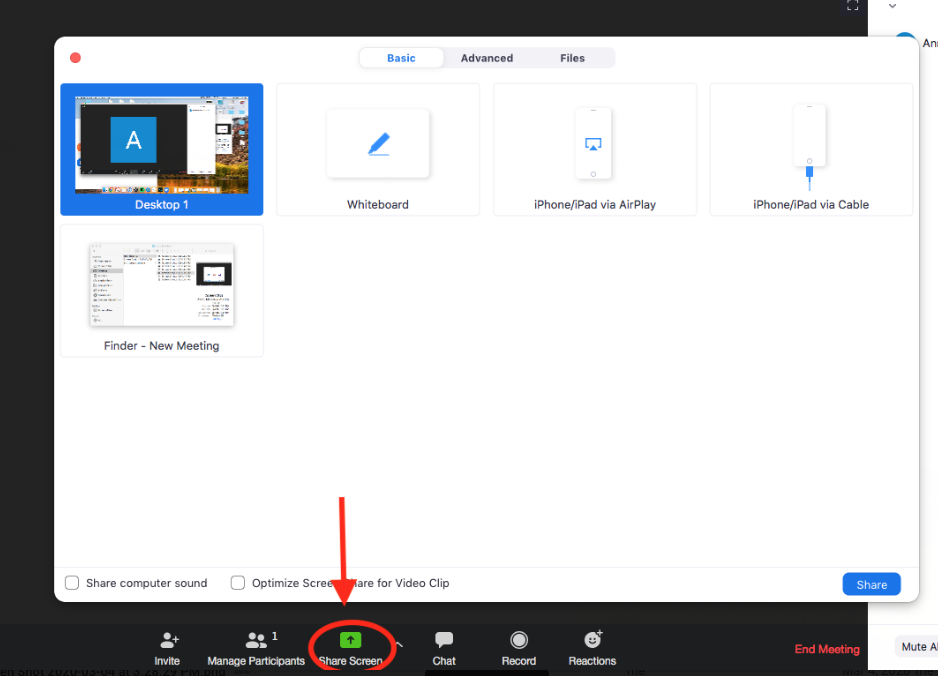
Once you’ve selected what you would like to share, a menu bar will show up at the top of your screen:

You have similar options as before, like controlling your mic and camera and participants, but now you can create a new share, pause your sharing, and annotate. Choosing “Annotate” allows you to draw over what is showing on your screen in that moment. The “More” button gives you more options below: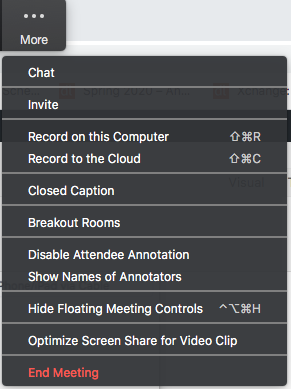
When you want to stop the screen share and go back to your original meeting, select the red button that says “Stop Share”.
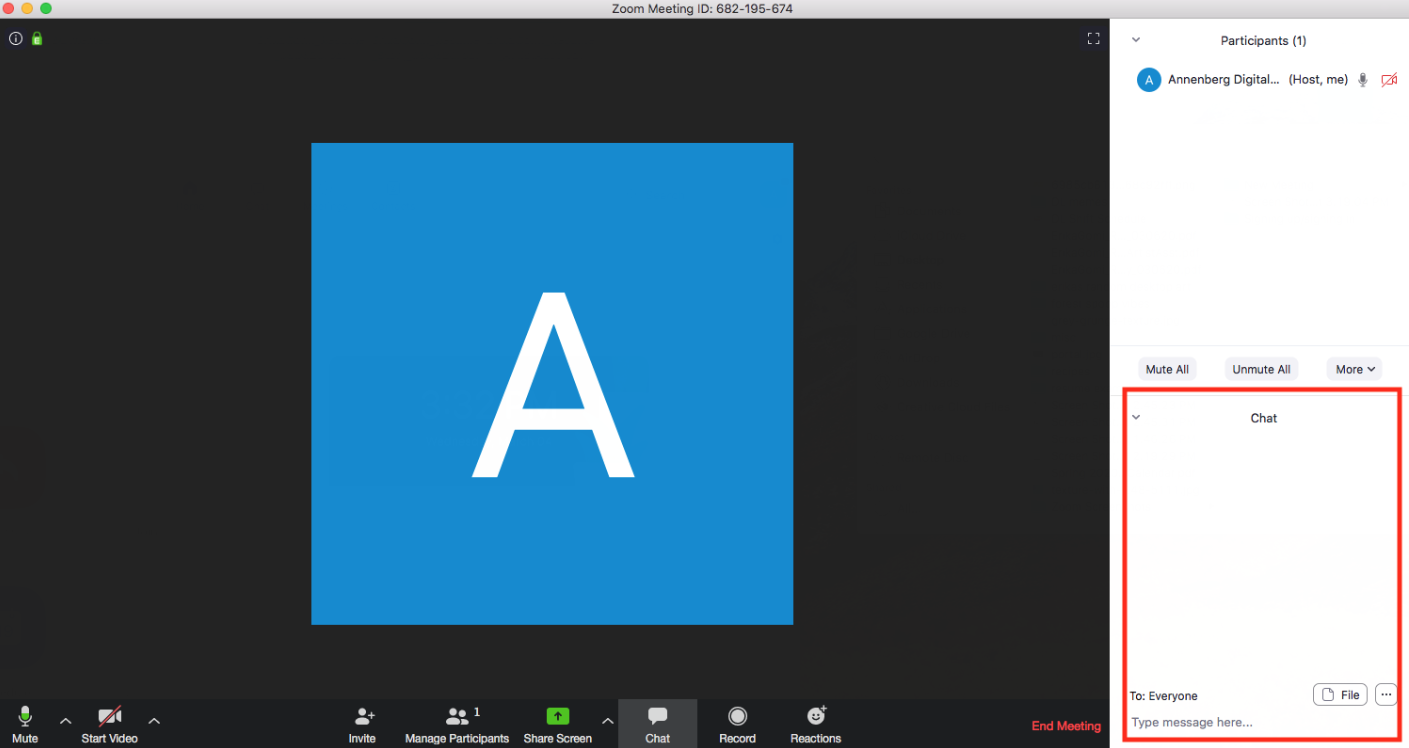
Chat
When selecting the “Chat” button, a new window will pop up on the right underneath the “Participants” block. Here you can choose to chat or send a file with your whole group or an individual.
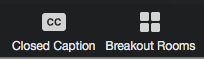
Closed Captions and Breakout Rooms
This next section will most likely be used more by faculty. If you are a host, you will also have the options of “Closed Captions” and “Breakout Rooms”.
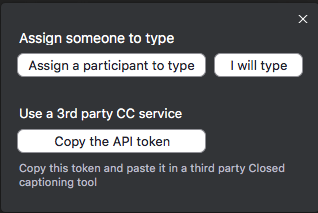
Selecting “Closed Caption” will show another window that allows you to assign a student to type out the captions in real time, choose to do that yourself, or get a third party to do the task.
“Breakout Rooms” is a helpful tool if you want to split your class up into smaller discussion sections. A smaller window will show up giving you the options to select how many breakout rooms you want and whether you want Zoom to split your students up into groups itself or if you want to manually choose which groups each will belong in.

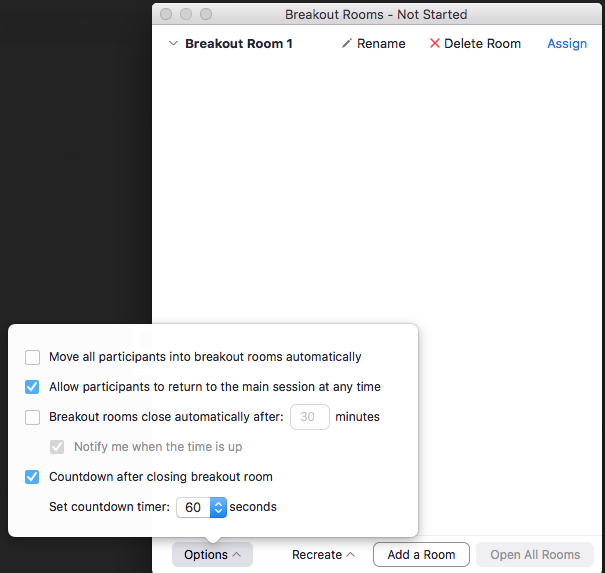
Once you select “Create Breakout Rooms”, a new panel will show up showing you all the groups Zoom has created with participants already in their assigned groups. You can rename, delete, or assign students to different groups. Under the options tab in the lower left corner, you can choose how long the students have to return to the main video conference among other options. On the faculty’s side you cannot see into any of the groups, however, you can jump into any group at any time to check in on how they’re doing. When you want everyone to come back to the main video conference, there should be a button in the lower right that will allow you to stop it. If not, just close out of the window.
If you don’t want to waste time and energy creating breakout groups within your meeting, you can preassign breakout groups before the video conference starts through the web portal. Log into usc.zoom.us and select the “Meetings” tab on the left. Select “Schedule Meeting”.
*If you don’t remember how to do all this, scroll up in this tutorial to the section where we schedule a meeting through the Zoom website.
Scroll down to the bottom where you will see “Meeting Options” (this is the same as “Advanced Options” in the desktop app). However, now that you’re using the web portal, one other option shows up: “Breakout Room pre-assign”. Check that and select “Create Rooms”.

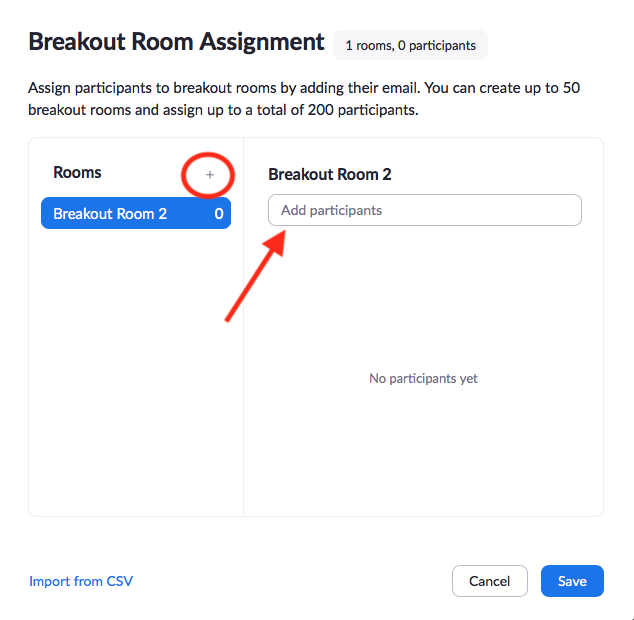
In the new panel that shows up, select the little ‘plus’ icon next to “Rooms”. This will then add a new breakout room. You can now add specific participants by inputting their USC emails. To make sure these preassigned breakout rooms work during your meeting, please have your participants log in and use their USC emails. If you want to add another room, just click the ‘plus’ icon again. Once you’re done creating your rooms, remember to save.
Now when you’re in your meeting and you want start breakout sessions, everyone will be assigned into the groups you already created earlier.
Thanks for reading through! We hope this tutorial helped and good luck with using Zoom! If you have any other questions, didn’t understand a part, or would like a more in-depth explanation, feel free to contact us at AnnenbergDL@usc.edu.