


Topics
Tired of using the Ken Burns effect to bring your still imagery to life in your videos? Worry not, as the technique you’re about to learn will change your life. Follow this tutorial to see how you can give 3D depth to your 2D photos using Photoshop and After Effects.
The Parallax Effect
Parallax is the apparent displacement of an observed object due to a change in the position of the observer. In the film world, this effect is widely used to animate still photos, giving them a realistic 3D look.
Here is what a parallax effect looks like:

Cool, huh?
This is nothing but the separation of the foreground and background of the still photograph, which we then combine in a 3D space in After Effects, where the magic happens.
Let’s get started!
1 – Choosing a picture to work with
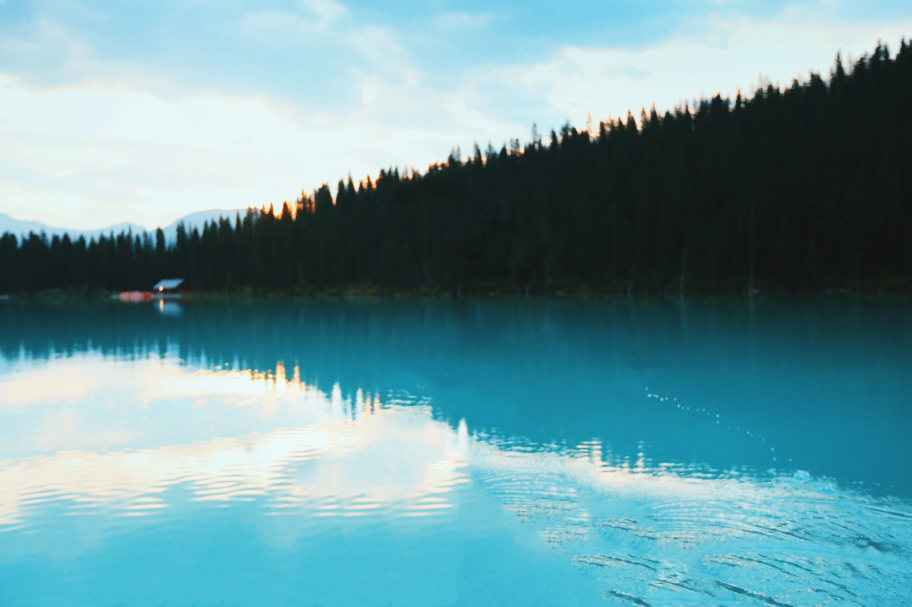
To start your first parallax effect, I’d suggest choosing an image in which the foreground and the background are clearly defined.

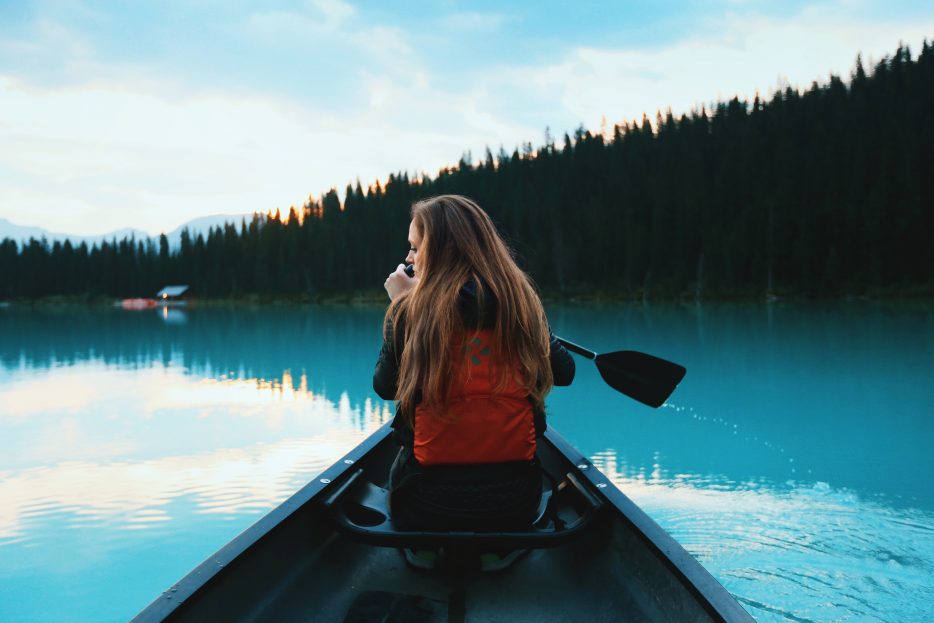
In this photograph, which we will be using for our tutorial, the shallow depth of field allows us to clearly identify the woman and her canoe as the foreground, and the river, trees and sky as the background. Your foreground should always be the focus point of the picture. Another tip would be to start with a rather simple background, that does not contain too many intricate details.
2 – Isolating foreground and background in Photoshop
Open your image in Photoshop, where you will isolate your foreground and background to create two different layers.
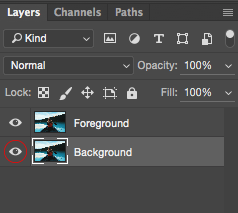
1. Unlock your background layer and duplicate it. Name the two identical layers ‘foreground’ and ‘background’.

2. Let’s make the ‘background’ layer invisible, so we can focus solely on our foreground. You can do that by clicking on the eye icon, in the Layer’s panel.
3. Select your ‘foreground’ layer, and choose your Quick Selection Tool from the toolbar.
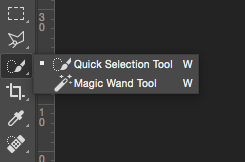
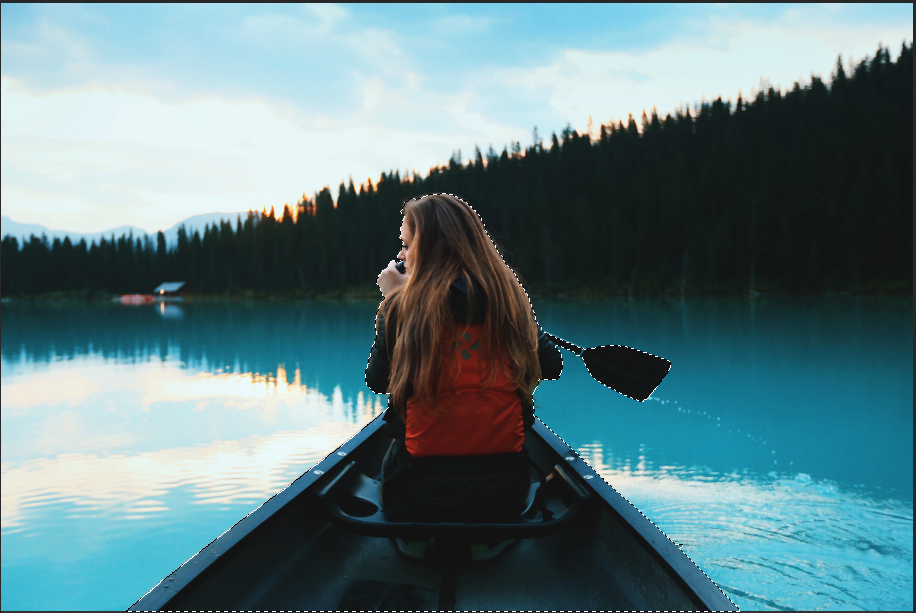
What we want to have in this layer is just the woman and her canoe, and nothing else. So go ahead and make the selection. You’ll click and drag over the areas that you want to select – taking extra care over on the edges of the woman.
In the top tool bar, you can use switch between a brush that adds to the selection and one that subtracts from the selection ![]() if you accidentally select some of the background.
if you accidentally select some of the background.
Depending on your photograph, you might need to use other tools to refine your selection.
Once you’re done, go to select -> modify -> expand to increase your selection by a couple of pixels. In my case, I expanded it by 2 pixels. This will make sure that you are not leaving any pixels behind.
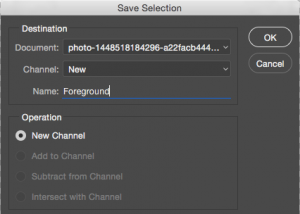
4. Go to select -> save selection. This is a way to save our current selection for a later use.
Name it ‘foreground’.
5. Go to select -> inverse to select the background. Then hit delete. If you hid your background layer, you should be seeing something like this:
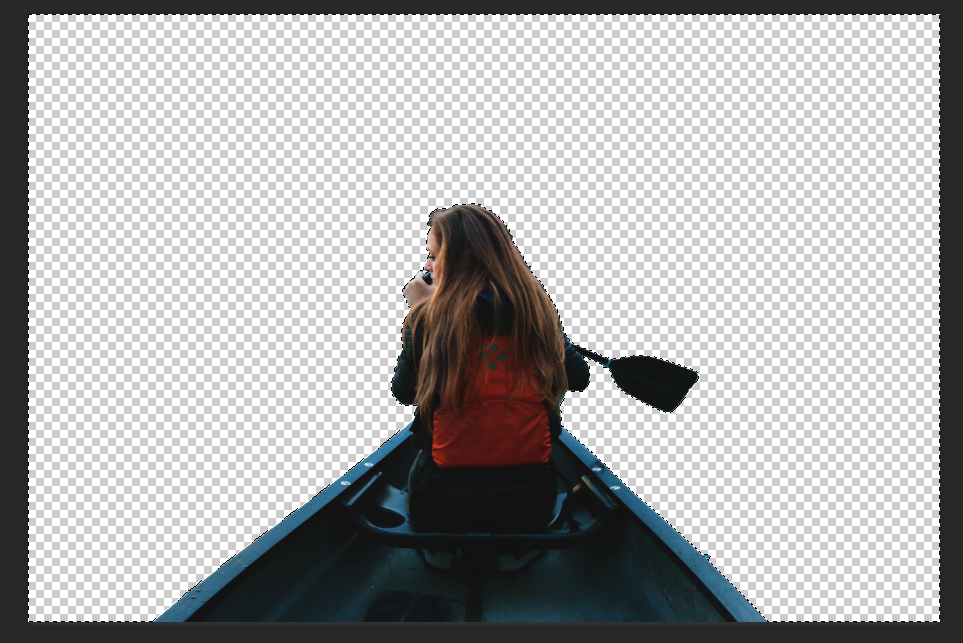
6. Now hit CMD+D (Mac) or CTRL+D (Windows) to deselect your current selection, and let’s also make our ‘foreground’ layer invisible and our background layer visible.
7. Click on the ‘background’ layer in the Layer’s panel and the go to select -> load selection. From the Channel drop-down menu, click on the ‘Foreground’ selection we created earlier.
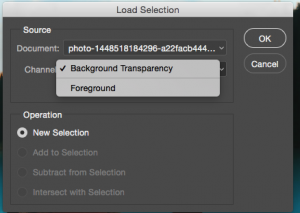
This should select our foreground once again, just like we did in step 3, only this time we are in the ‘background’ layer.
8. What we want now is to remove the foreground from our background layer. With the Foreground selection in place, go to edit -> fill.
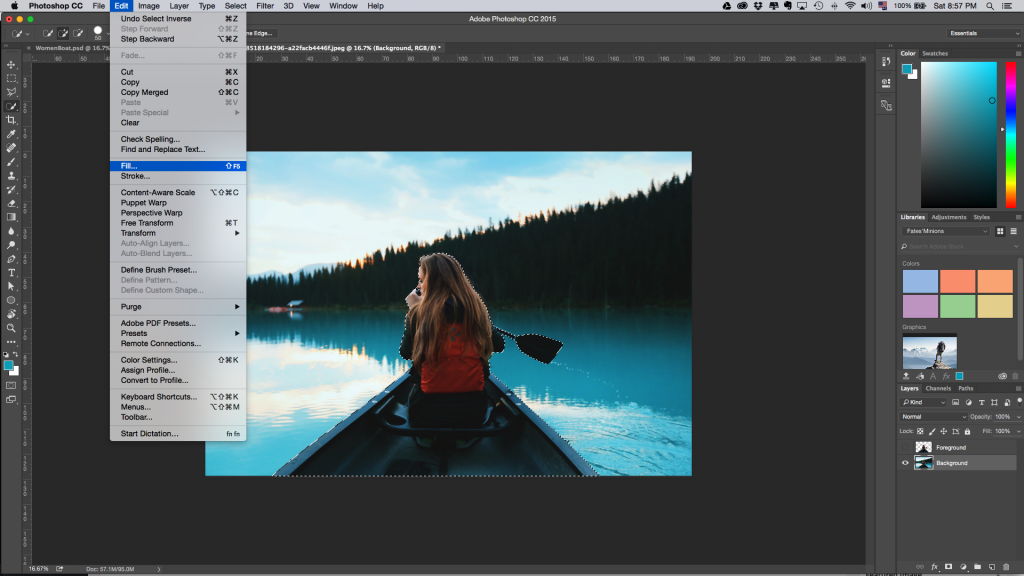
We will use the content-aware technique, which randomly fills the selection with surrounding pixels and blends them.
Click OK.

Because I have a very uniform background that is not too complex, content-aware actually worked quite well for me. You can still see some weird ghosting, but this is an easy fix with the clone tool.
Now, content-aware will not work with all photographs. Especially with those that have different textures and patterns. You might have to rely on the clone tool, as I mentioned above, and other tools like the Healing Brush. It’s not impossible to work with more complex pictures, but it will just take you much longer to get the desired result.
After playing around with the clone tool, this is how my background looks now:
And these are my layers:
In one layer, only the girl and the canoe (your foreground), and in the other, the background.
Now let’s go ahead and save this file.
Go to file -> save as.
Format will be Photoshop (psd file), and we want to make sure that we are saving the layers as well.
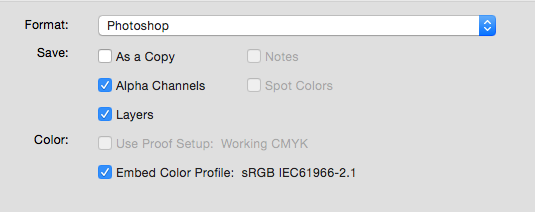
Hit save and voilà! We’re ready for After Effects!
3 – Setting up your layers in 3D space
Great, now that we have our PSD file, let’s go ahead and open After Effects.
You don’t need to be an expert to follow the next steps, but if you’re new to After Effects, I’d recommend checking out this beginner workshop that will introduce you to the basics.
Let’s start!
1. Once you have an new AE project open, right-click on the Project Window then go import -> file.
2. Choose your saved PSD file. In the Import File window, make sure you select ‘Composition – Retain Layer Sizes’ in the ‘Import As’ drop-down menu.
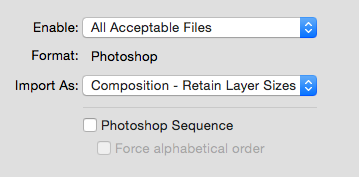
Click ‘Open’.
3. A new window will pop up. Make sure the Editable Layers Styles box is checked. This will ensure that your Photoshop layers are preserved in After Effects.

4. After you click OK, you’ll see two items in your Project Window: a folder containing your separate .psd layers, and a composition.
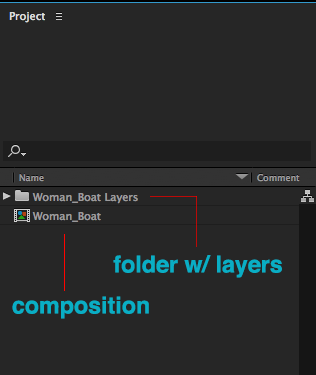
Double-click in the composition.
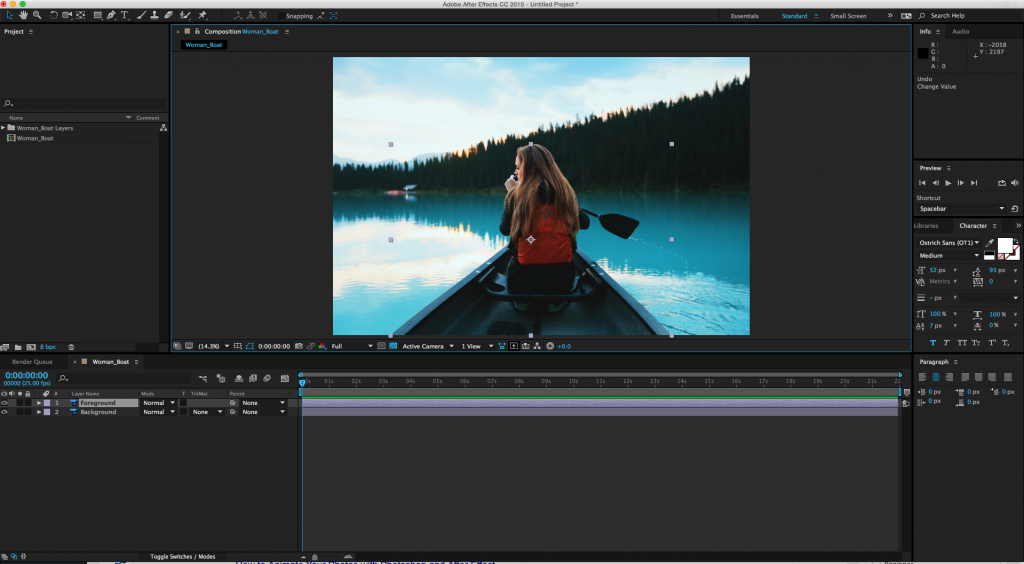
You will now see a timeline in the bottom part of the screen and your two Photoshop layers. If you click and drag your foreground in the Canvas, you will see that you can move it around independently from the background.
5. Now let’s make sure we check our Composition Settings. Right-click in your composition in the Projects Window, then click on Composition Settings. You will see that our width and height is quite big, and that’s because this is the original size of our still image. Since our output is a 1920×1080 resolution for video, we’ll go ahead and change it to those values. Next, we want to set the duration to 5 seconds. Let’s also set our frame rate to 29.97. Don’t worry if you no longer see your image in the Canvas. We will rescale it later.
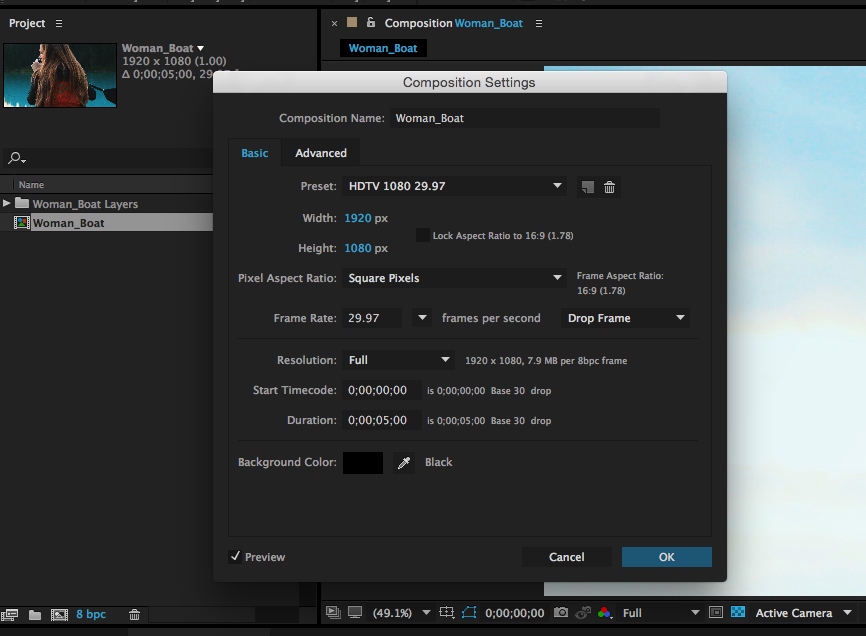
Hit OK once you’re done.
6. Before resizing our image, let’s first select the Foreground and Background layers in the Timeline panel, and make them 3D layers.
Select both and right-click, then select 3D Layer.
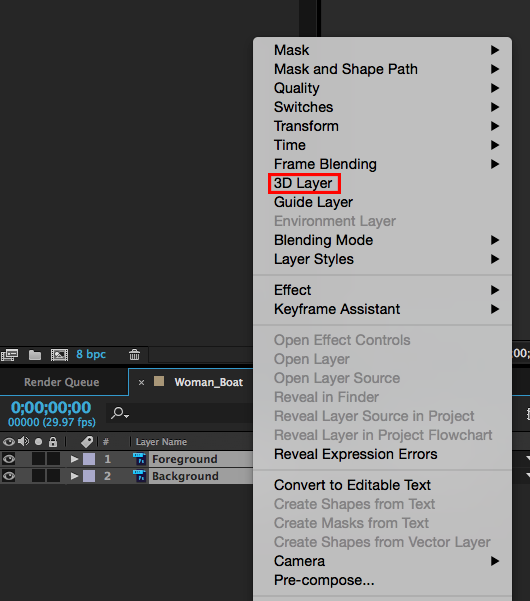
When you make a layer a 3D layer, the layer will remain flat, but we are now able to move and rotate it in the Z axis, which defines the depth of an object in 3D space.
7. Now let’s resize our layers so they fit in our 1920×1080 screen.
Select each layer and press S. This will show the Scale property of each layer in the Timeline Panel. Click and drag over the percentage value to increase or decrease the size of the layer.
Once you have your layers properly resized, let’s separate them in 3D space.
8. In your Canvas, there is a drop-down menu where you can choose how to view your composition. The default is usually set to Active Camera or Front. Let’s go ahead and change that to Left.
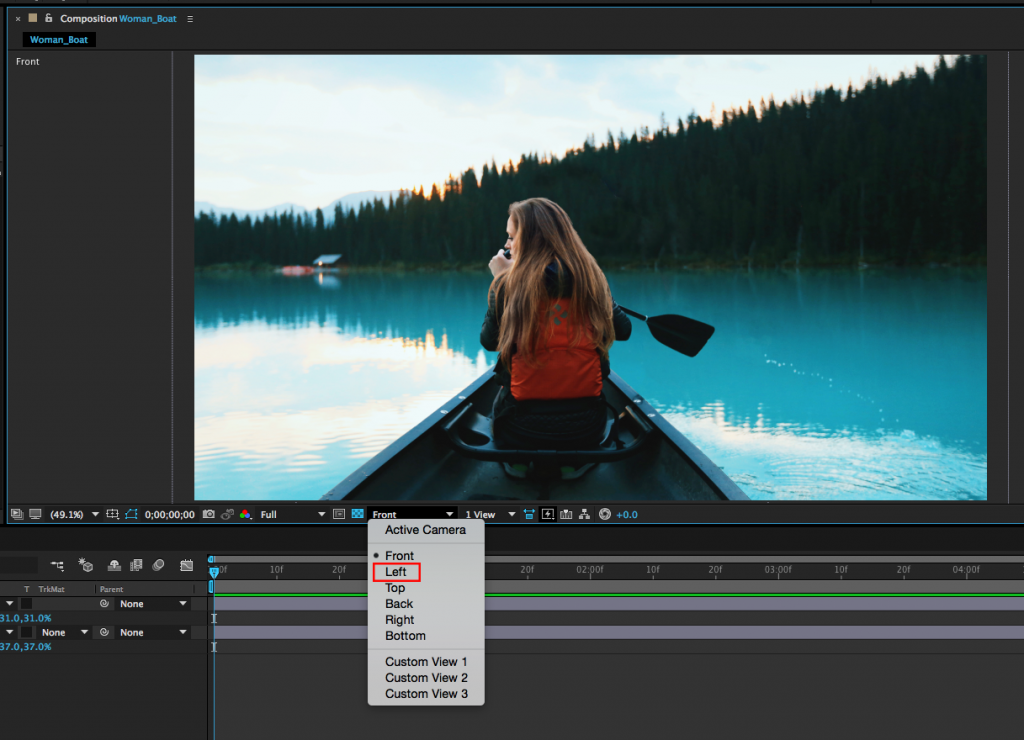
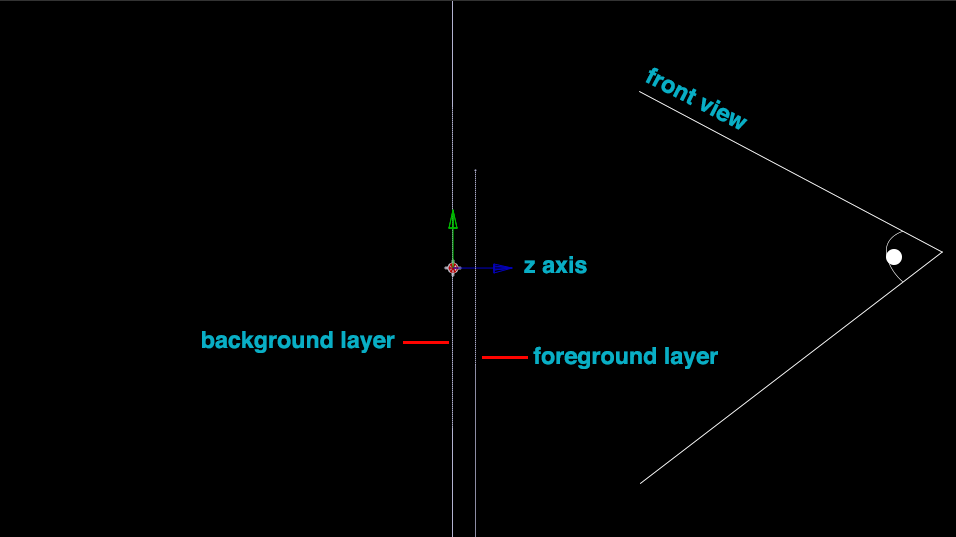
You will now see a side view of your layers.
Click on your Background layer, and in the Canvas, click and drag the blue arrow to the left. The blue arrow represents the Z axis, and since we’re in a side view, this means that we’re pushing our layer backwards.
You can also change the Z Position value in the Timeline Panel.
Switch your view mode to Active Camera.
Click on your Background layer, then press P. This will show you the Position Property of that layer. The first value stands for the X axis, and this will move your layer horizontally. The second value is for the Y axis, which will move your layer vertically. The last one is your Z axis, which will move the layer in depth.
Go ahead and change that value to about 156.
Depending on how you scaled your layers, you might or might not see a change in your Front View. Regardless, we can move on to the next step and come back for adjustments later.
9. Go to the top menu, Layer -> New -> Null Object.
Nulls objects are invisible markers with position, rotation and scale properties that you can place in your scene, and that can be used to control other elements in your composition.
We will parent our background and foreground layers to this Null object, which will allow us to control the movement of both layers by only changing the properties of the Null object itself. Whatever transformations you apply to the Null layer will also be applied to its child layers.
Not sure what this means?
Firstly, let’s make our Null layer a 3D layer, just like we did for our background and foreground layers.
Then, let’s select both layers and make them child objects of the Null object we have just created.
After you selected both foreground and background layers, drag the pick whip from one of them in the Timeline panel to the Null object.

Now click on the Null object and press R. This will show the Rotation property of the object. Play around with the X and Y rotation values and see what happens.
How cool is that? Got that 3D feeling yet?
Click Reset in the Transform property, and let’s create the magic!
4 – Animating your scene
The secret to creating a realistic parallax effect is to stay minimal in your camera moves. If you exaggerate in any rotations or movement, you’ll be giving away the effect, and breaking the illusion.
In the short video below, you can see how I used keyframes to animate the position and rotation of our null object, creating the 3D illusion in my still image. Bare in mind that it all depends on the image you have, and the values I show you might not fit your project. But you’ll get the basic idea, and hopefully have fun playing around with your layers!
5 – Exporting your file
Once you’re happy with your animation, it’s time to export it to a video format.
On the top menu, go to Composition -> Add to Render Queue.
The Render Queue Panel will come up where your Timeline Panel is. This is where you’ll prepare your file for export.
Definitely look at your Render Settings and Output Module as these will define the format and size of your video file.
Output Module is especially important as this is where you get to choose your video codec, under the Format Options. In my case, I chose H264 as my codec.
Finally, Output To will let you choose where to save it.
Once you set all of these, click Render and voilà!