


Topics
While Illustrator is mainly for illustrating and InDesign is mainly for publishing, that doesn’t mean you can’t publish with Illustrator or illustrate on InDesign. In fact, Illustrator has very powerful type and character manipulation. We’ll be taking you through them in this comprehensive guide.
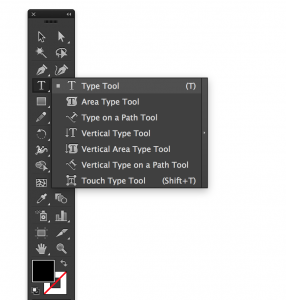
3 Ways to Use The Type Tool
To start, bring up the Type Tool by pressing (T) or going to your toolbar and hitting the ‘T’ icon. There are 3 ways you can use this tool:
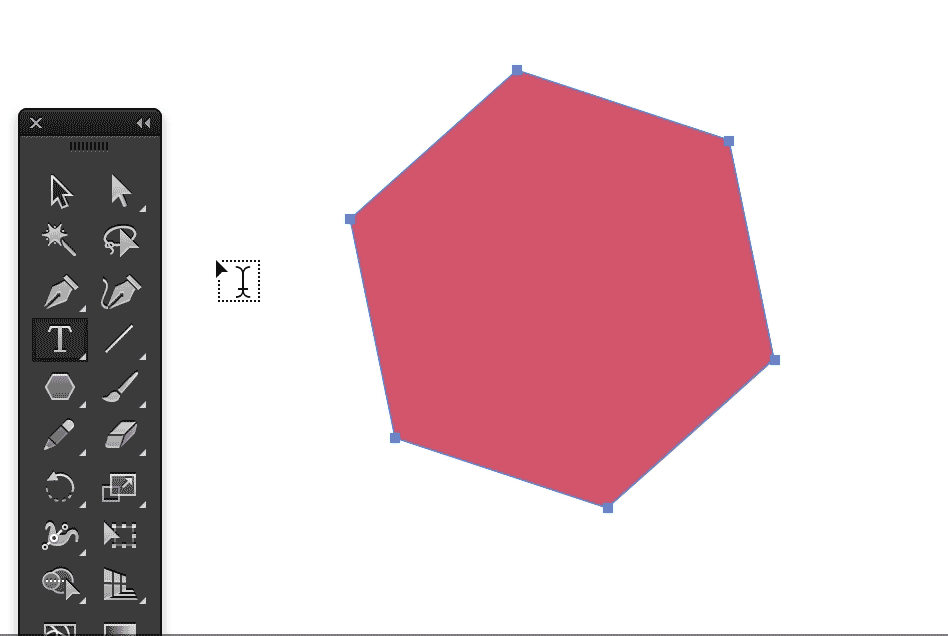
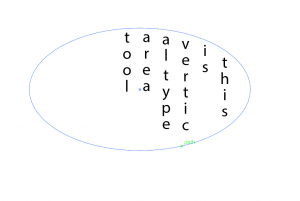
And funny enough, if you hold down the Type Tool icon in the toolbar, the very next function is the Area Type Tool. Like I mentioned before, the Area Type Tool allows you to type inside a shape and will stay contained inside said shape.
Special Type Tools
Vertical Type Tool
The Vertical Type Tool works like the first type tool we used. You can either click, click-drag-type, or click on an edge of a shape to type. The only difference is that you’re typing from top to bottom. The same goes for the Vertical Type Area Tool.

Type on a Path Tool
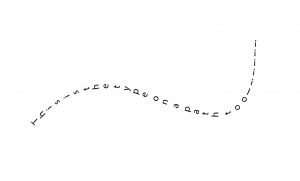
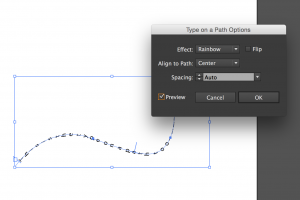
We will now talk about the (Vertical) Type on a Path Tool. These two tools are essentially the same except that one types horizontally and one vertically. It also allows you to type on any line/unclosed shape.
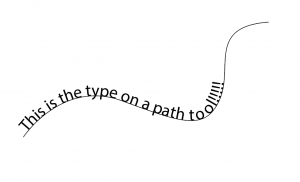
These functions also have extra sets of options when you go to the top bar Type > Type on a Path > Type on a Path Options. A dialogue box will pop up offering effects, alignment, and spacing. Click on the ‘preview’ checkbox, and play around! When you’re done you can hit OK to keep what you made or cancel to revert back to the original.
Let’s return to the toolbar and Type Tool (T).
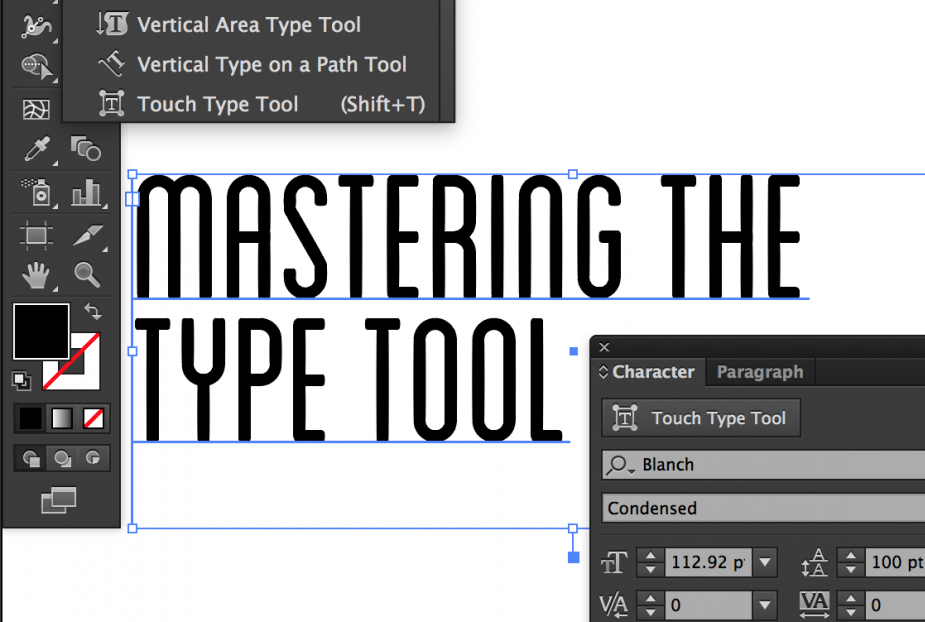
Touch Type Tool
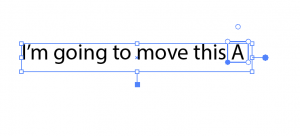
Holding down the Type button (T), the last function is the Touch Type Tool (shift T). If you haven’t noticed, whenever we click on a letter, the whole text box will highlight. If you wanted to edit one letter, you would have to double click into the text box, highlight it, and then do your edit – what a pain. Adobe knows we’re about the lazy life, and created the Touch Type Tool. With this, you can just click on a letter and do your edit! You can move, scale, rotate, and change the font.
Congratulations, we finished going over each function of the Type tool. However, we’re not quite done with character manipulating.
Character Panel
Changing Your Font
What kind of tutorial about typing and letters would this be if we didn’t have a section on fonts? To change your font you need to go to the character palette (cmd T) or Window > Type > Character. We’ll see at the top of the palette, the Touch Type Tool (yay!), and then below that the font library. Below that is Font style, which is how you select different versions of the font (regular, bold, italics, light, etc.)

The mini dropdown menus are how we customize our chosen font. In other words, changing font size, leading, kerning, and tracking.
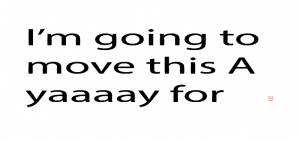
Font Size
 Changing font size, I hope, is self explanatory.
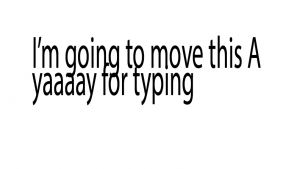
Leading
 Changing leading is changing the line height, aka, the space between selected lines.
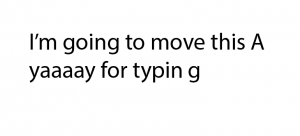
Kerning
 Changing kerning is changing the space between two characters. This is achieved by placing your cursor between the letters.
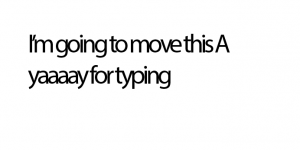
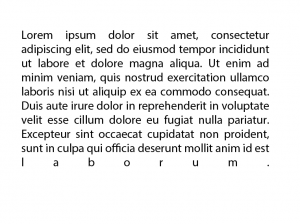
Tracking
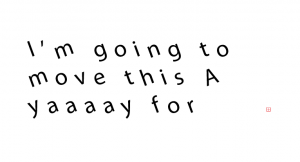
![]() Changing tracking is like kerning, but for multiple letters. This is achieved by selecting the letters you want to change.
Changing tracking is like kerning, but for multiple letters. This is achieved by selecting the letters you want to change.
Vertical Scale
On the top right of the character panel, you will see an icon of 3 lines. Click that to show more options to change your font. You will be given 4 more drop down menus and 6 buttons. Here you will change vertical scale, horizontal scale, baseline shift, and rotation. The icons will give you the options of all caps, small caps , superscript, subscript, underline, and strikethrough.
 Vertical scale stretches or squashes the selected characters vertically.
Horizontal Scale
 Horizontal scale stretches or squashes the selected characters horizontally.
Baseline Shift
 Baseline shift, shifts the line on which the characters sit.
Rotation
 Rotation rotates selected characters.
We have now thoroughly exhausted the Character palette, but we have one more palette to go!
Paragraph Panel
This palette is usually opened alongside the character palette, but if not, go to Windows > Type > Paragraph or (opt cmd T).

Alignment
The top 7 buttons show the alignment and justification of the text. Align left, center or right, and justify to the left, center, right, or all. Justify means to form straight lines for the margins.
There are 5 drop down menus which I will quickly go over. Left indent pushes the left margin to the left. Right indent, pushes the right margin. First-line left indent indents the first line to the left – think of it as like pushing the tab key.
Space before paragraph plays with the space between a paragraph and the paragraph above it. Therefore, space after paragraph plays with the space between a paragraph and the paragraph below it. If you have only 1 paragraph, these will not do much for you.
So that’s it–go try out different type options and find the styles you like best. Enjoy!