Topics
Download this tutorial as a PDF here.
Introduction
Prezi.com offers a way to create presentations that engage the audience in an interesting and non-traditional way. It is a virtual whiteboard that transforms presentations from monologues into conversation: enabling people to see, understand, and remember ideas. The program allows you to zoom out to see the bigger picture and zoom in to see the details. It’s 3-dimensional canvas is a virtual space where you can delve deeper and pan wider to broaden the conversation.
I suggest that you look at some Prezi examples before delving into this tutorial to get a sense of the flow of Prezi and purpose of Prezi presentations.
Creating an Account
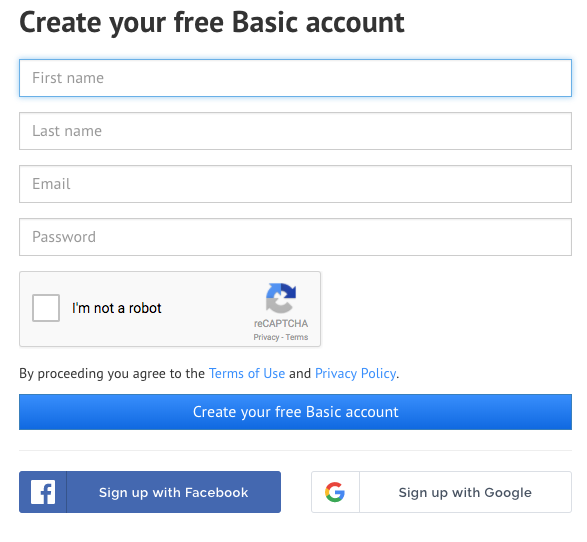
If you don’t already have an account, go ahead and visit http://www.prezi.com and find the ‘Get started’ button.
![]()
In this tutorial, we are going to use a Free Basic account.
Note: Prezi offers a EDU standard account that’s also free when you use a valid school email. Paid accounts offer more space as well as the ability to create private presentations.
You will then be directed to fill out your personal info. Once you’re done, click on the ‘Create your free Basic account’ button.
Navigation
Once you’ve logged into your account, your main workspace will look like this (pictured below).
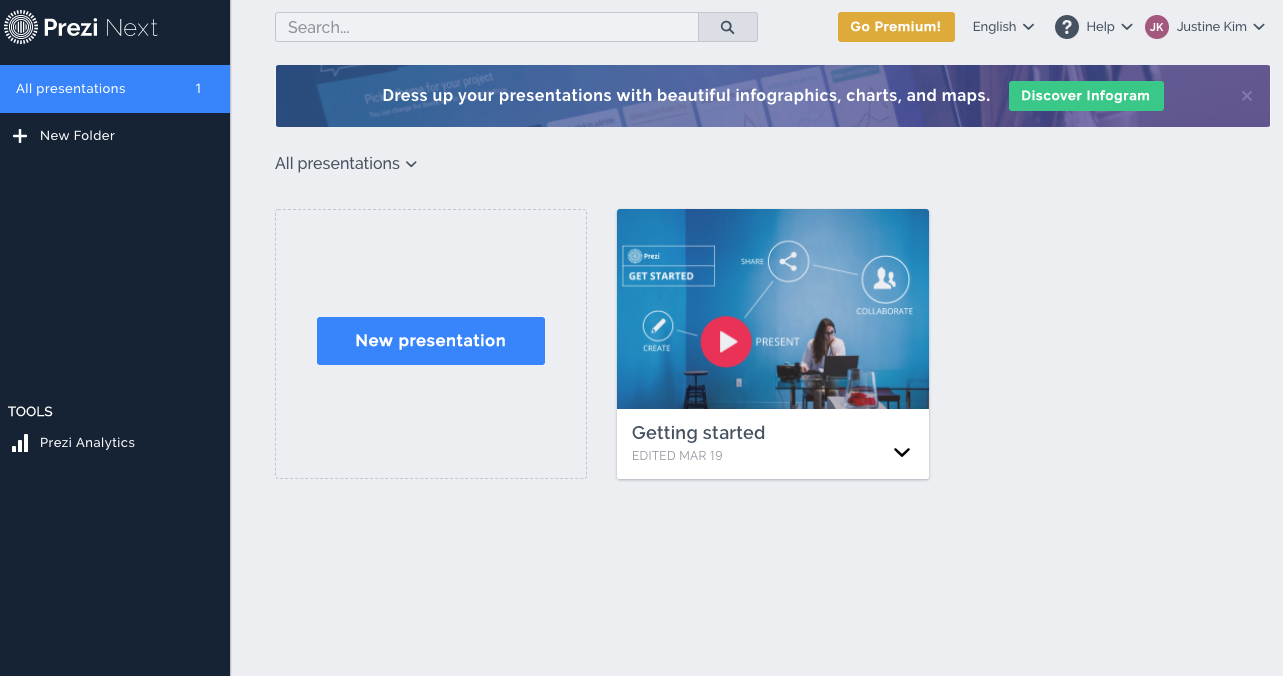
- All presentations: View and Edit your Prezis. (you can also filter with ‘created by me’ or ‘shared with me’)
- Getting started: An intro video that introduces you to basics of creating, presenting, sharing, and collaborating on a Prezi.
- “New Prezi”: This button will allow you to start your own Prezi.
- “New Folder”: This button will allow you to start new folders to group your Prezis.
- Prezi Analytics: A premium feature that allows you to track how viewers digest and interact with your presentation
Creating a Prezi
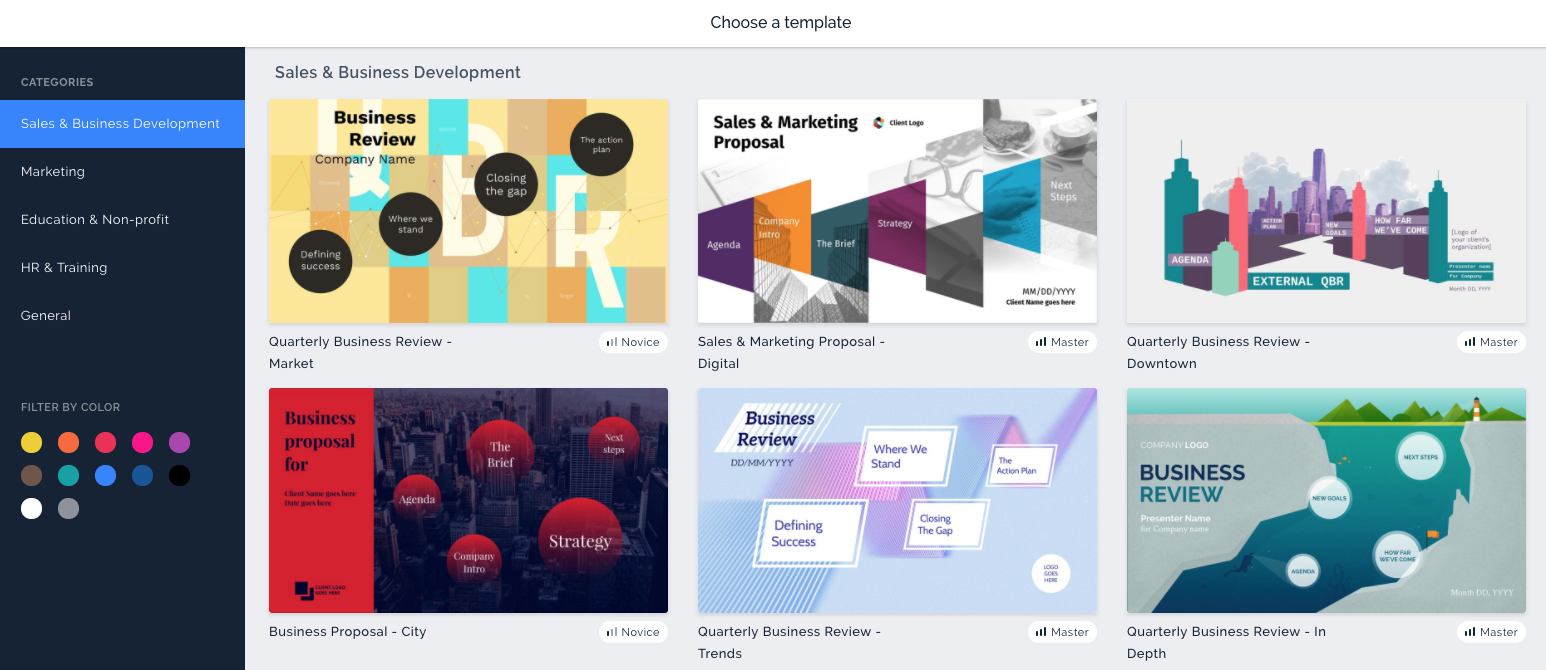
1) Click on the “New Prezi” button.

2) Prezi.com offers pre-made templates filtered based on categories and color. When you click on a template, it will allow you to preview it and to see the skill level required which ranges from ‘novice’ to ‘master’. Choose one that you like and then click on the “Use this template” button. You can also start with a blank canvas by choosing the blank template under General. In this tutorial, let’s work from a Blank Prezi.
Editing a Prezi
Once you’ve selected the blank template, you’ll be taken to this screen. This is where you will edit and add elements to your presentation.
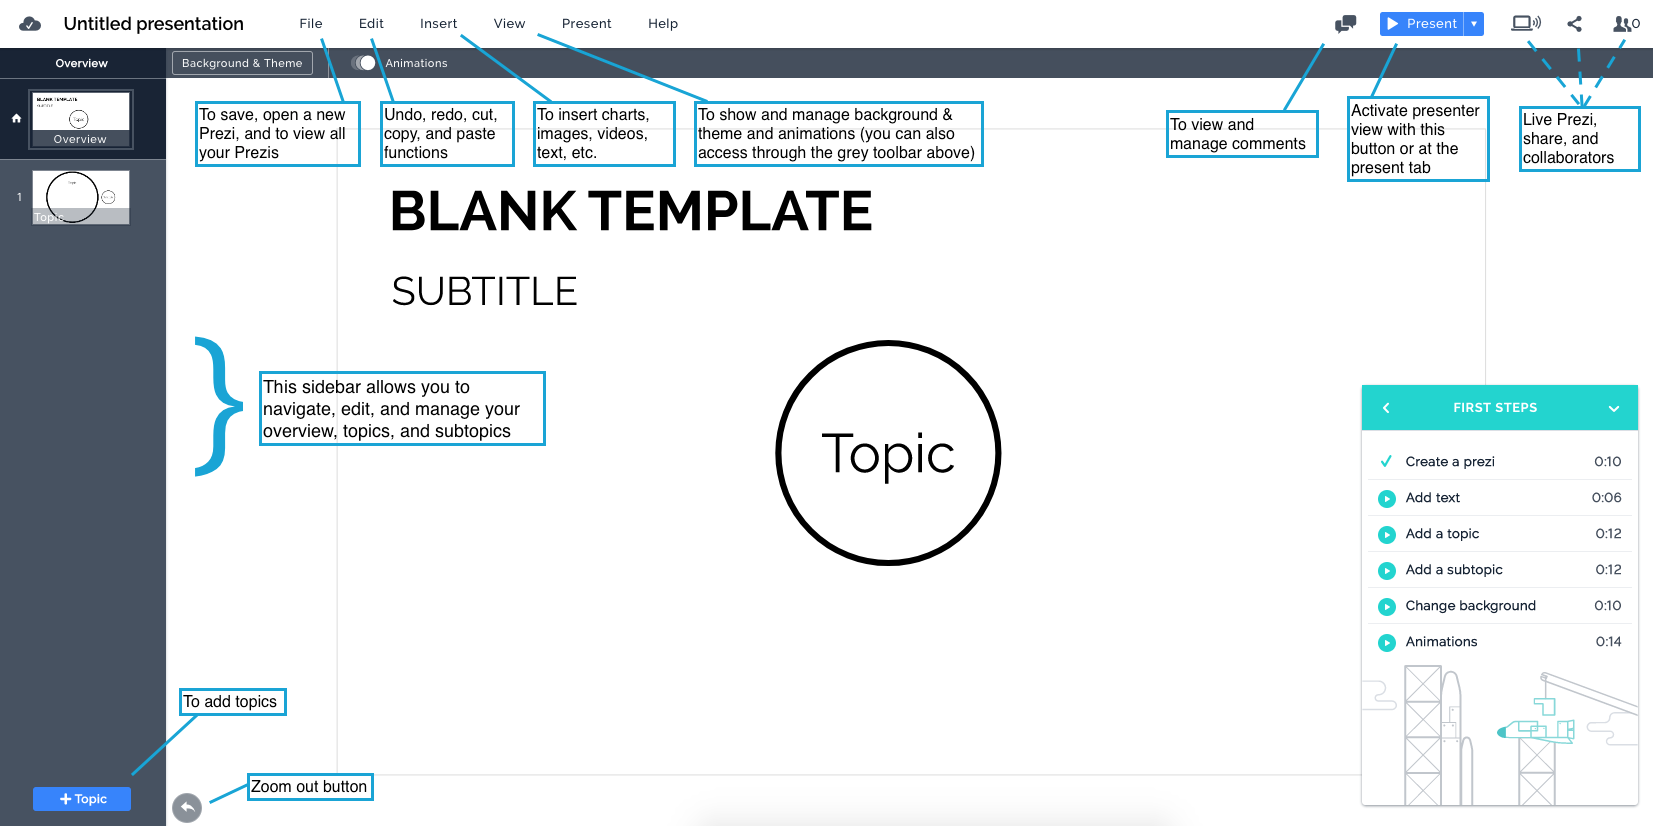
Tips
1) If on a computer, you can use the scrolling wheel on your mouse to zoom in and out of your Prezi quickly. On a laptop, swipe up and down on your trackpage to zoom in and out.
2) Double click on elements to zoom in on them.
Understanding Flow & Animations
In Prezi, elements are already ordered in terms of an overview, topics, and subtopics (which act like slides in a traditional Powerpoint presentation) but you can manipulate the flow of your presentation through animations, which will dictate the order of elements and when they appear. When you click on the arrow keys during your presentation, this is how it will navigate and present your Prezi.
Your animation options include:
- Fade in
- Fade out
- Zoom area
* all of these can be managed through the animations toolbar or “View -> Show Animations” where you can apply animations to specific objects and order them in your Prezi *
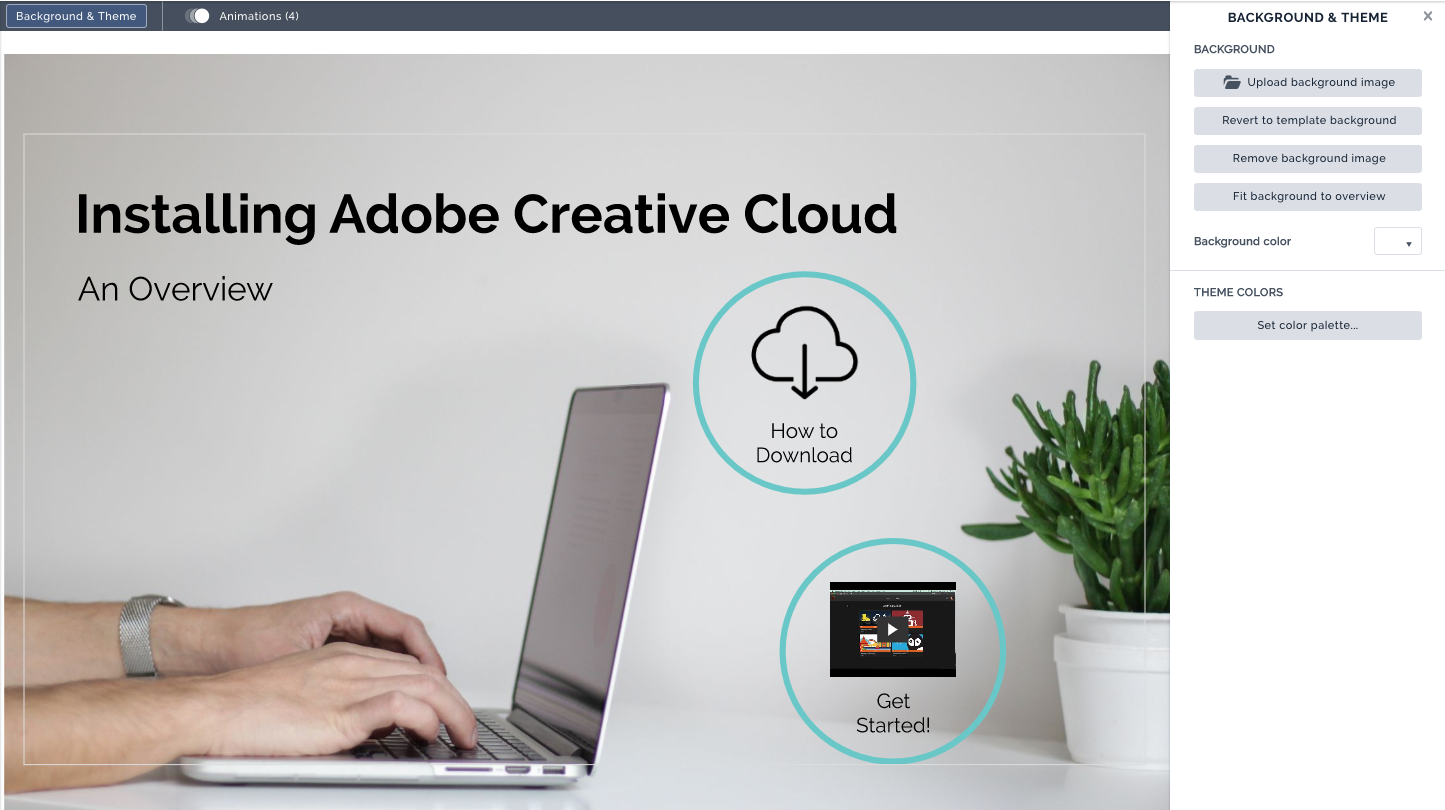
Let’s do an example. In this tutorial, we’re going to do a simple Prezi about Adobe Creative Cloud. In this Prezi, I’m going to use images, icons, and a video. Get creative when coming up with concepts for your Prezi!
Prezi Example
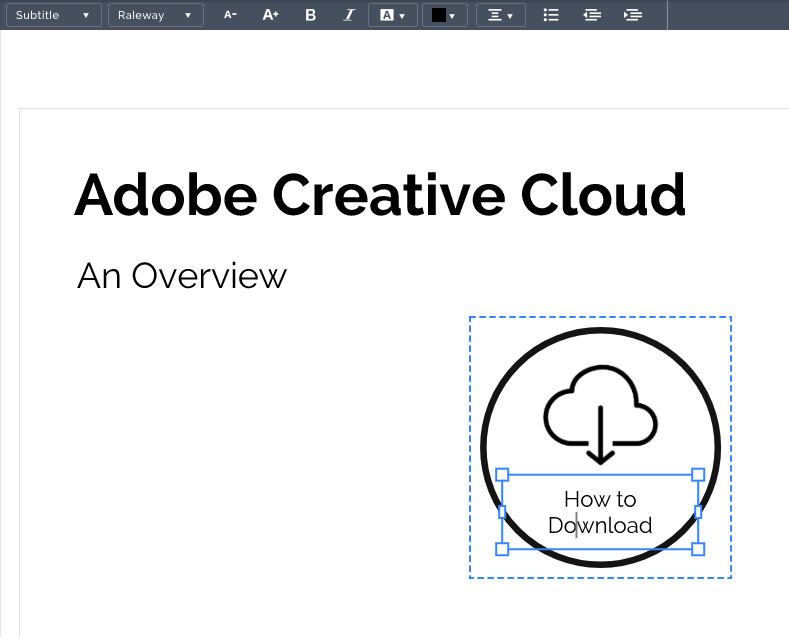
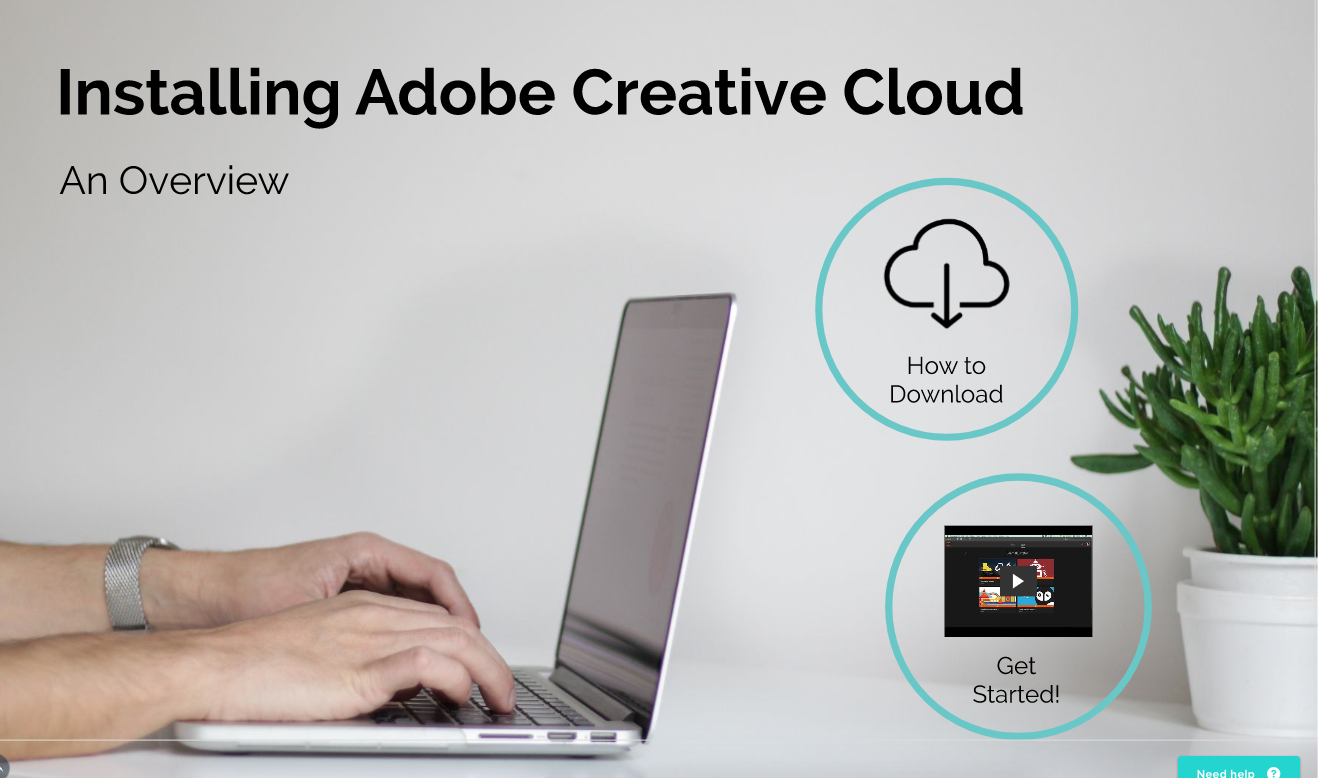
1) First, I’m going to change the Prezi title to “Installing Adobe Creative Cloud: An Overview”.
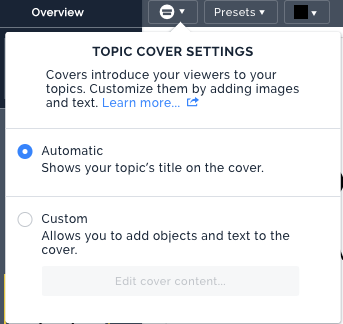
2) Then I’ll add a topic…when adding a topic, Prezi will have the settings on automatic as the default. Right click on it to switch to “Custom” as we’ll be adding images to our topic covers.
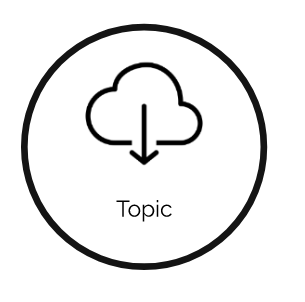
3) Insert an image by going to “Insert -> Image” . For this tutorial, let’s use the Noun Project (a useful site to download icons to use in presentations) to get an icon representing “download”.
4) Once you’ve found your image , you will be able to resize and add animations to your image. Click on the corners of the image to drag in and out to increase or decrease the size of your image.
Let’s decrease the size of the cloud and place it inside the topic.
5) Now, let’s add text. I’m going to double click until a text box appears and type in “How to Download”. Note how you can bold, italicize, highlight, indent, and format the text in many different ways!
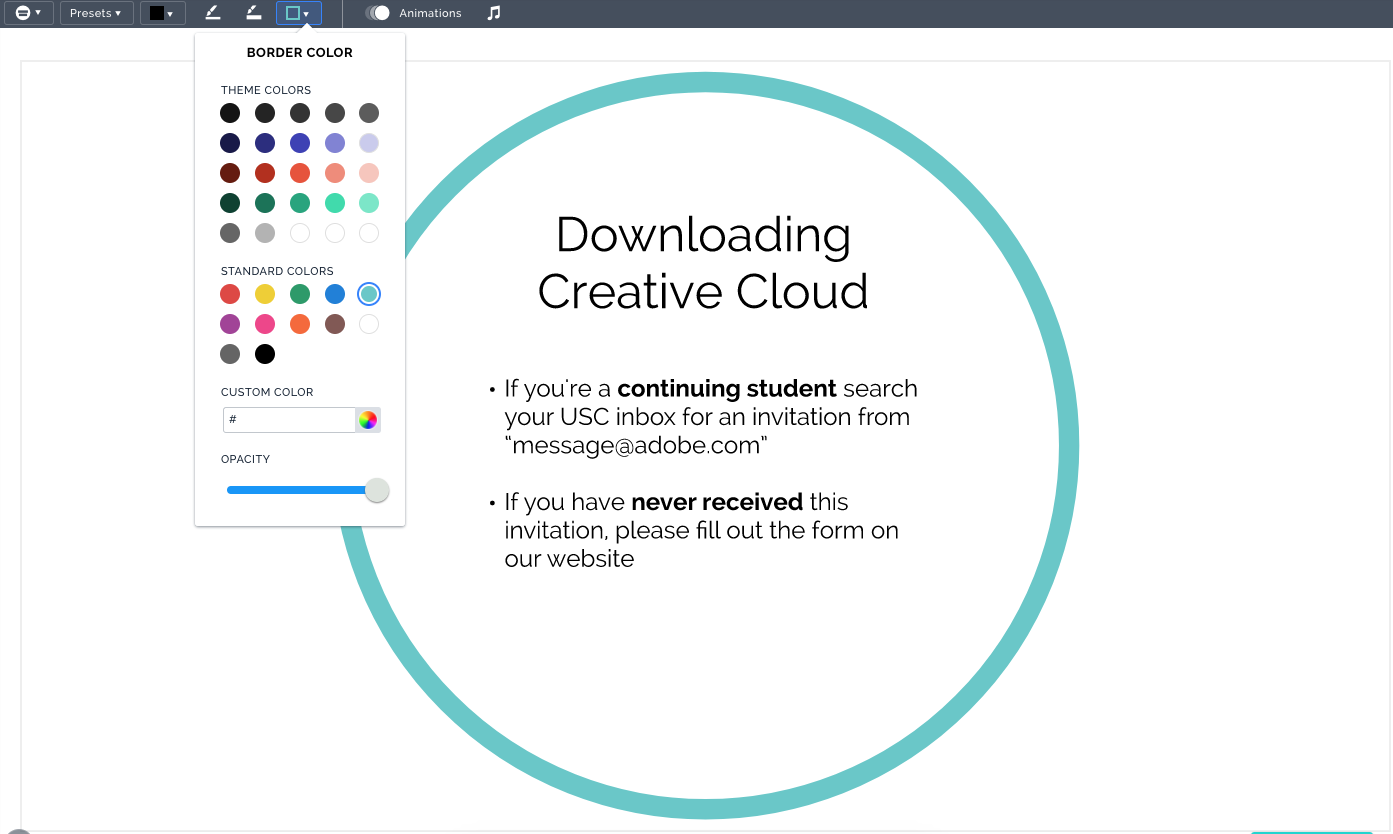
6) Let’s add some other elements. Double click on your topic circle to add a title and text. You can change the border color, thickness, and opacity!
7) Now let’s add some subtopics. Click the “+Subtopic” button in the bottom left and choose which style you want.

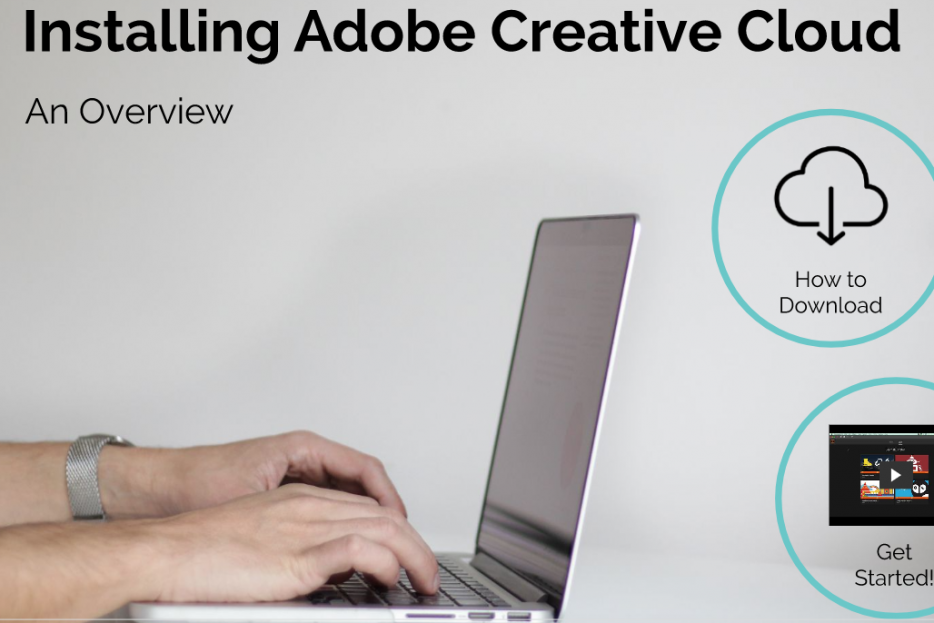
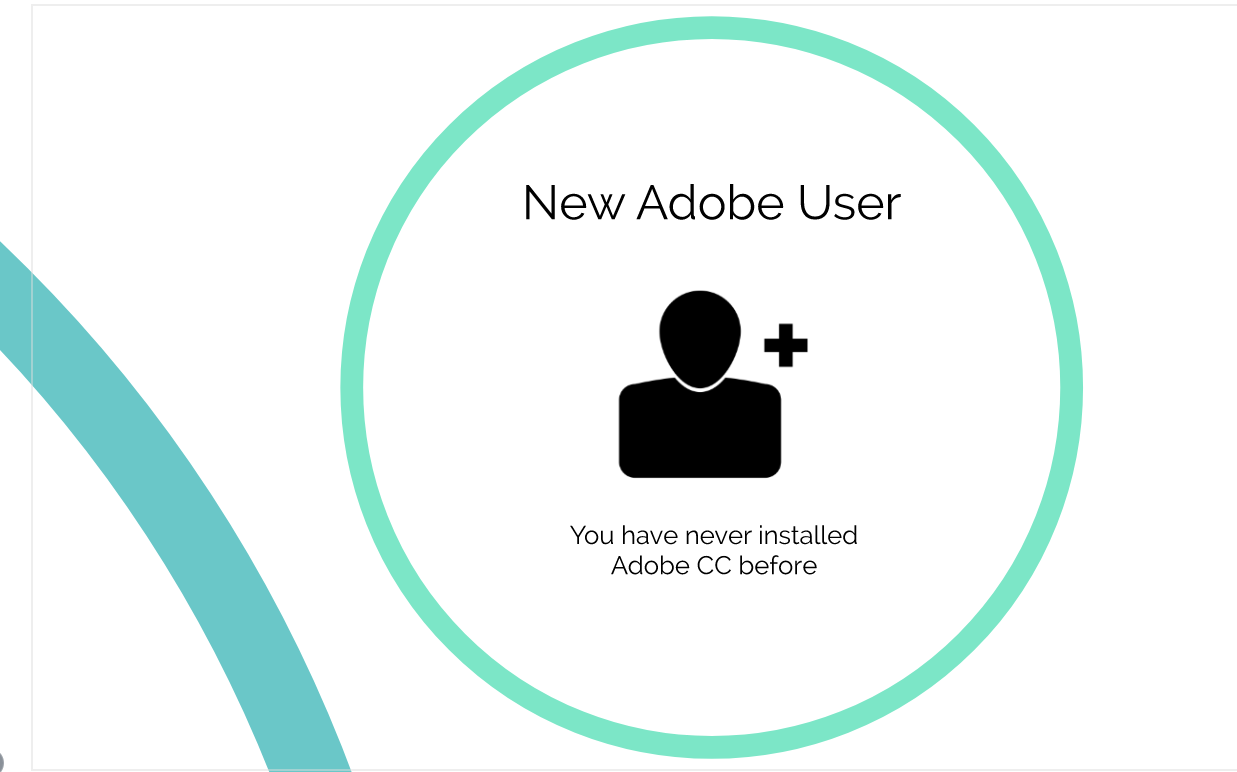
8) This is how my Prezi looks now after adding three subtopics (make sure to change the topic cover settings to custom if you want the cover title to differ from the subtopic title). I’ve titled mine “Installation Scenario” 1-3. For subtopic “Installation Scenario 1” I’ve made that the “New User”, added some text, an icon, and changed the border color (see below).

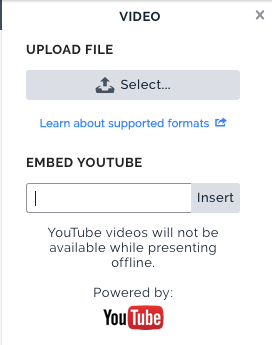
9) Let’s add a video inside the next topic. Go to Insert > Video to either upload a video or to embed a YouTube video and then press Insert.
10) The video will then load on your screen. Again, you can drag the corners in and out to increase the size of your video. There are other things you can Insert such as Icons, Charts, Audio, etc.
11) Now let’s add some animations to set the flow of your presentation. I’ve added a background image that I found from Unsplash (a great website to find high quality stock photos for free) and moved the topic bubbles around. Prezi naturally orders your “slides” to go from overview -> topics -> subtopics, however, you can add more animations.
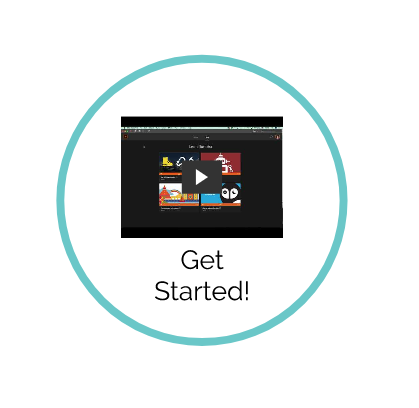
12) Open up your animations and make sure you’ve chosen “At the beginning of this prezi”. I want the “How to Download” and “Get Started!” topics and the video to fade in at the beginning of the prezi. To do so, click on the topic, press the + sign, and choose fade in and do the same for the video. Now you should have three fade in’s.
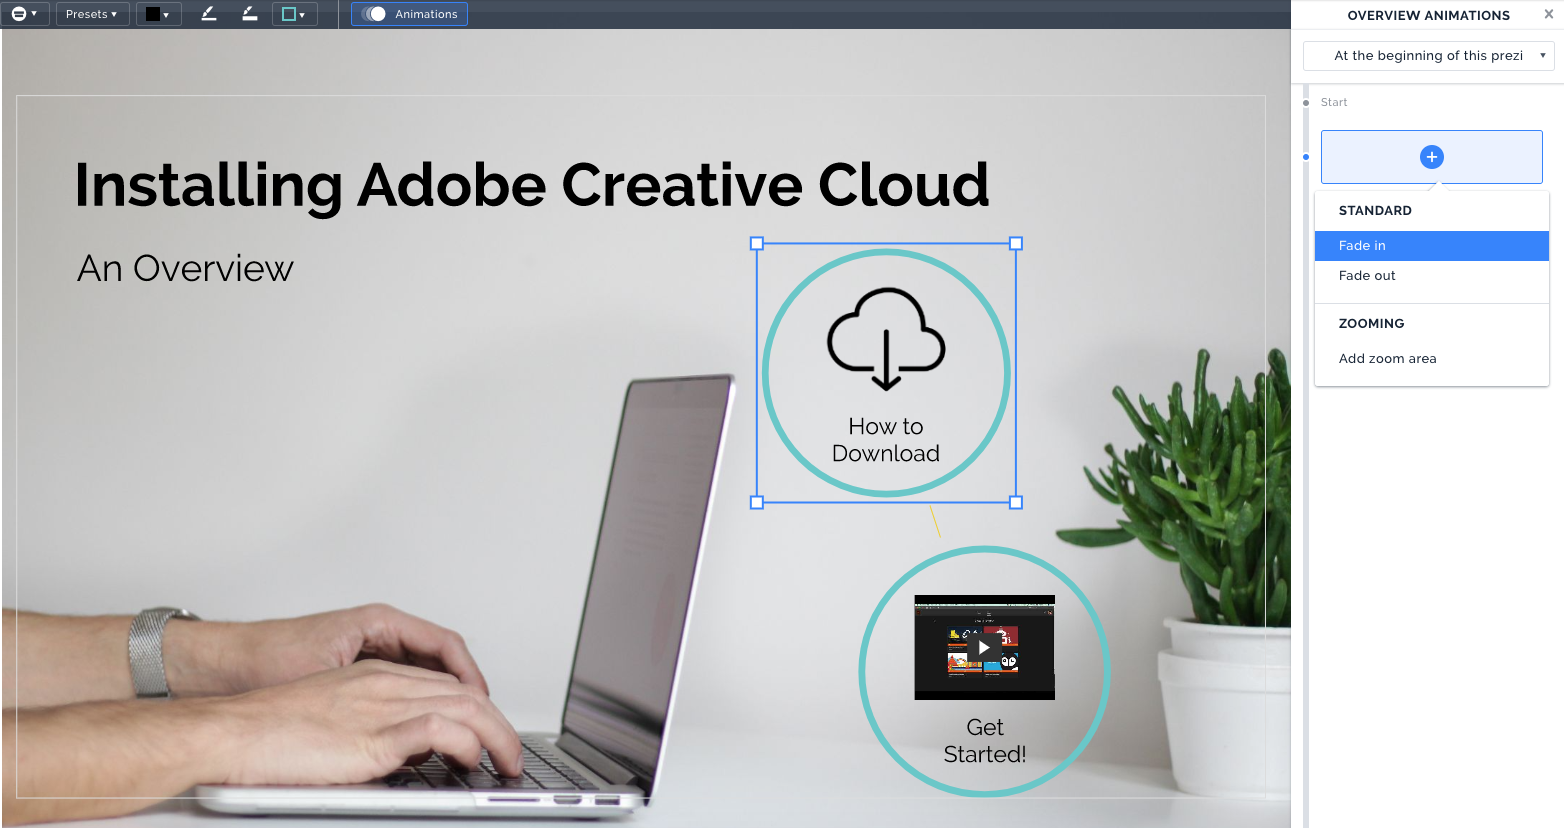
13) Prezi zooms automatically to topics, but I want it to zoom more for the text that I have, so I’ll add a zoom area. Press the + sign, then “Add zoom area” which will bring up a blue bounding box. You can place that wherever you want the zoom. 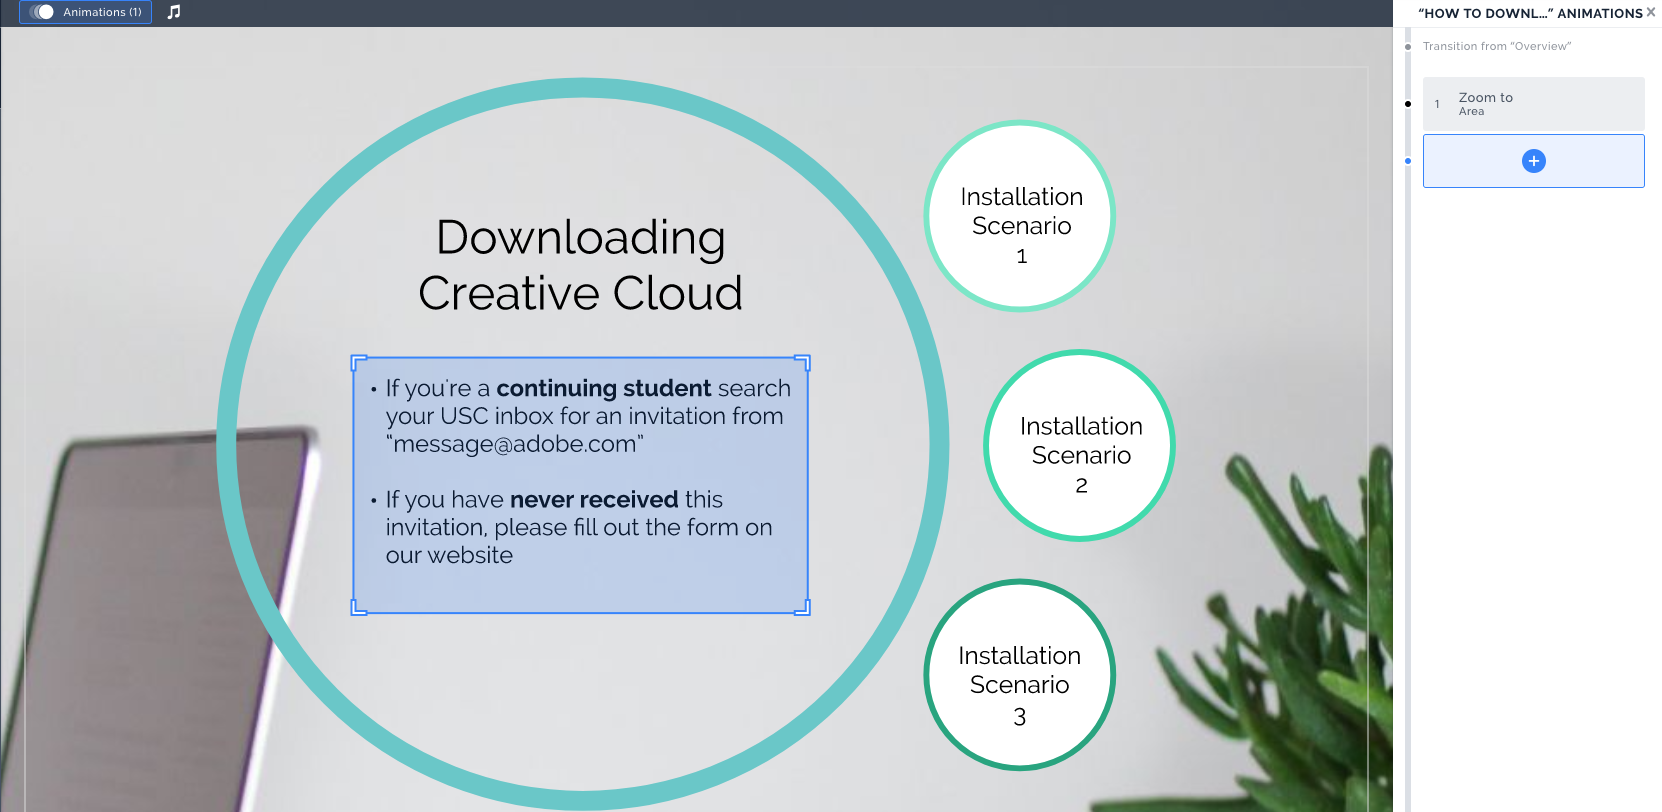
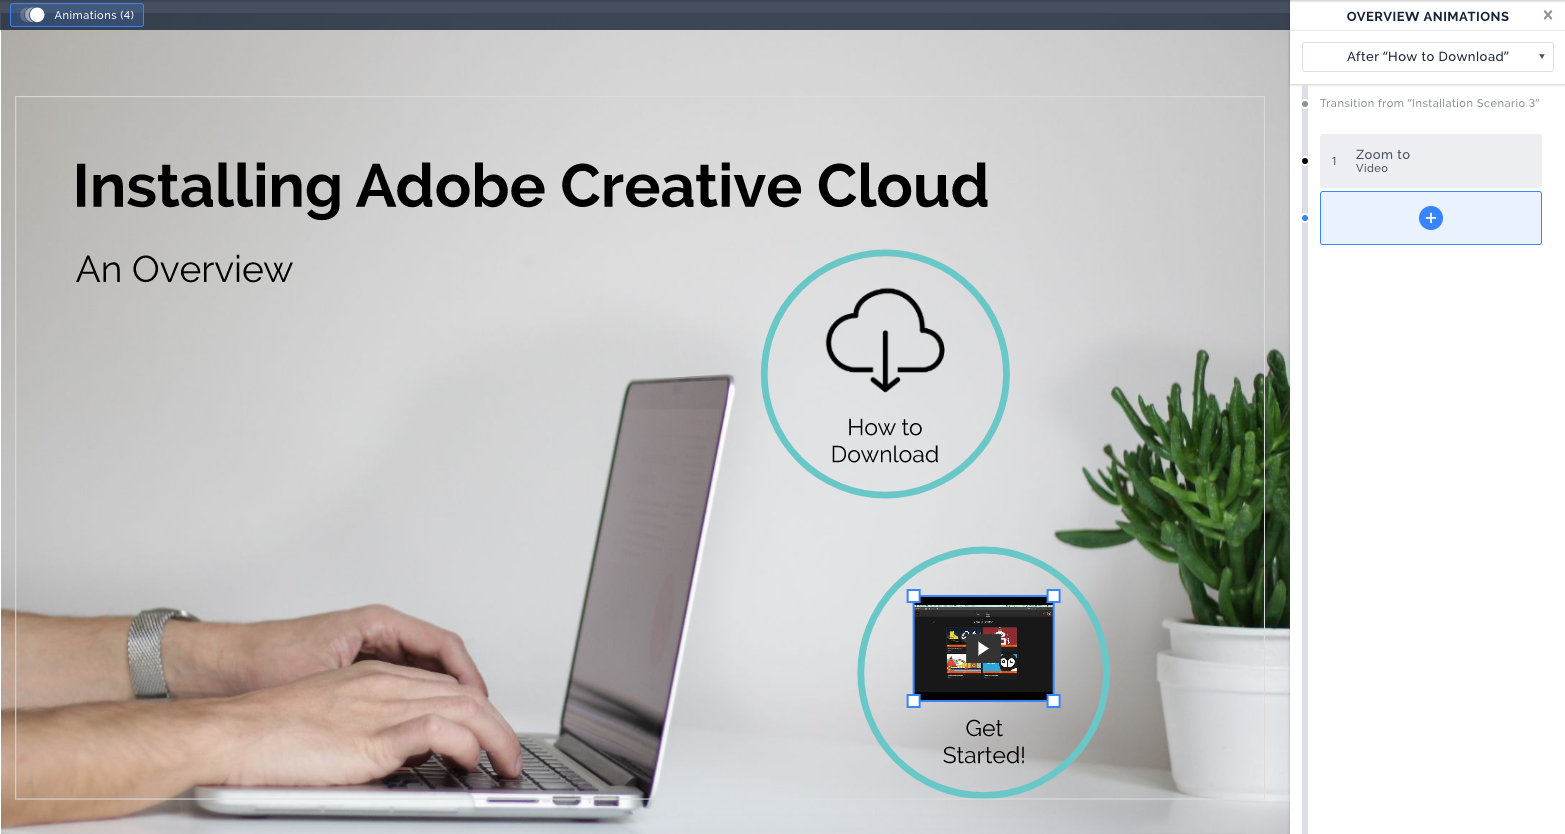
14) After the “How to Download” topic, I want the Prezi to transition to the video and have it start playing immediately. To do so, click on the video (make sure you’re on “After ‘How to Download'”) and add “Zoom to”. I now have a total of four animations, but try adding some more and play around with it!
15) Now you can preview your presentation by clicking on the “Present” button.
![]()
Themes
You can change the template scheme and colors at anytime by clicking on Background & Theme.