


Topics
Download this tutorial as a PDF here.
Introduction
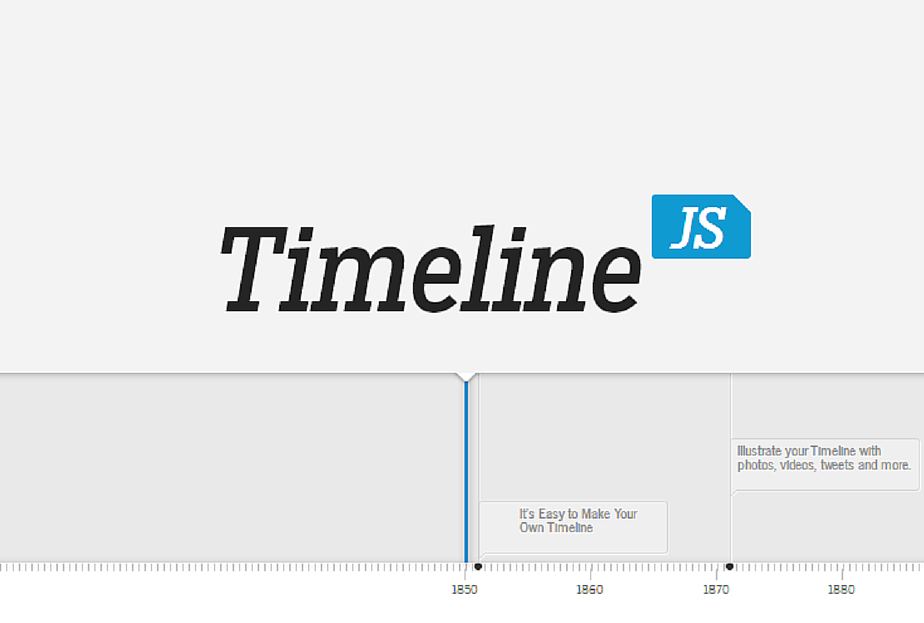
TimelineJS (https://timeline.knightlab.com/) is a web application and open source tool that can pull in me-dia from different sources and organize it into a nice looking timeline interface. You can set up the timeline using a Google spreadsheet or for advanced users, using a JSON file. Timeline allows you to directly pull in content from Twitter, Flicker, Google Maps, Youtube, Soundcloud and other media types. In this tutorial, we will cover using the Google spreadsheet to create a timeline.
Starting Your Timeline
1) Visit http://timeline.knightlab.com/ and click on “Make a Timeline Now.”

2) The site will redirect you to the four easy steps to creating a timeline. Note that they also have a video tutorial that you can watch! Click on the “Google Spreadsheet Template” button to start working on your timeline. As it says on their website, drop dates, text, and links to media into the appropriate columns. Do not change the column headers, don’t remove any columns, and don’t leave any blanks rows in your spreadsheet. 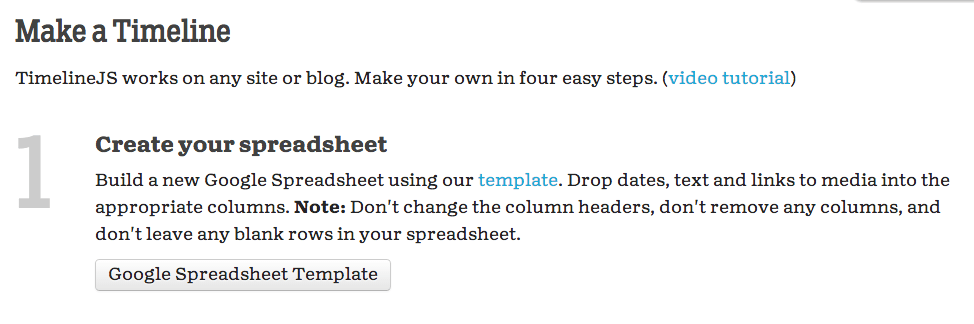
3) You will be redirected to the Google spreadsheet template. You will want to click “Use this template” at the top. This will save the Google Spreadsheet in your Google Drive. Note: You may need to sign into your Google email if you are not already logged in.

Editing Your Google Spreadsheet
- Start Date: Enter in a Start/End Date and Time. Take note of the format MM/DD/YY 0:00:00. If there is no time, leave it 0:00:00.
- End Date: Leave end time blank to create an introduction to your timeline that will work as a cover.
- Headline: Use this column to change the headline of that particular point on your timeline.
- Text: This will the body text that shows up for each Timeline slide.
- Media: In this column, you can add video, Flickr photos, Tweets, YouTube or Vimeo clips, Soundcloud, Instagram, Google Plus status, Wikipedia, or an image. Simply paste the link in and Timeline JS will format it in an aesthetically pleasing way when you publish it.
- Media Credit: Make sure to give credit to the owner of the media.
- Media Caption: This column will add a text caption underneath the media.
Example
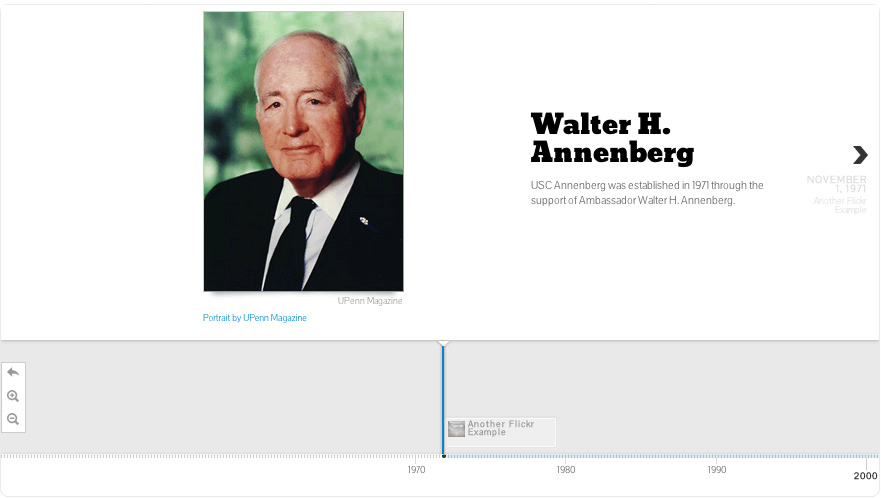
Let’s create a timeline about the history of USC Annenberg as an example.
1) Start inputting the information into the timeline. In this instance, I’ll start with Walter H. Annenberg, who helped fund USC Annenberg.

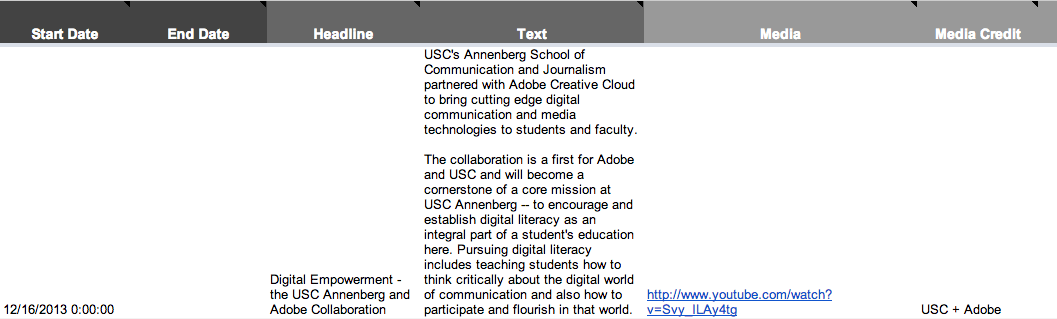
2) Input a start date and I will leave the end date blank, so that it exists as a cover. I will input a title, “Walter H. Annenberg” and in text, I’ll write a caption. Make sure to give the media a credit and caption when applicable. For instance, this data that I inputted below will look like this when published:
Other Types of Content
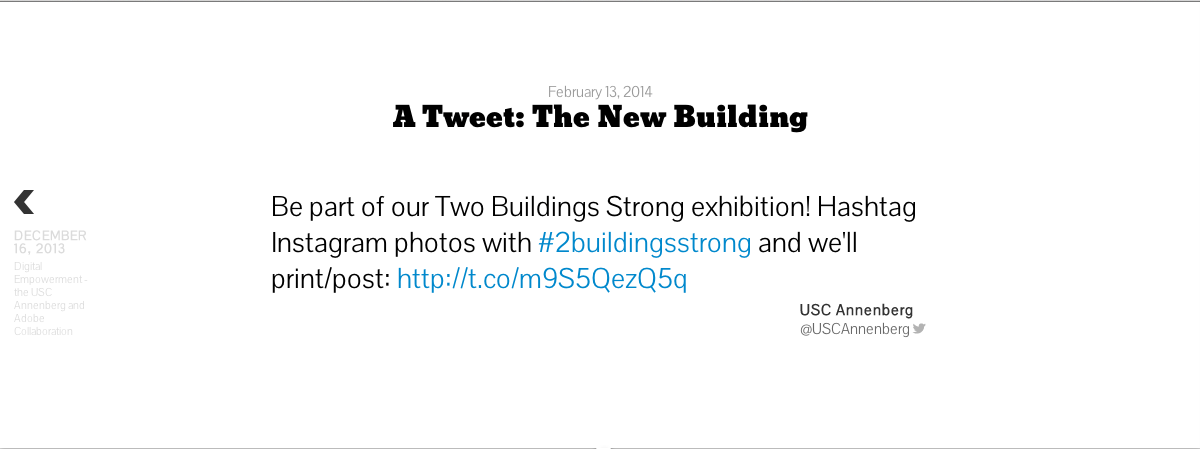
As noted before, you can aggregate content from various sources such as Flickr, SoundCloud, You-Tube, Vimeo, Twitter, etc. Simply paste a link to that media and Timeline JS will format it automatically. Here are some examples of how a video and tweet that I’ve added to my Annenberg timeline will look from the Google spreadsheet to being published:
YouTube


Publishing Your Timeline
Once you’ve added all your Timeline points, you can now publish it and preview how your Timeline will look. (You can also do this at anytime during the process to preview how it looks).
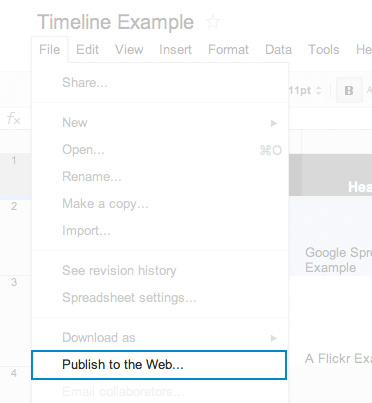
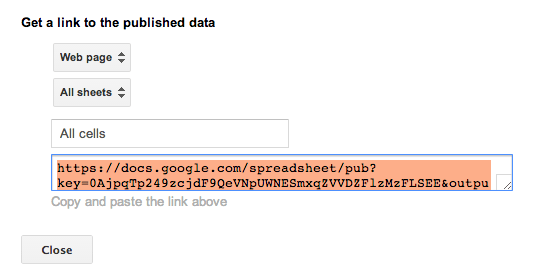
1) On your Google Spreadsheet, go to the File menu > select “Publish to the web…”
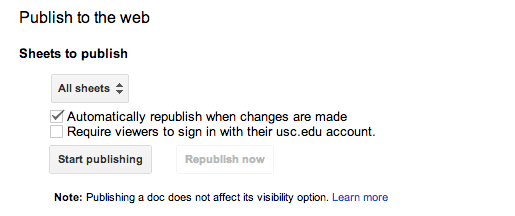
2) In the next window, check “Automatically republish when changes are made.” Uncheck all other boxes. Click “start publishing.” This will give you the URL to embed in your HTML file, which will appear below Start Publishing.
3) Highlight and hit CTRL + C on your keyboard to copy the link.
4) Now go back to the timeline website (http://timeline. knightlab.com/) and scroll down until you see the generator box. This section of the website looks like this:
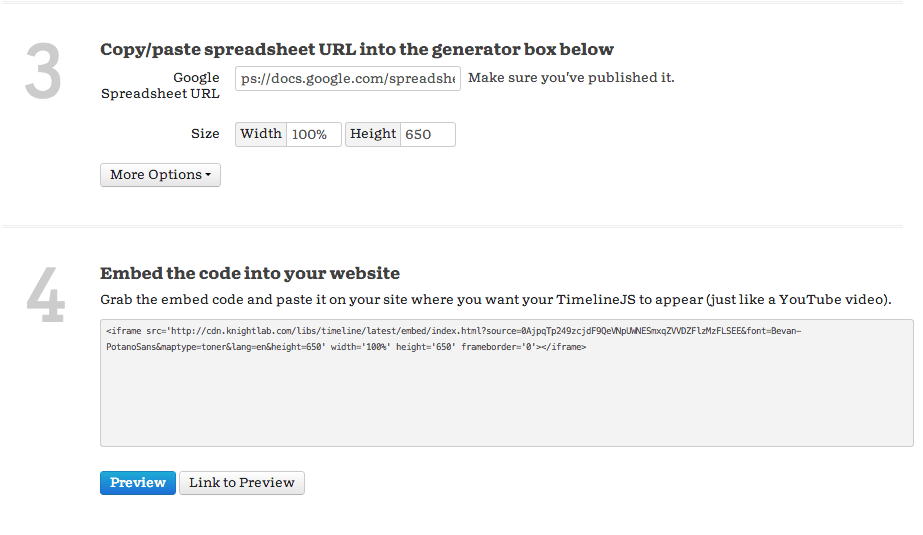
5) CTRL + V or PASTE that URL into the “Google Spreadsheet URL” section. You can edit the width and height of your timeline and also click on “More Options” to such as fonts, different map types, etc.
6) The site will then give you an embed code in Section #4 that you can copy onto any website. You can preview your timeline by clicking on the Preview button. You can also get a direct link to your timeline by clicking on “Link to Preview.” It will open a new tab with your timeline, where you can copy the hyperlink.
Thank you for this post. Very helpful. =]