Introduction to DesktopServer
DesktopServer (an application created by ServerPress) allows you to create a WordPress locally on your computer. Design, develop and deploy complete, fully configured solutions right on your desktop. This is great when you want to start a website project on WordPress, but don’t want the site live or you aren’t ready to purchase hosting and a domain. ServerPress calls this a “development site.” When you are ready to host your site, it will be easy to transfer the files.
The following tutorial will go through the steps of creating a localized WorPress site with DesktopServer.
Downloading DesktopServer
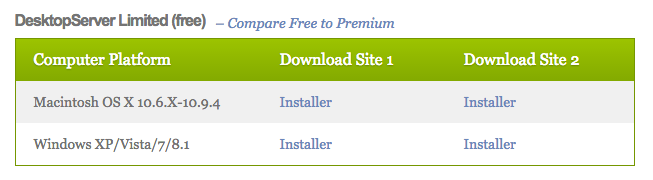
1) Go to to http://www.serverpress.com/downloads/
2) For this tutorial, we are downloading the Free DesktopServer Limited. This version allows you to make 3 development sites. Choose the Installer under Download Site 1 for whichever Computer Platform you are on (Mac or PC). It will automatically start downloading into your Downloads folder.
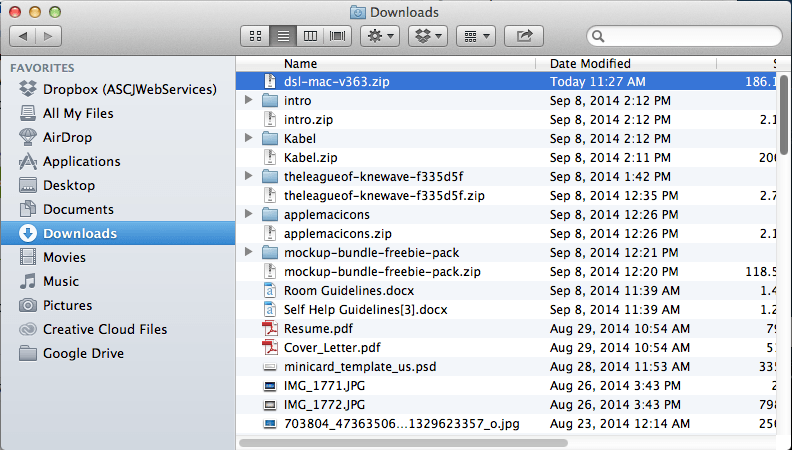
3) Open the .zip or .exe file in your Downloads file. This will create a folder with the installer.
4) Double click on the Install DSL v363 file. This will launch the Installer.
5) Follow the instructions of the Installer. Click Continue when prompted and install the Limited version, and then wait for it to finish Installing.
6) Once it’s done, it will notify you. Click Ok and then click Finish to close the installer.

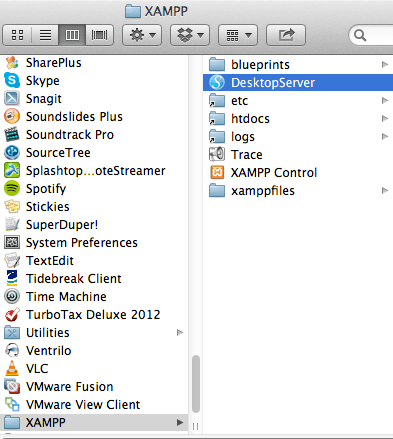
7) You will now find the application in your Applications folder under XAMPP. In the XAMPP folder, you’ll see the DesktopServer application. Double click on Desktop Server to launch it.
8) When you launch DesktopServer, it will ask you to Restart DesktopServer to run with privileges. Choose Yes and then click Next.

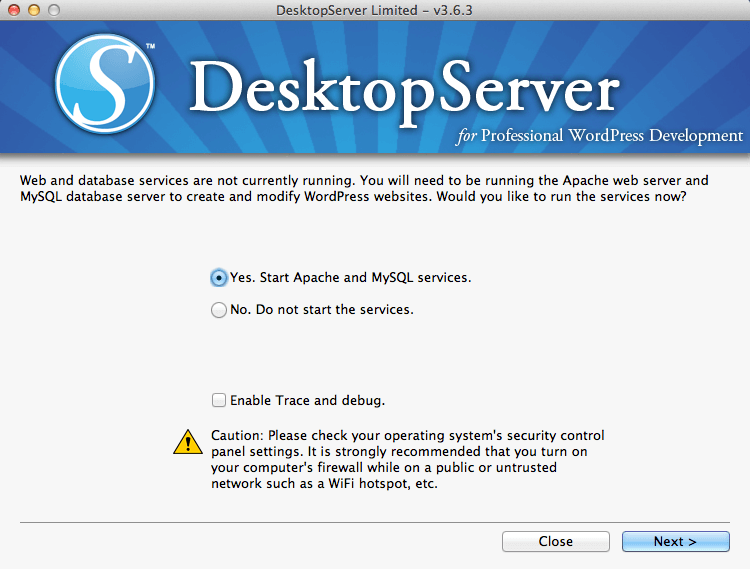
9) DesktopServer will relaunch. and ask to start running the web server and MySQL database server. Choose Yes and click Next.
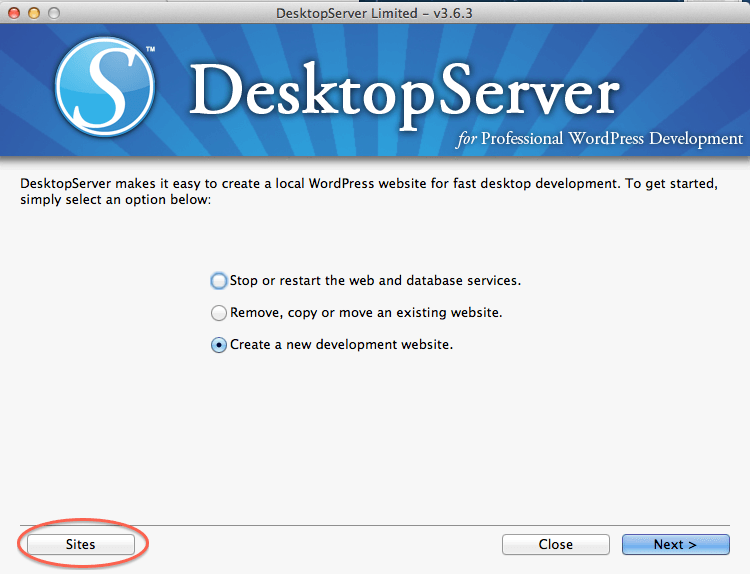
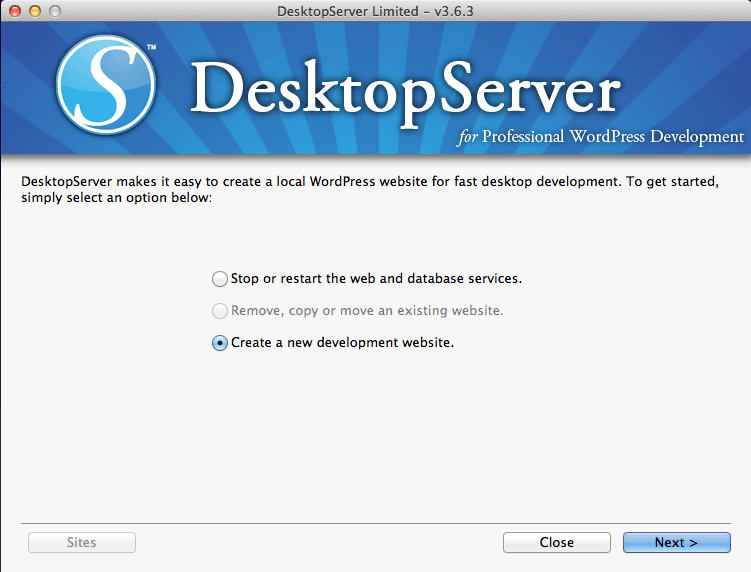
10) It will then notify you that the servers are running and done, click Next. You will not see the following screen, where you will get started on create a development website. Choose “Create a new development website” and click Next.
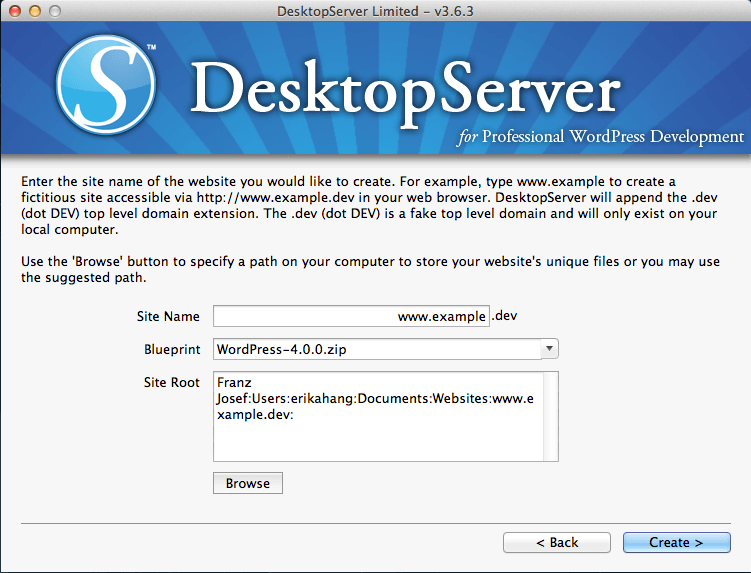
11) Type in a site name. Remember: The .dev is a fake top level domain and will only exist on your local computer. When you are ready to make your site live, you will be able to choose a standard domain name. The Blueprint is already set to WordPress, so we can leave that. The site files will automatically route to your Documents folder and create a Websites folder there. You can change where these files save if you want by clicking Browse. Then click Create.
12) Desktop Server will start creating your development site. Once it says Done! click Next.
13) It will inform you that configuration is complete. Click the URL.

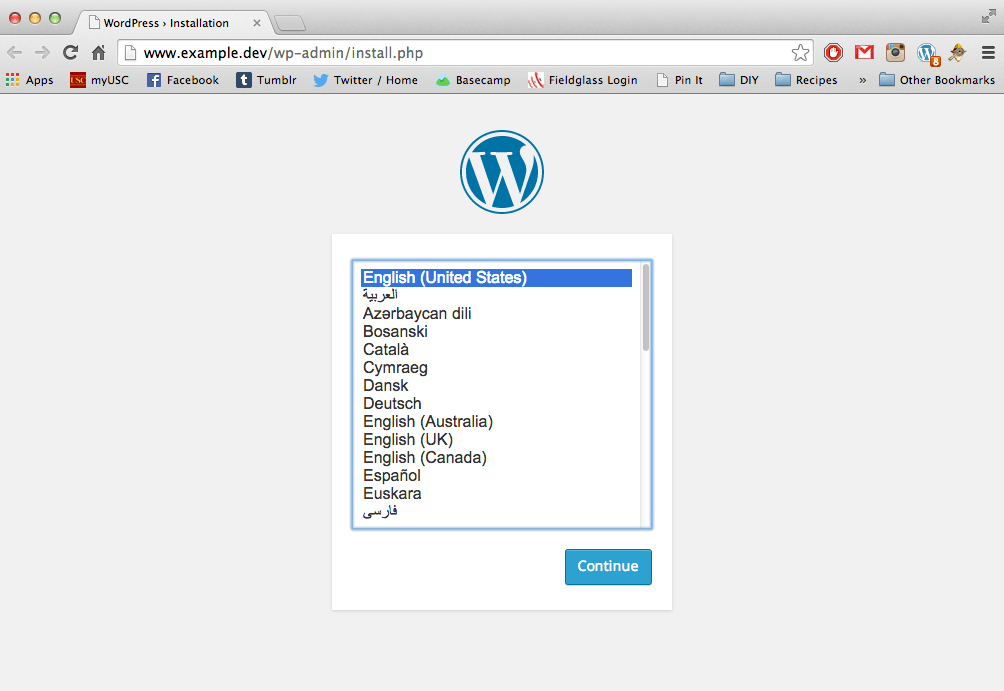
14) Your development site will open in your default browser. Select your language and click Continue.
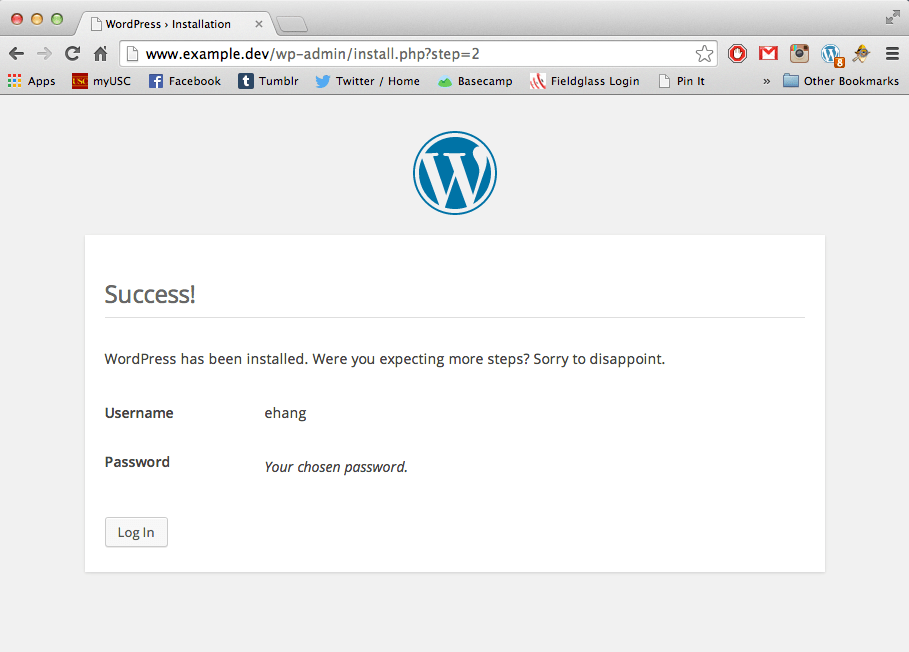
15) Now, we need to give your site a Site Title and also create a username and password to get into the WordPress site. Fill out the form below and click Install WordPress.

16) You will get a success window. Click Log In to start playing with your site.
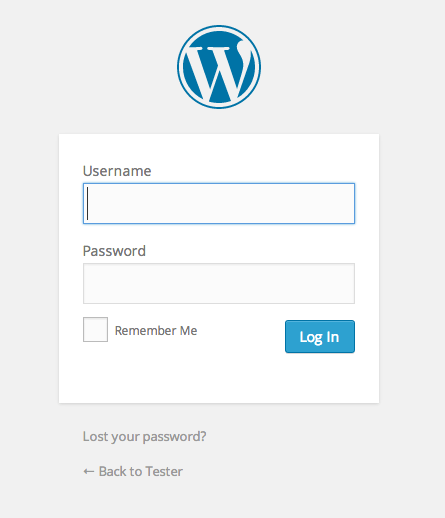
17) Use the username and password you created to Log In. Then click Log In.
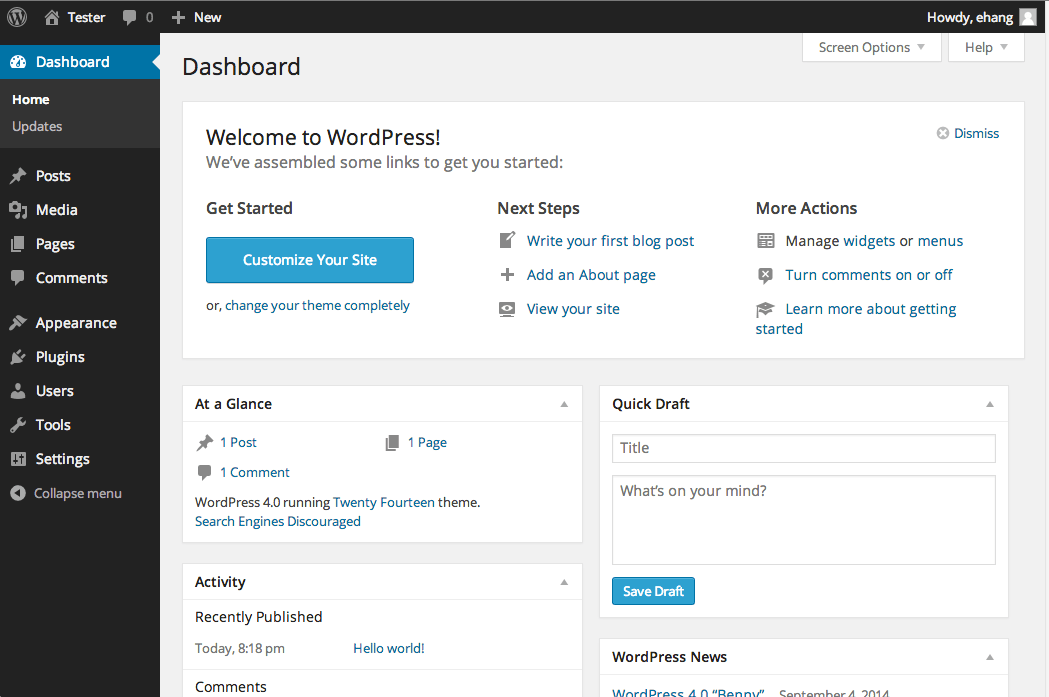
18) Now, you will see your dashboard! Now, start building your WordPress development site!
Note: If you ever need to log back into your site, you can open the DesktopServer application and click on “Sites” to get links to all your development site.